Create an ASP.NET Web Application (.NET Framework – Web Forms or MVC) using Azure AD Authentication
In this post I want to show, how you can create a claim aware ASP.NET web application (.NET Framework – Web Forms or MVC) with C# in Visual Studio, in order to authenticate users against Azure AD.
A few weeks ago, I also wrote a post with multiple parts about the Active Directory Federation Services (ADFS) and how to authenticate users in ASP.NET web applications against it beginning with Part 4.
Create an ASP.NET web application (.NET Framework – Web Forms or MVC) in Visual Studio
Now I will do the same but this time the users will have to authenticate against Azure AD.

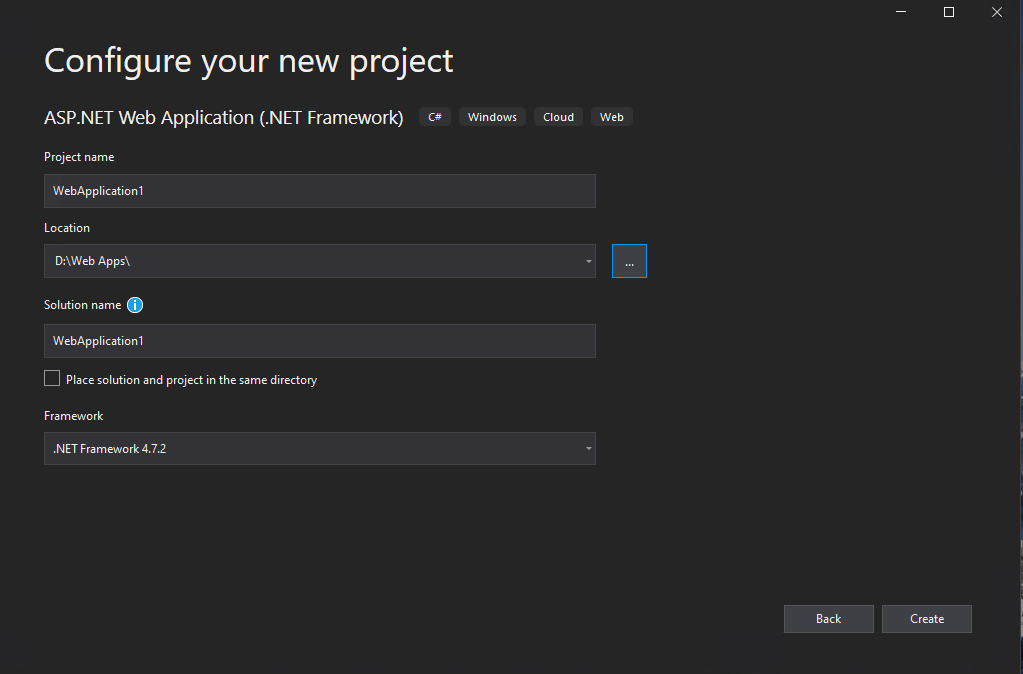
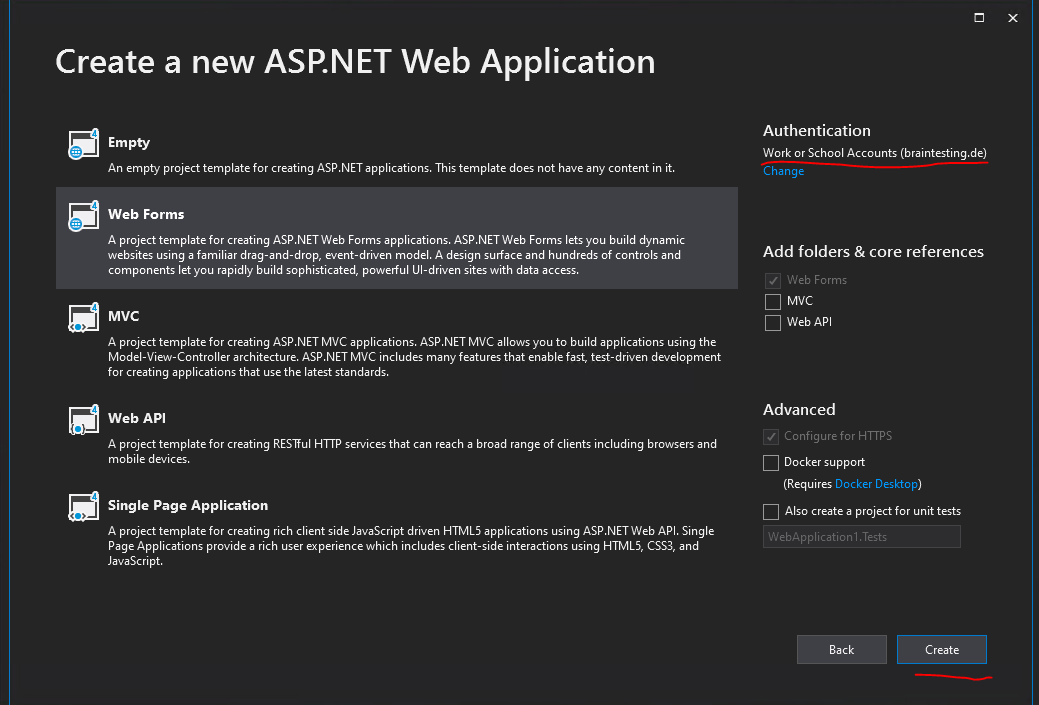
I will use here the Web Forms template.
ASP.NET Web Forms
https://en.wikipedia.org/wiki/ASP.NET_Web_Forms
Click on the right top in the Authentication section on Change.
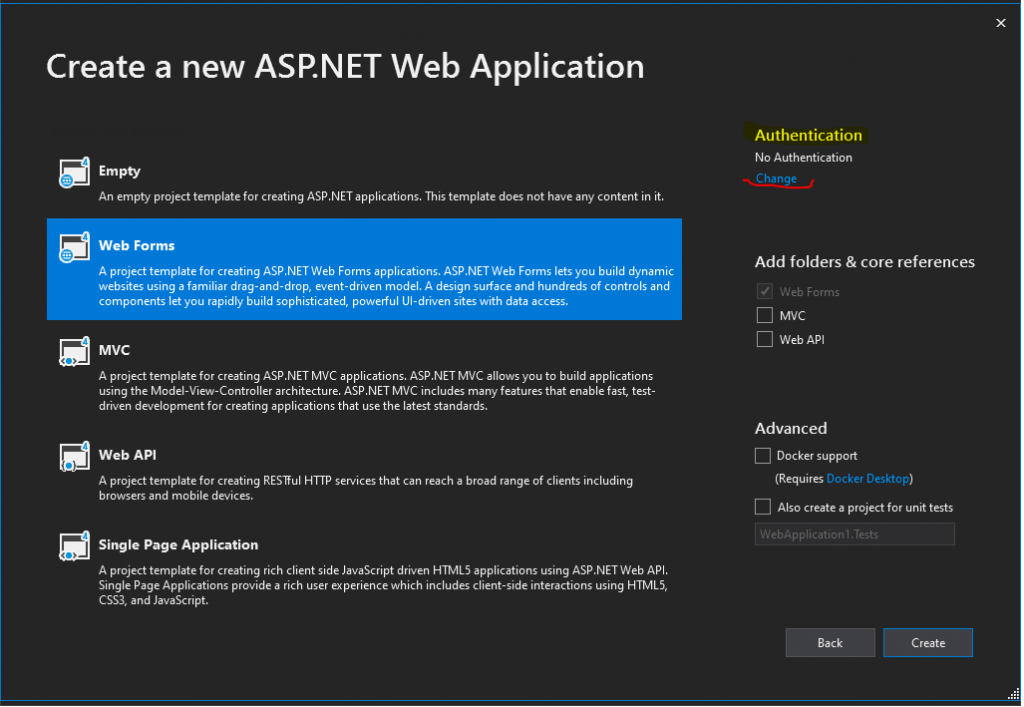
You can also choose here the MVC template, there will be no differences regarding the authentication against Azure AD.
ASP.NET MVC
https://en.wikipedia.org/wiki/ASP.NET_MVC
Click on Change under Authentication
In the following drop-down select Cloud – Single Organization
You can also select here Cloud – Multiple Organizations, in this case your web application will accept users from multiple Azure Active Directory tenants.
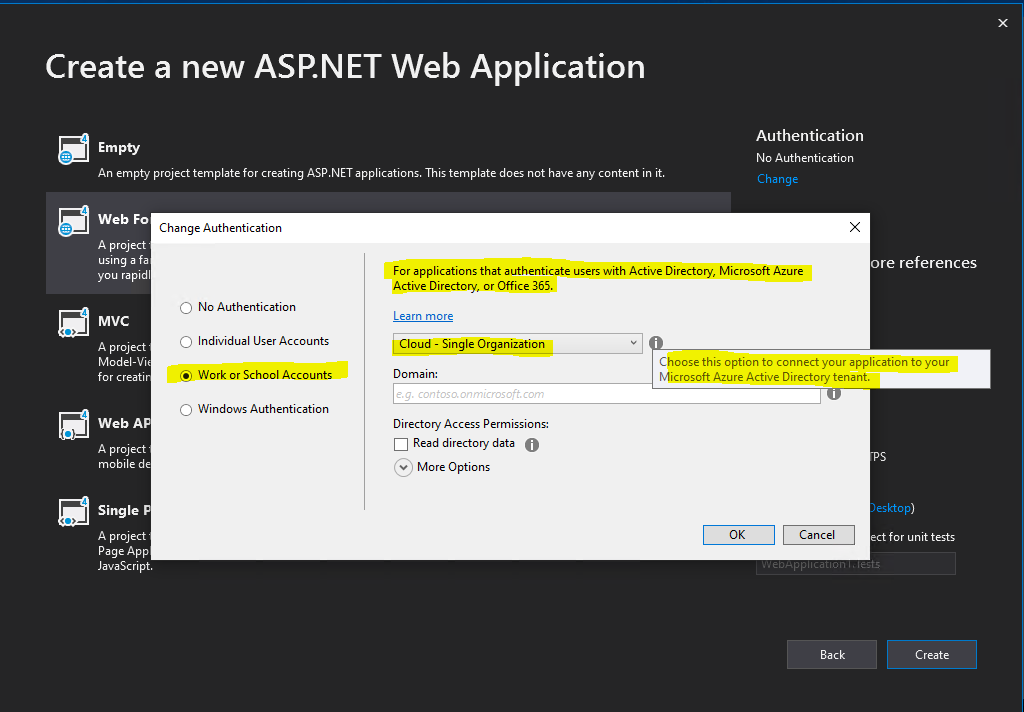
Enter the domain name of your Microsoft Azure Active Directory tenant.
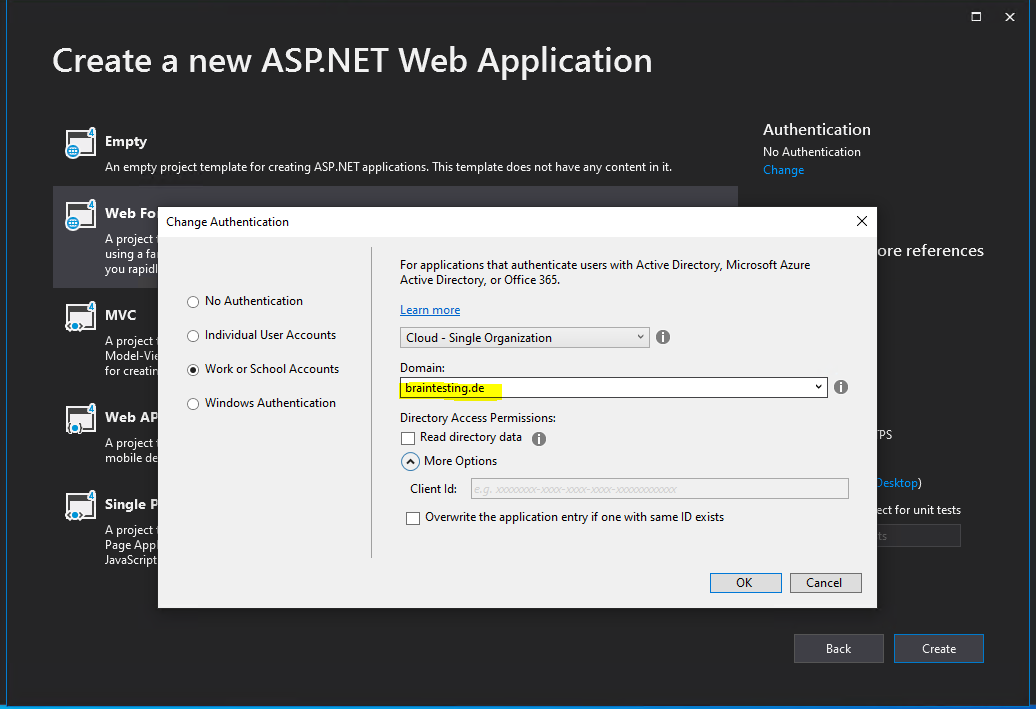
The Client Id, needed from OAuth2 and OpenID Connect to authenticate the user, will be created automatically if we leave it blank.
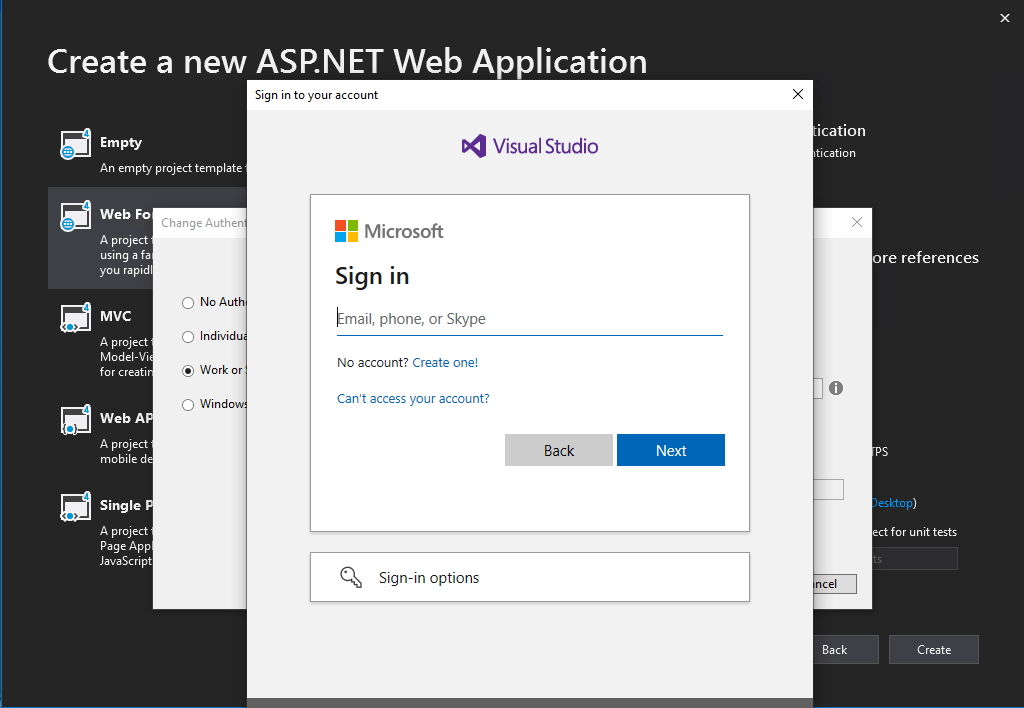
Click on OK and we need to authenticate against our Azure tenant as entered in the Domain field.
Click on Create
Analyze what the Visual Studio Wizard made to support Azure AD Authentication
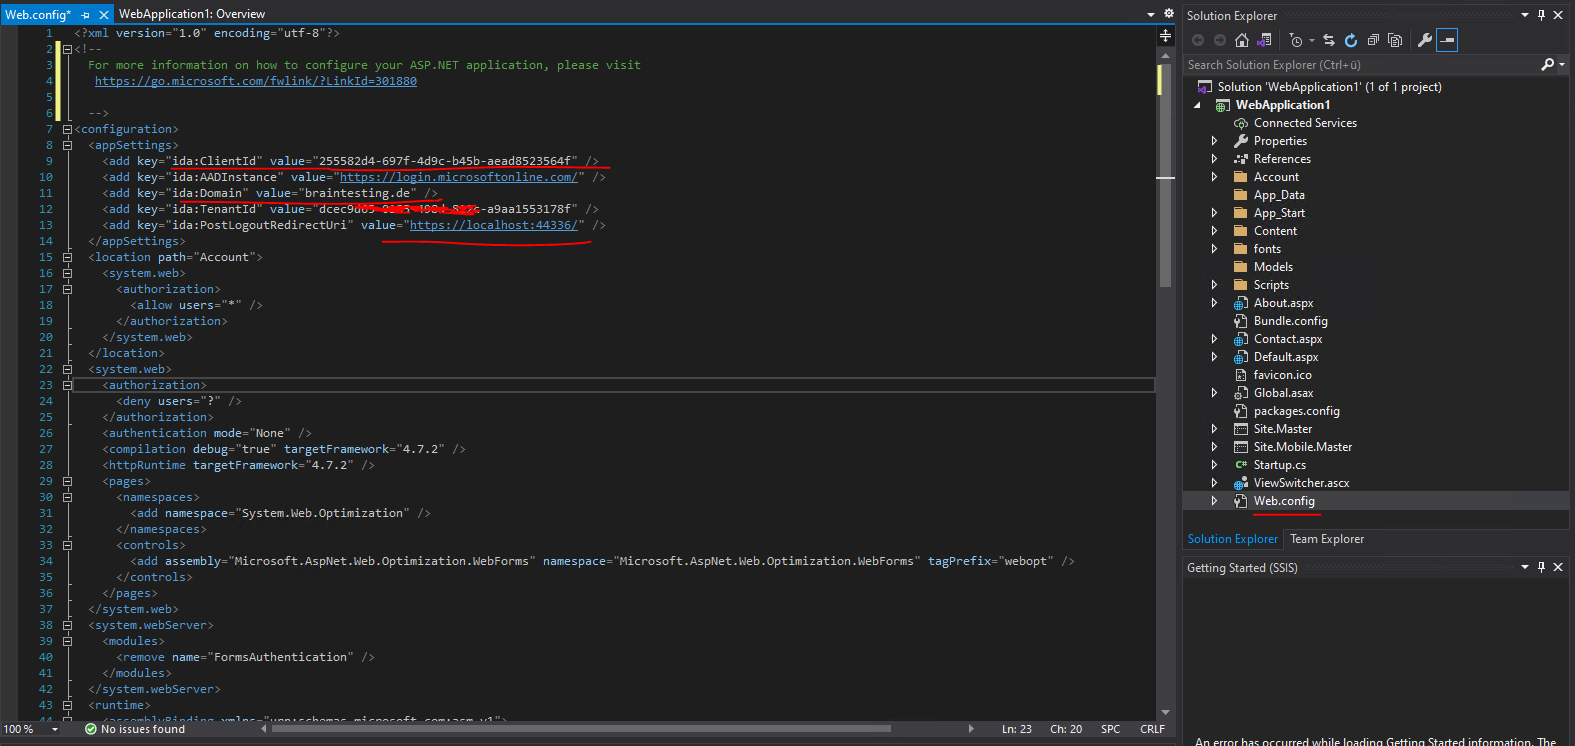
Now I will first check what Visual Studio and the Web Forms template will have created regarding Azure AD authentication.
So I opened the Web.config file.
Here you can see that the Client Id is as mentioned created automatically. You can also see the Azure AD domain for the tenant the application will authenticate against and the URI of our web application.
Now I want to check what happens in Azure AD during the creation process of the web application in Visual Studio, as we had provided our credentials for Azure to Visual Studio, something must be happened there.
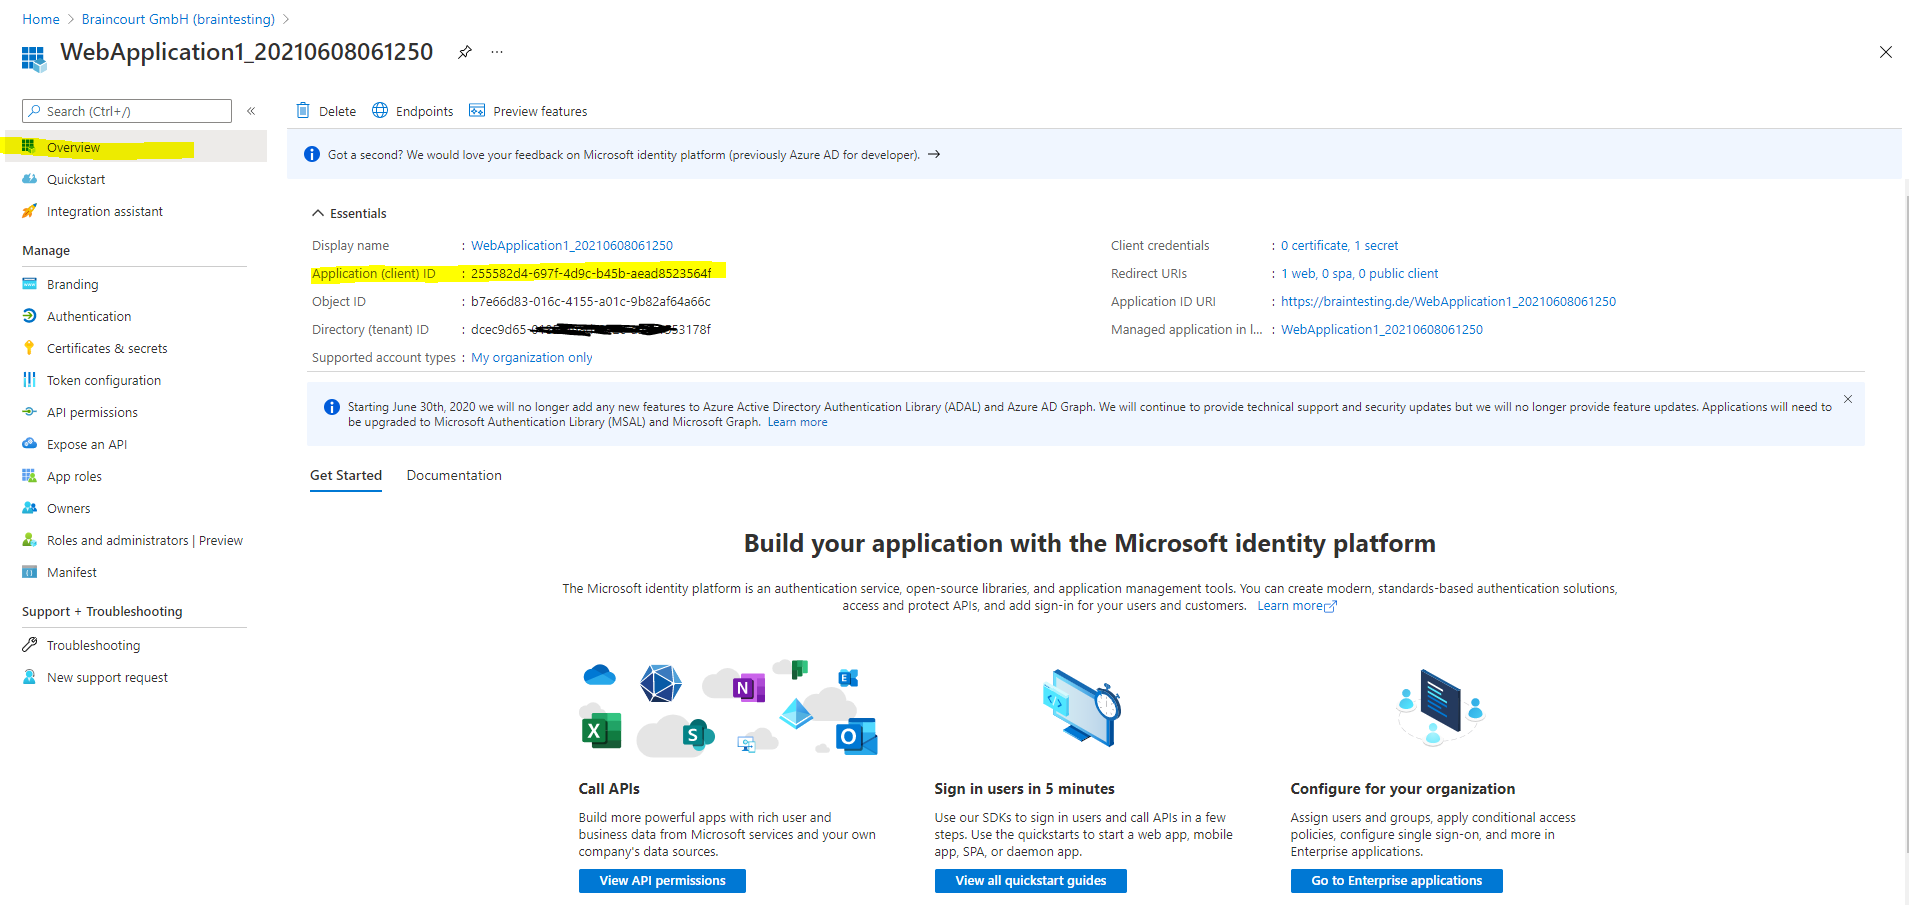
As we know that all applications needs to be registered in Azure AD, to be able to authenticate users with it, I will search for the new web application under Azure AD -> App registrations -> All applications
There we go, our WebApplication1 is shown up here and registered. The Application ID is our Client Id in the web.config file.

Quickstart: Register an application with the Microsoft identity platform
https://docs.microsoft.com/en-us/azure/active-directory/develop/quickstart-register-app
In this quickstart, you register an app in the Azure portal so the Microsoft identity platform can provide authentication and authorization services for your application and its users.
The Microsoft identity platform performs identity and access management (IAM) only for registered applications. Whether it’s a client application like a web or mobile app, or it’s a web API that backs a client app, registering it establishes a trust relationship between your application and the identity provider, the Microsoft identity platform.
Registering your application establishes a trust relationship between your app and the Microsoft identity platform. The trust is unidirectional: your app trusts the Microsoft identity platform, and not the other way around.
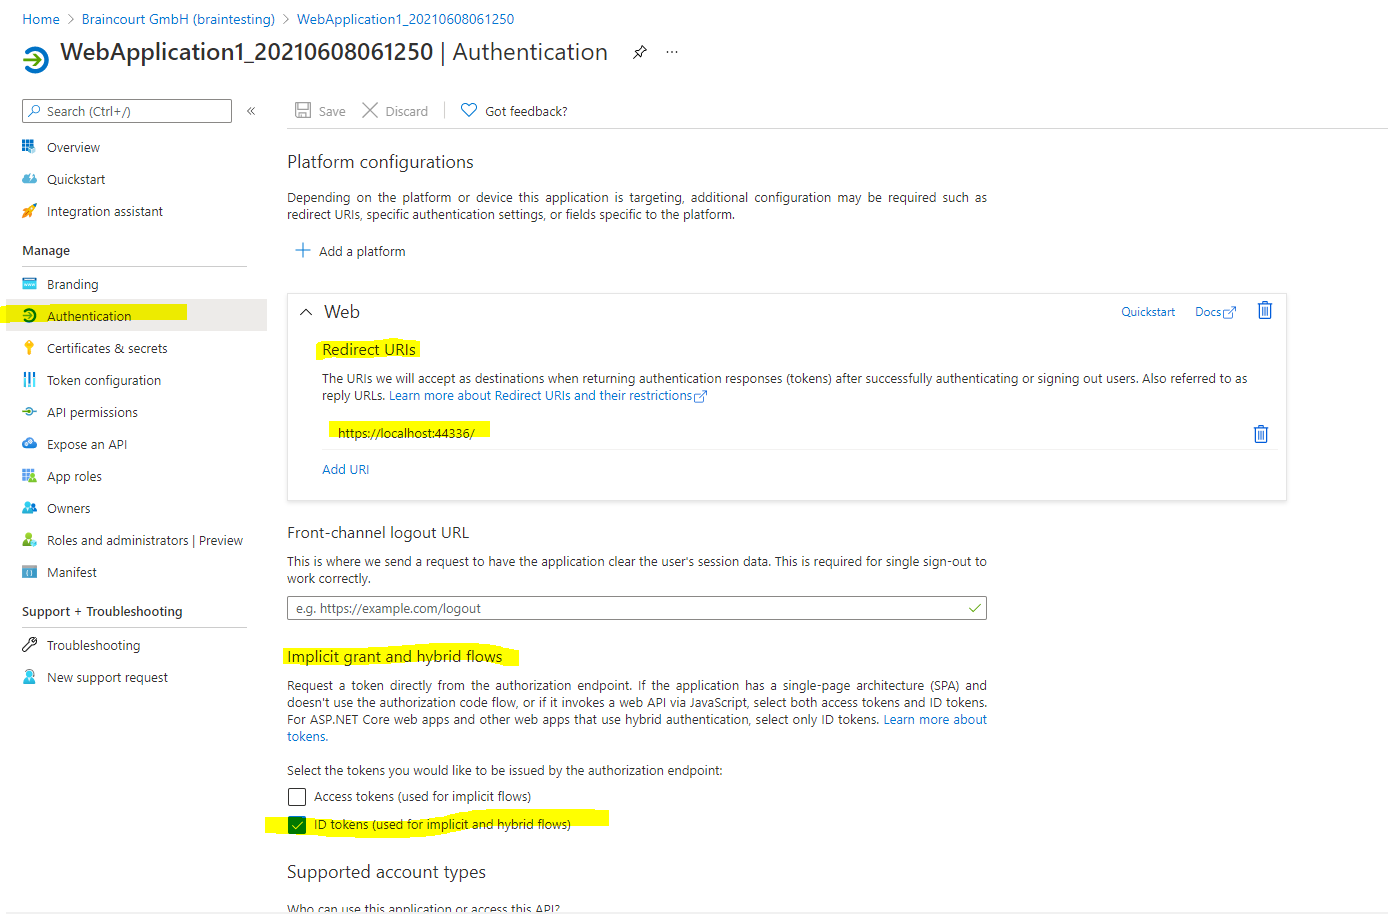
Here in the Authentication section you find some interesting and important settings.
Once you will find here the Redirect URI which have to be the PostLogoutRedirectUri value from your web apps Web.config file and you will also see, that under Implicit grant and hybrid flows the checkbox ID tokens (used for implicit and hybrid flows) is enabled.
More about the implicit grant flow you will find in the following Microsoft article.
Microsoft identity platform and implicit grant flow
https://docs.microsoft.com/en-us/azure/active-directory/develop/v2-oauth2-implicit-grant-flow?WT.mc_id=Portal-Microsoft_AAD_RegisteredApps
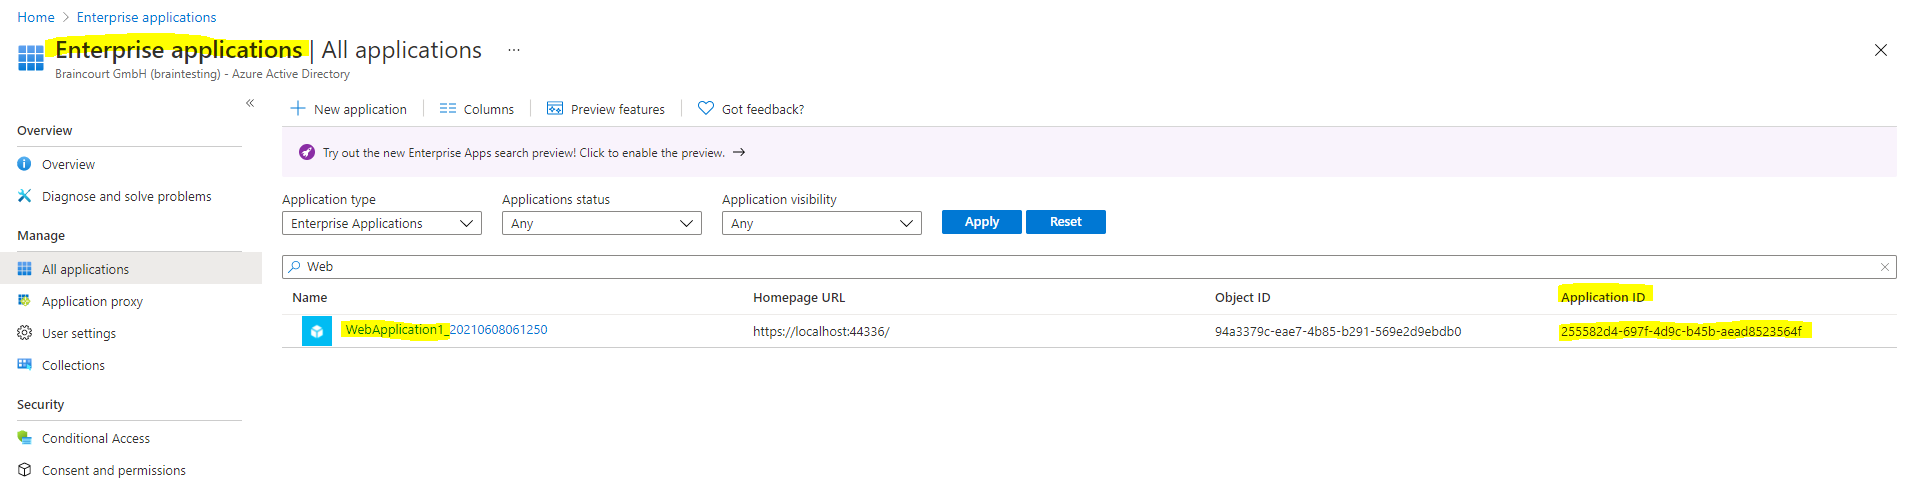
Further the web app is show up in the Enterprise applications from Azure AD and represents the Service Principal Object.
Azure AD -> Enterprise applications.
Testing Azure AD Authentication
Let’s try if it works already.
Click on F5 to start debugging and run the application
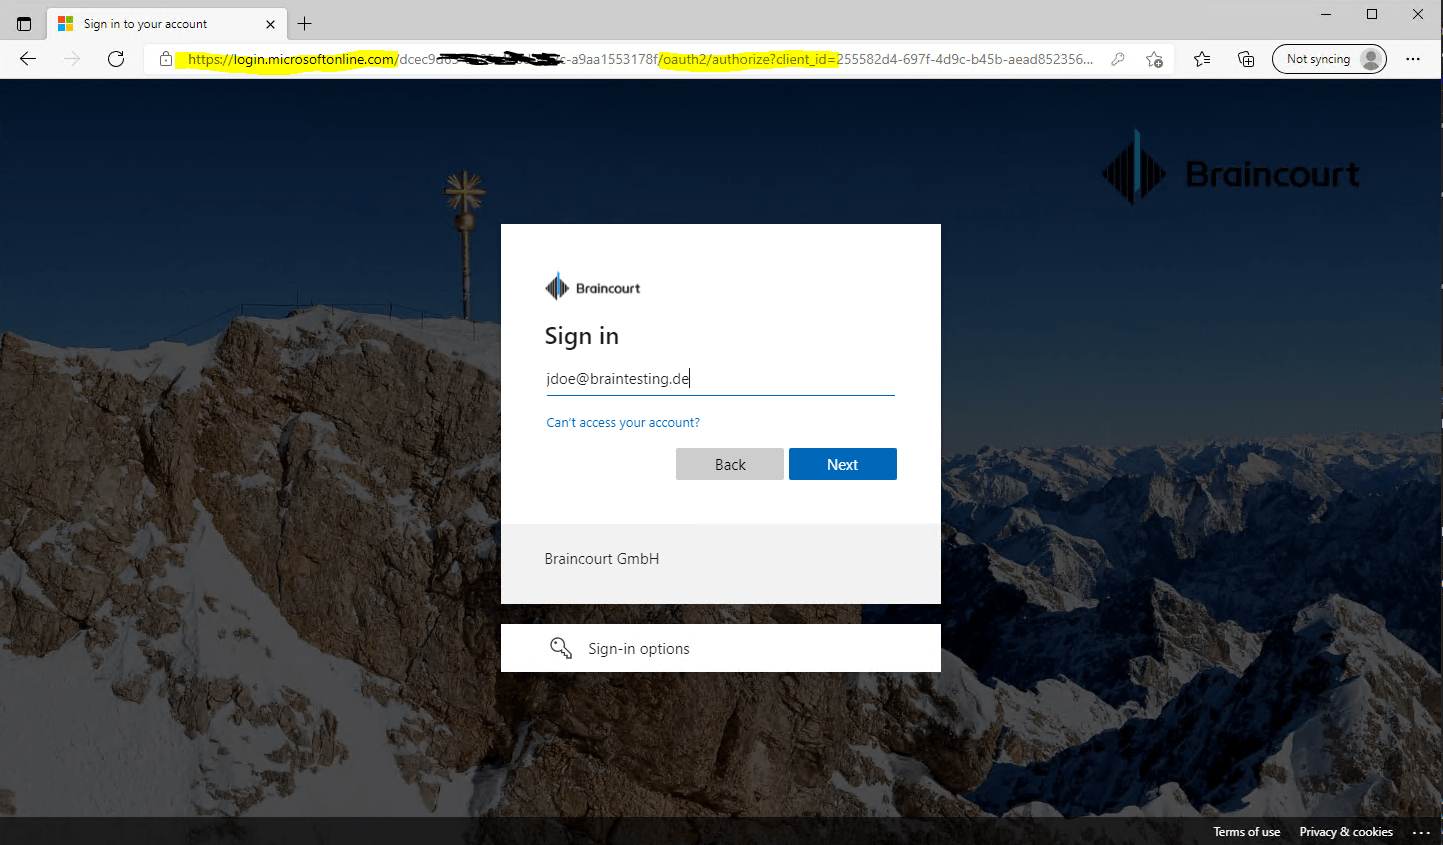
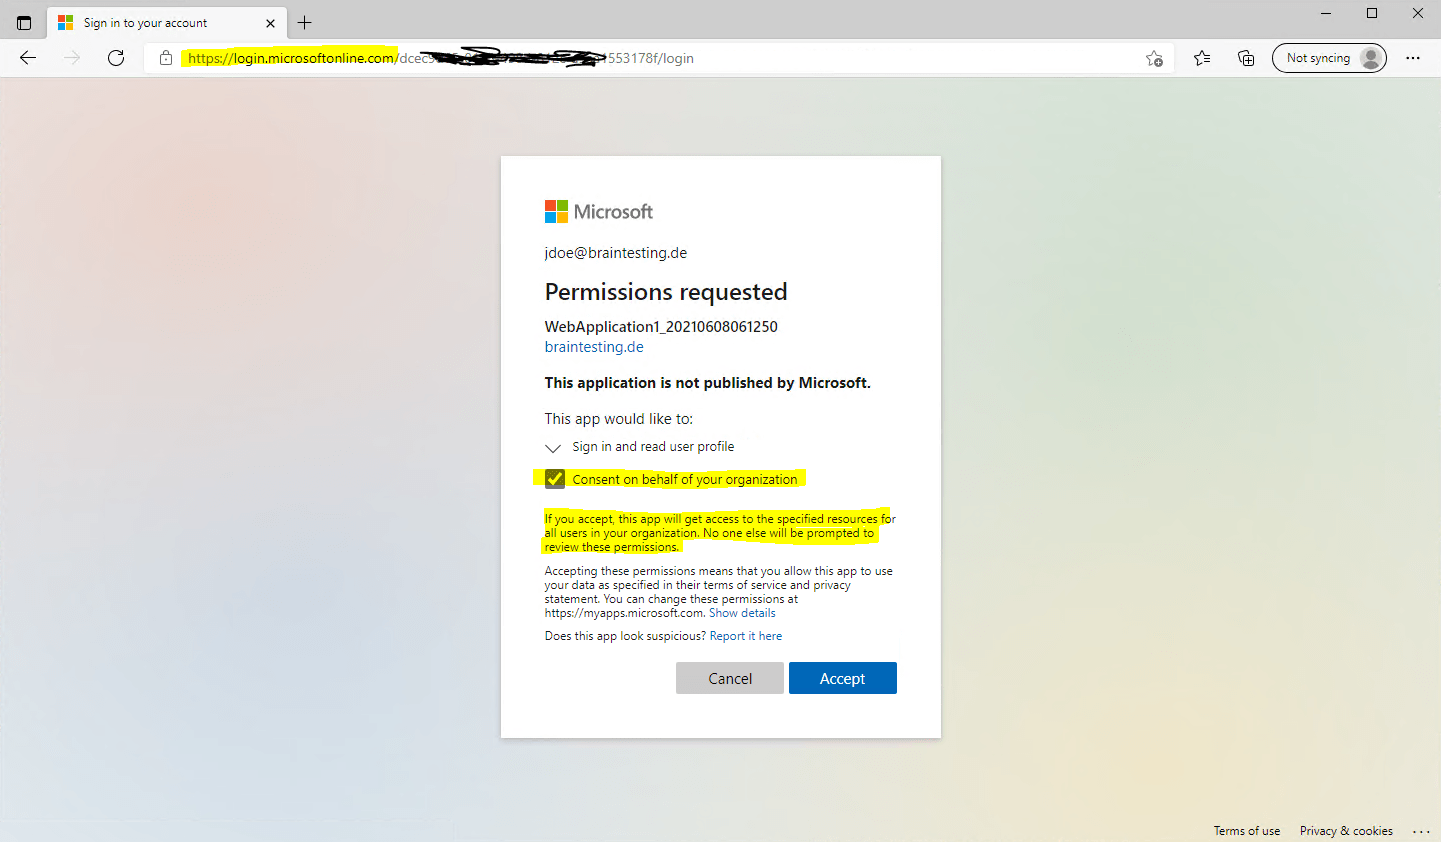
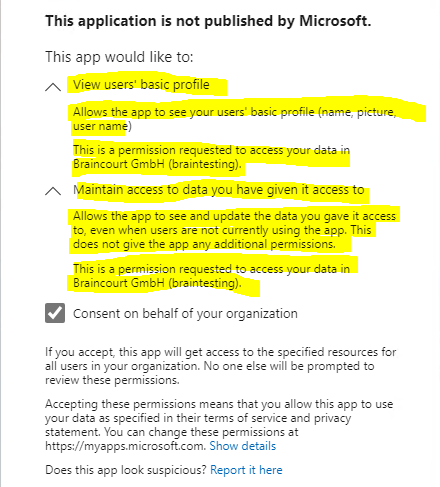
For the first time, the application wants to access Azure AD, you need to consent that the application can access these data.
Further users will not be prompted to consent.
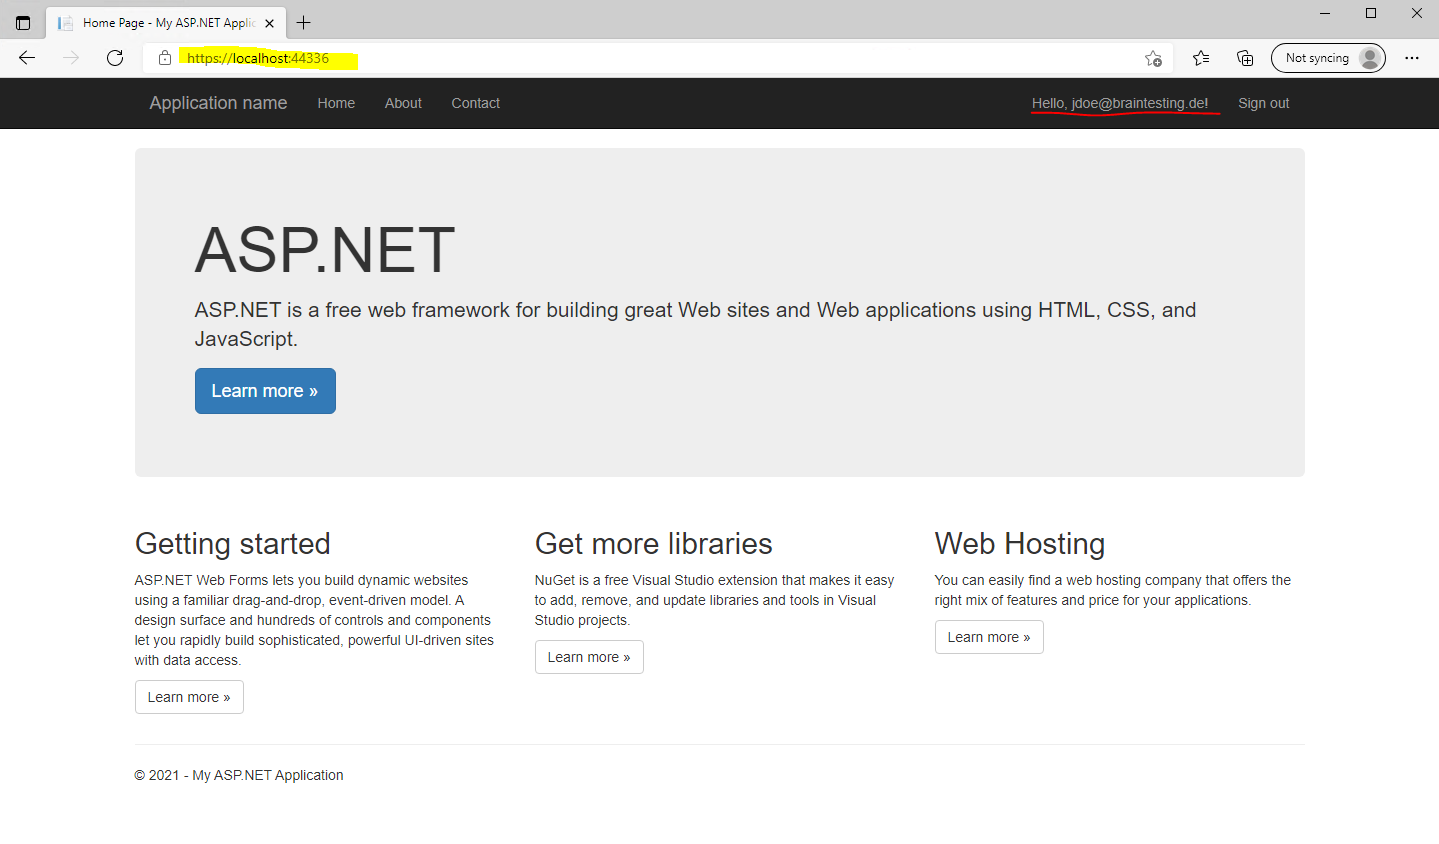
Finally I get signed-in to my web application using an Azure AD user account.
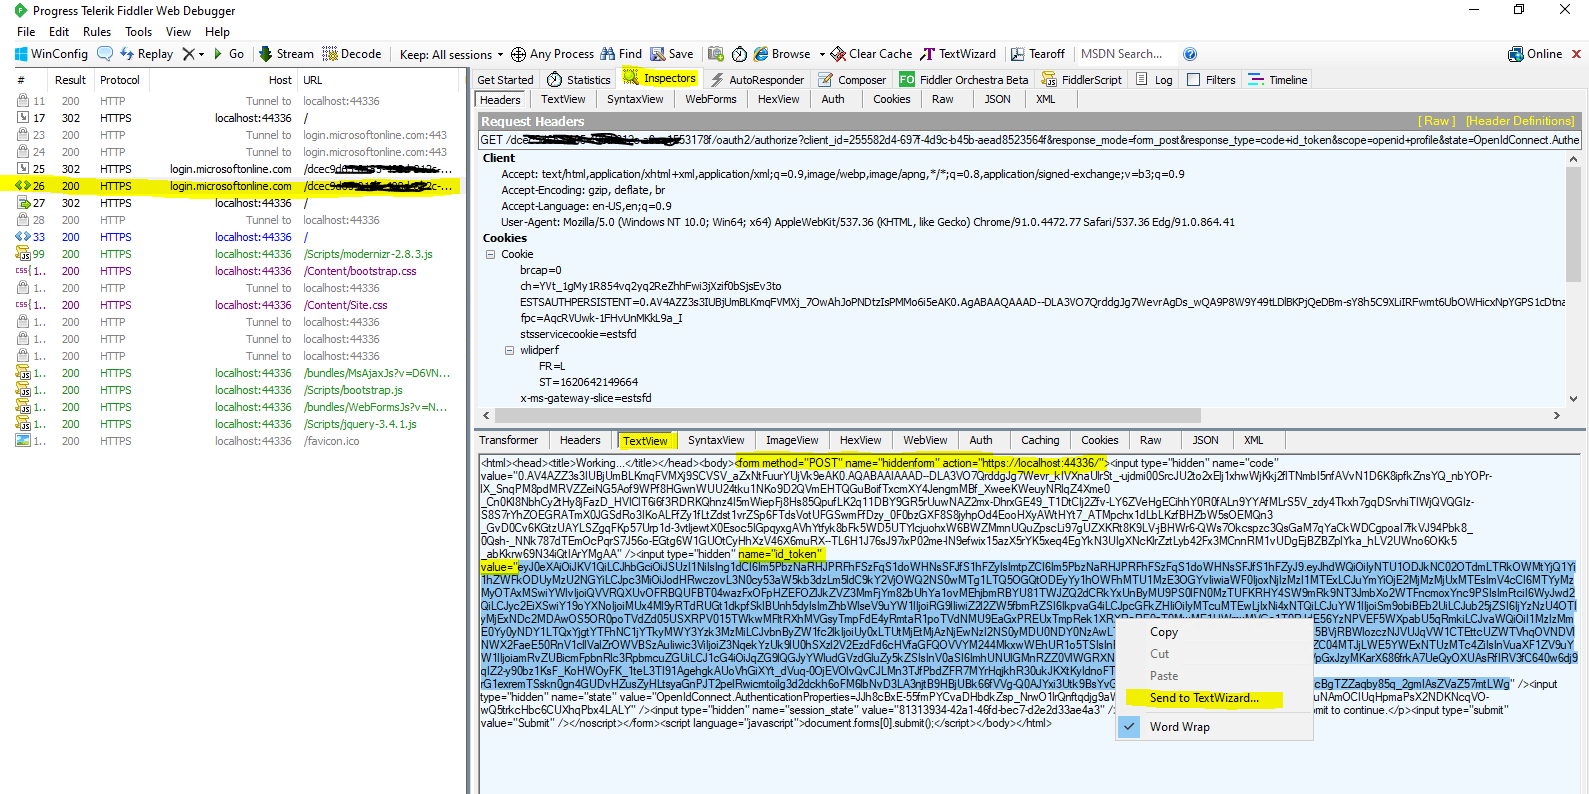
If you are interested to see how to analyze the authentication process, which is performed from Azure AD using the OAuth 2.0 and OpenID Connect protocol, you can read my following post about how to analyze AD FS SAML Claims with Fiddler. The process to capture the traffic and analyze it with Fiddler will be the same as for AD FS.
Shortened:
The second HTTP Request for login.microsoftonline.com will include in the response headers the JSON Web Token (JWT) issued from Azure AD (sts.windows.net) and OpenID Connect to authenticate using a HTTP Post against your web app.
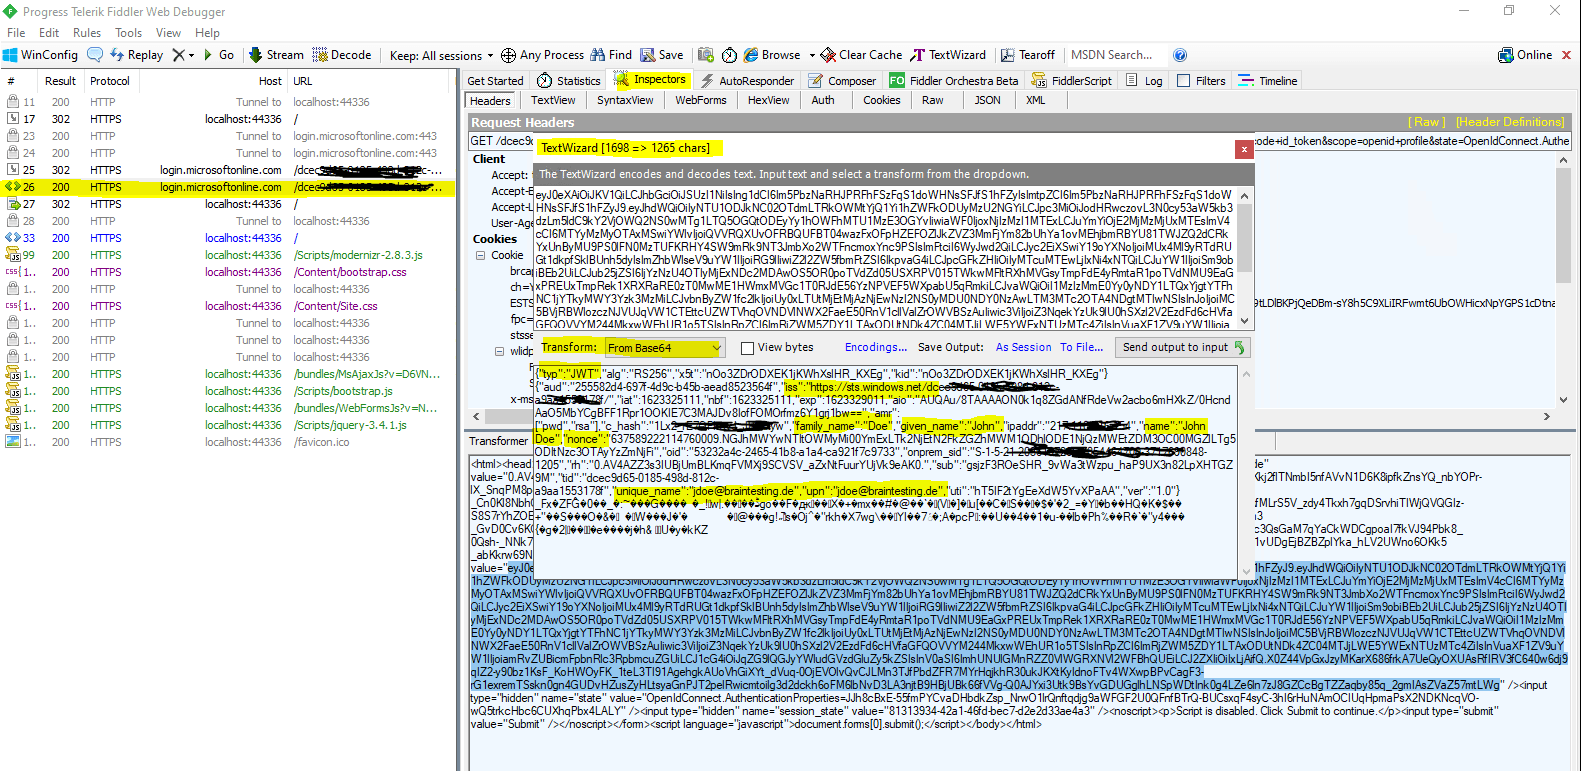
You can also decode the ID Token above under the following link
https://jwt.ms/
The site also lists clearly the claims after decoding the token.
These JSON Web Token (JWT) includes a set of default claims issued by default from Azure AD without the need to first configure them.
These claims contains a set of information about the user like the email address or the user principal name, in on-premises and the Active Directory they will be stored as Active Directory user attributes.
What set of information (claims) the JWT by default included, depends on the endpoint from where it was requested.
Claims in an ID token
https://docs.microsoft.com/en-us/azure/active-directory/develop/id-tokens#claims-in-an-id-token
In case you need more claims as by default will be issued, you can add optional claims in the Azure portal and the App registration menu of your web app.
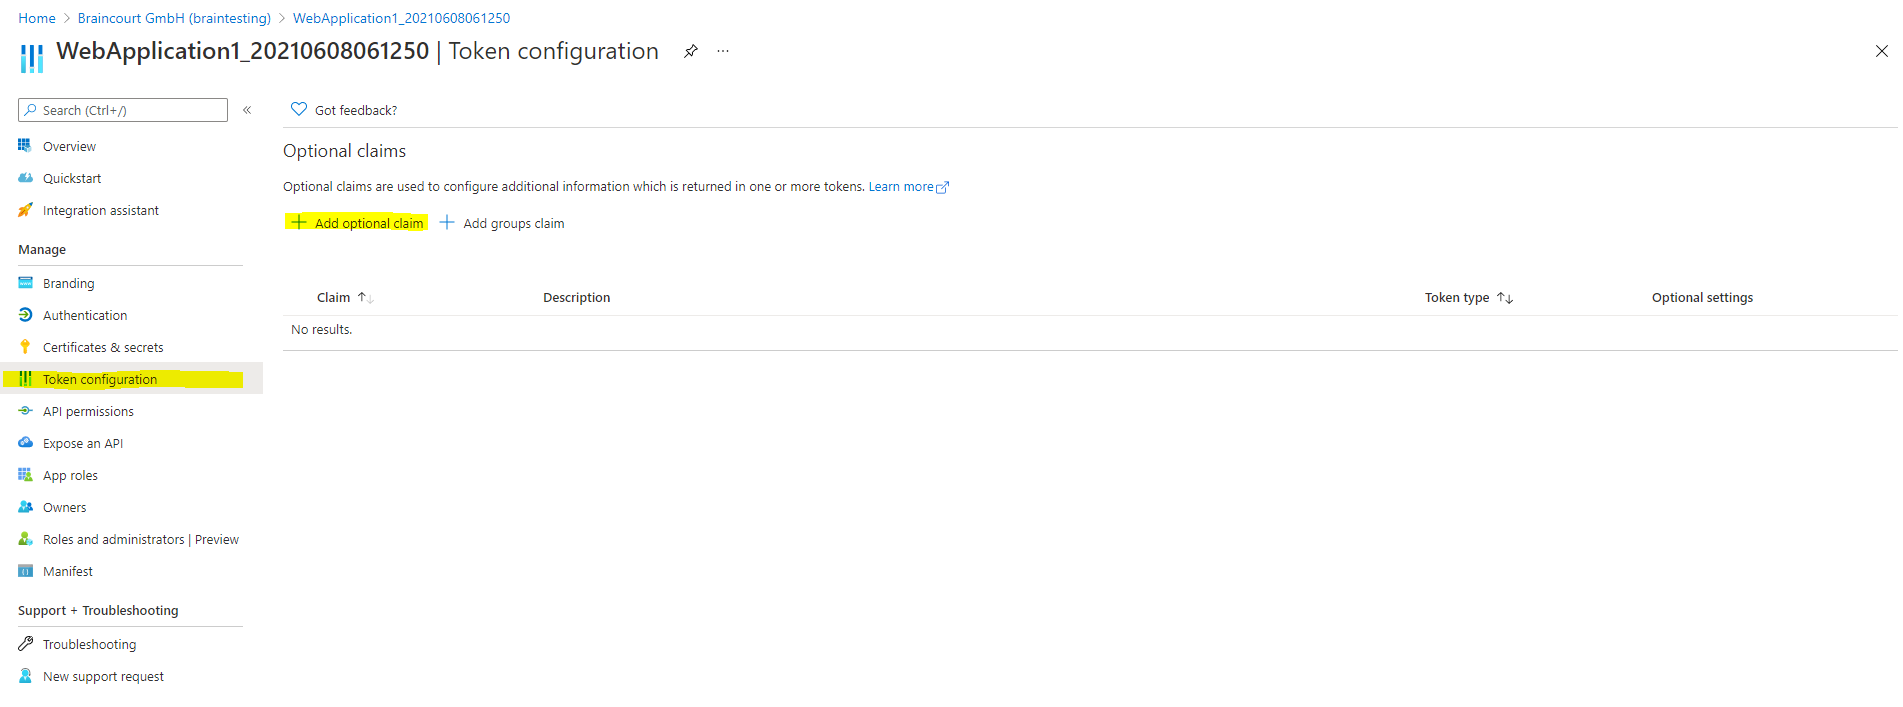
How to: Provide optional claims to your app
https://docs.microsoft.com/en-us/azure/active-directory/develop/active-directory-optional-claims
How to: Customize claims emitted in tokens for a specific app in a tenant (Preview)
https://docs.microsoft.com/en-us/azure/active-directory/develop/active-directory-claims-mapping#omit-the-basic-claims-from-tokens
Microsoft identity platform ID tokens
https://docs.microsoft.com/en-us/azure/active-directory/develop/id-tokens#claims-in-an-id-token
Details about OAuth 2.0 and OpenID Connect you will find in my following post.
Links
Quickstart: Add Microsoft identity platform sign-in to an ASP.NET web app
https://docs.microsoft.com/en-us/azure/active-directory/develop/quickstart-v2-aspnet-webapp
Quickstart: Register an application with the Microsoft identity platform
https://docs.microsoft.com/en-us/azure/active-directory/develop/quickstart-register-app
Application and service principal objects in Azure Active Directory
https://docs.microsoft.com/en-us/azure/active-directory/develop/app-objects-and-service-principals
App Registration vs Enterprise Applications
https://docs.microsoft.com/en-us/answers/questions/270680/app-registration-vs-enterprise-applications.html
The best home for modern WordPress sites built on the Google Cloud Platform