Set up Active Directory Federation Services (AD FS 5.0) – Create an ASP.NET Core Web App (Model-View-Controller) by using OAuth 2.0 & OpenID Connect – Part 7
In this post I want to show you, how you can create a claim aware ASP.NET Core Web App (Model-View-Controller) with C# in Visual Studio, in order to authenticate users with OpenID Connect through an AD FS server.
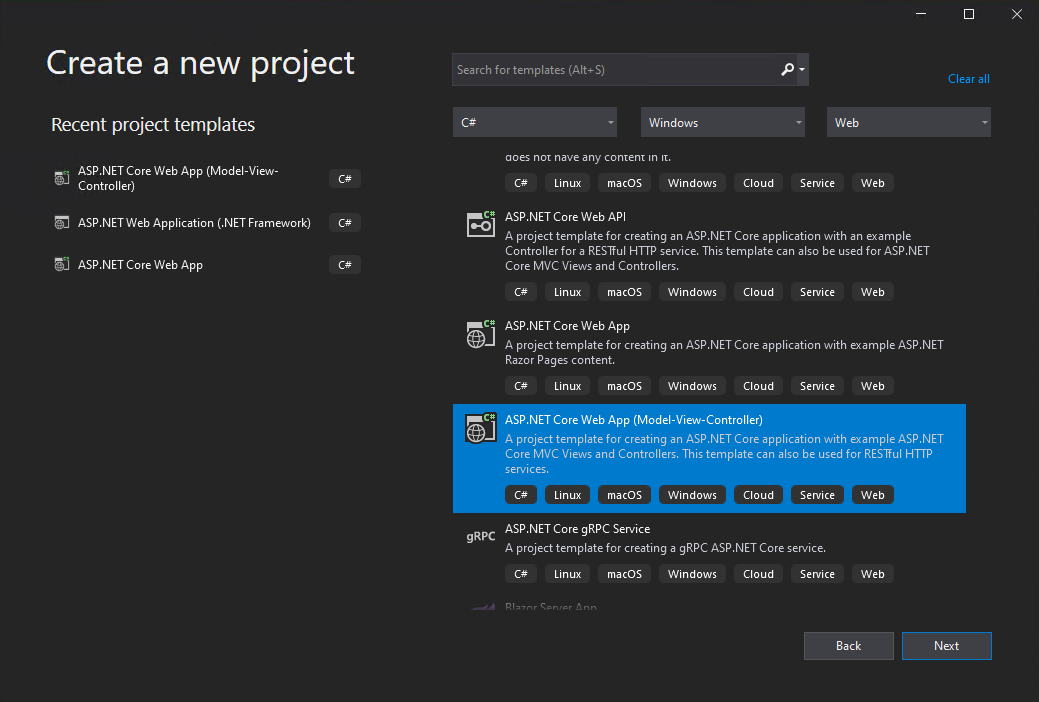
This post is split into multiple parts
Part 1 … will cover the installation from the internal ADFS ServerPart 2 … will cover the installation from the ADFS Reverse Proxy Server in the perimeter network
Part 3 … will cover all about certificates for an ADFS environmentPart 4 … we will create an ASP.NET Web Application (.NET Framework -Web Forms) and configure it to be claim aware using WS-FED.
Part 5 … we will create an ASP.NET Core Web Application (MVCs) and configure it to be claim aware using WS-FED.
Part 6 … we will create an ASP.NET Web Application (.NET Framework – MVC) and configure it to be claim aware by using OAuth 2.0 and OpenID Connect.
Part 7 … we will create an ASP.NET Core Web Application (MVC) and configure it to be claim aware by using OAuth 2.0 and OpenID Connect.
Part 8 … will explain and list all identity protocols, AD FS supports.
For this post I used the information from the following tutorial from Microsoft, which documents how to configure an ASP.NET web application to authenticate against the Microsoft identity platform with OpenID Connect.
Tutorial: Add sign-in to Microsoft to an ASP.NET web app
https://docs.microsoft.com/en-us/azure/active-directory/develop/tutorial-v2-asp-webapp
I modified this in order to authenticate against an on-premises AD FS server using OpenID Connect and using an ASP.NET Core Web App instead an ASP.NET Web Application (.NET Framework).
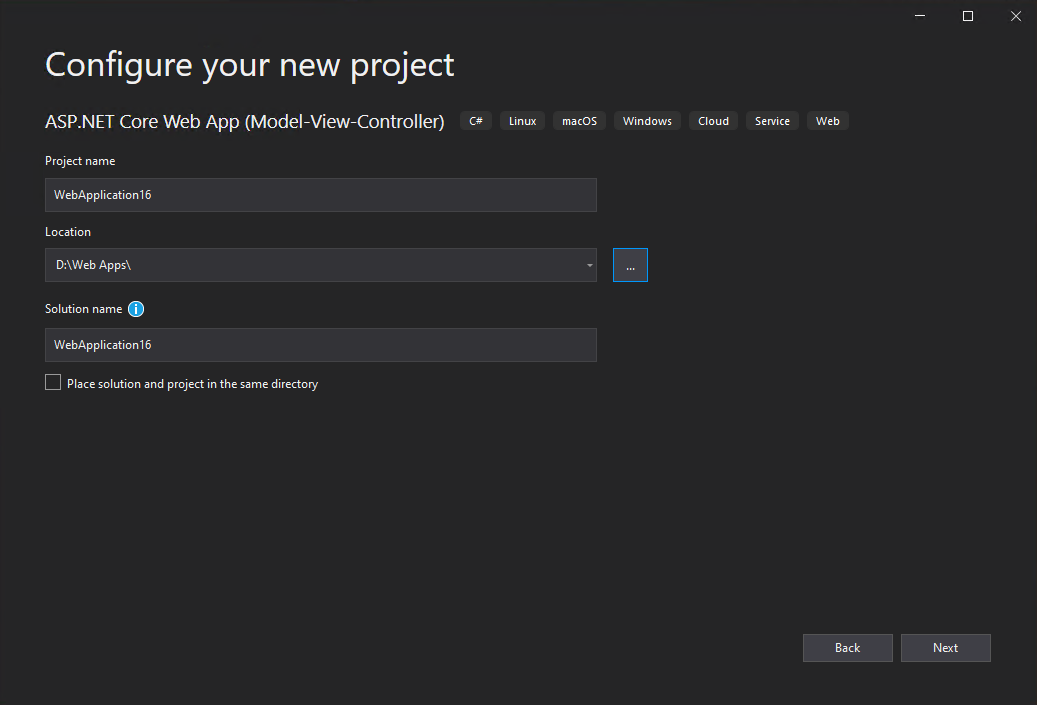
First I will create the web application in Visual Studio and after that I will show you how to configure OpenID Connect in AD FS server.
Here I will select for Authentication Type Individual Accounts.

Further I will configure the Web App to use HTTPS which is checked by default.
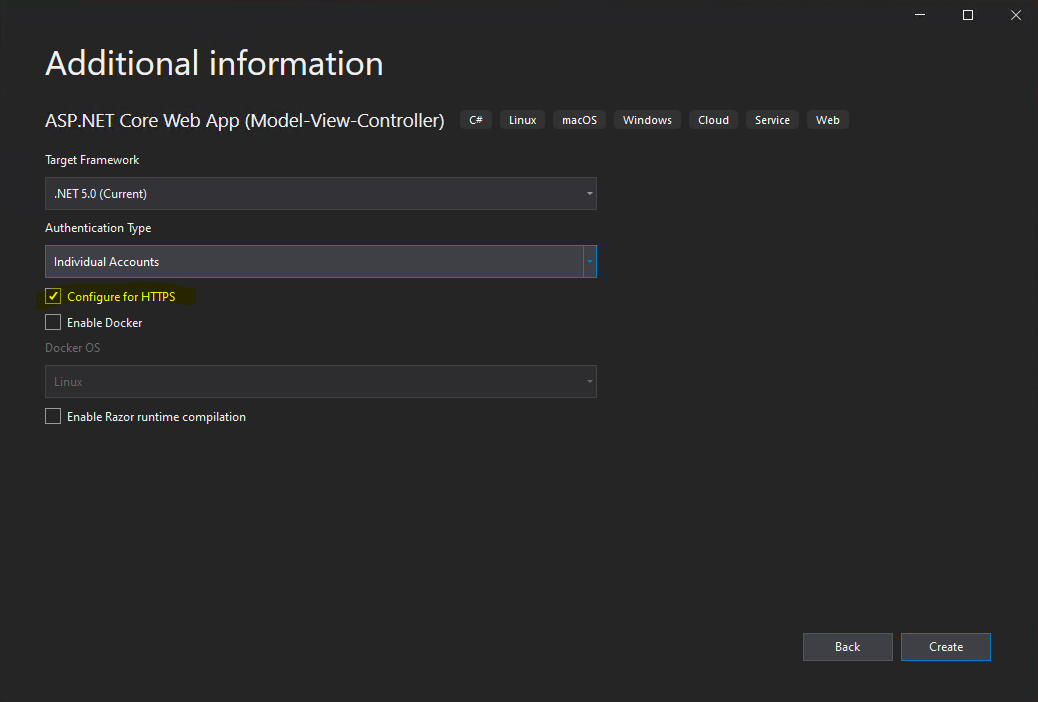
Now you can click on Create.
At this point I will check the URL from the web application in order to create an Application Group on the AD FS server, which we will need to create to use OpenID Connect. This is different from the WS-Trust, WS-Federation and SAML 2.0 WEB SSO protocol, where we have to create a relying party trust and have to configure which claims have to be issued.
The URL from your web application you can check in the properties of your project, so right click on your project and navigate to the Debug tab as follows.

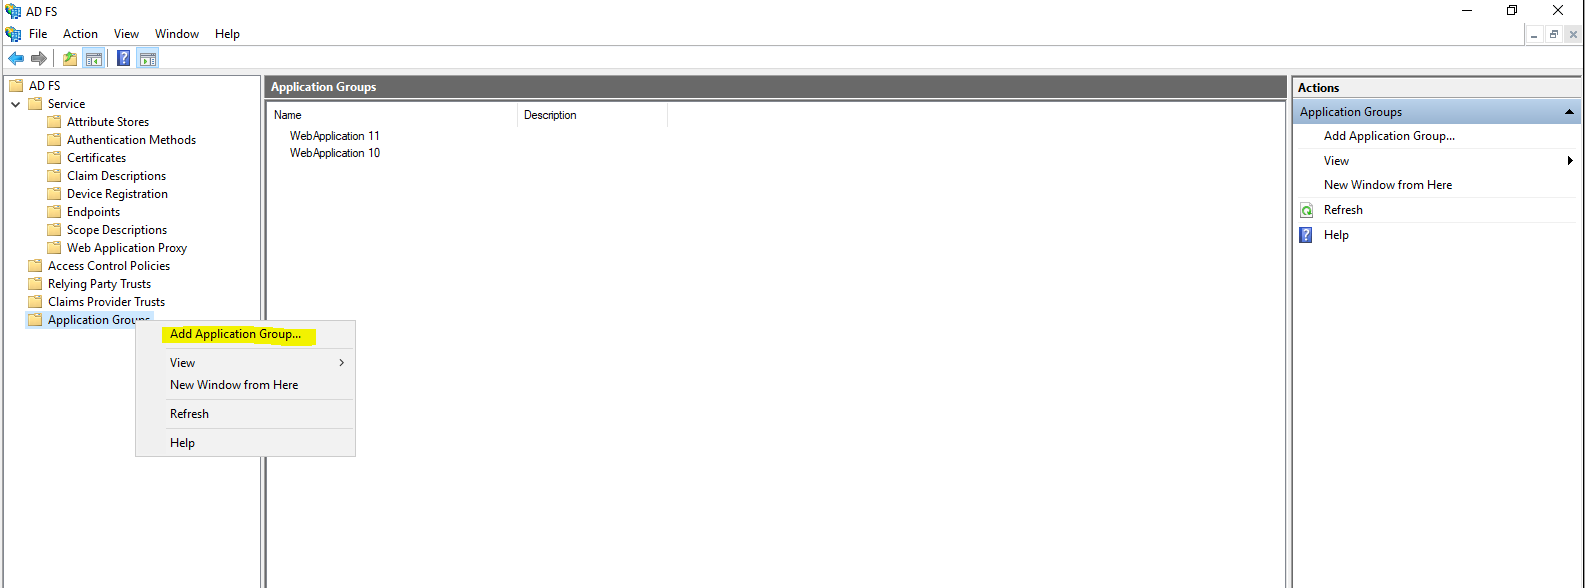
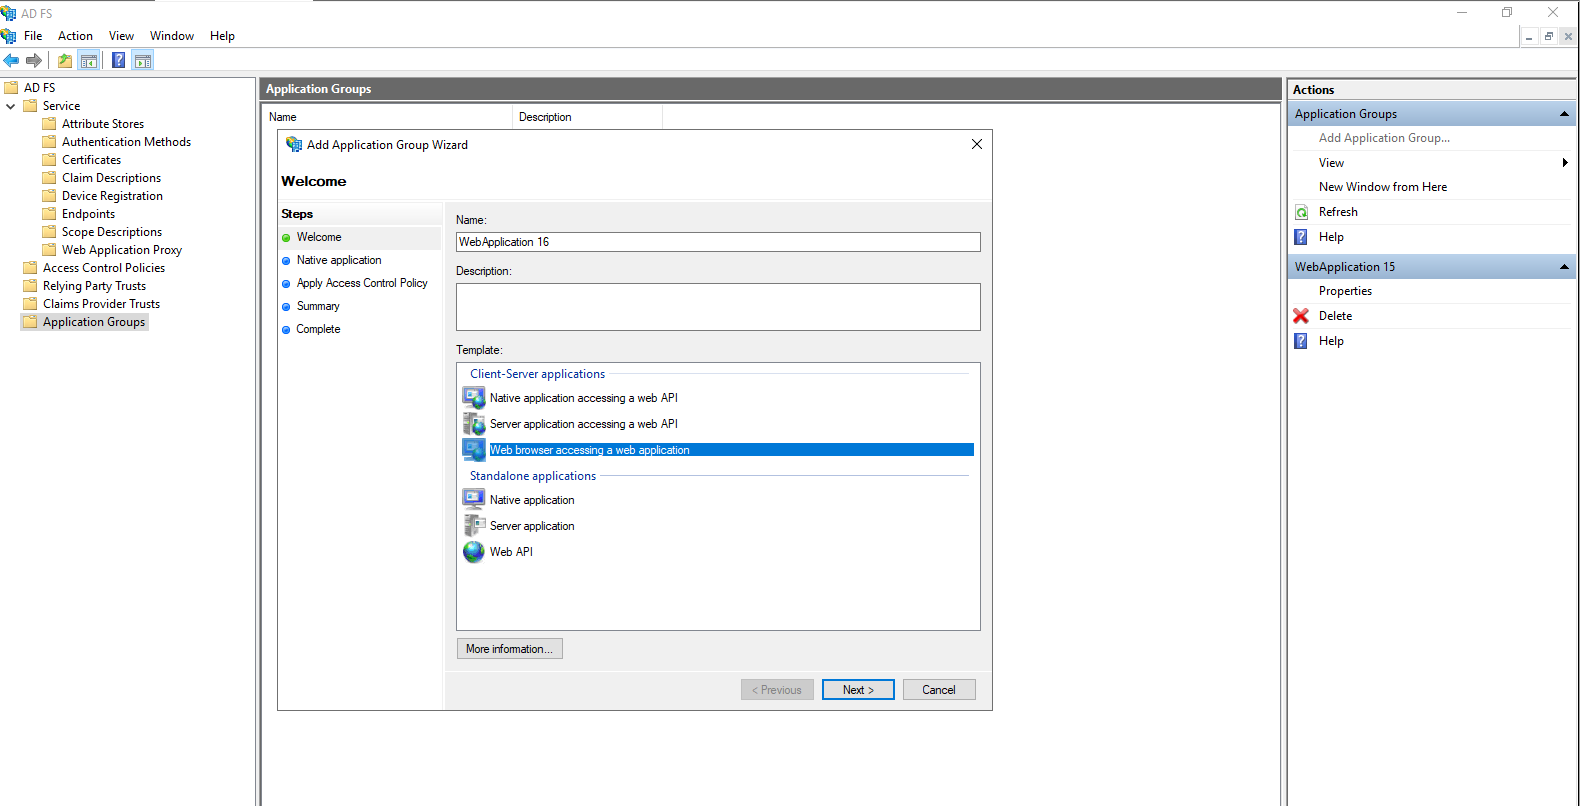
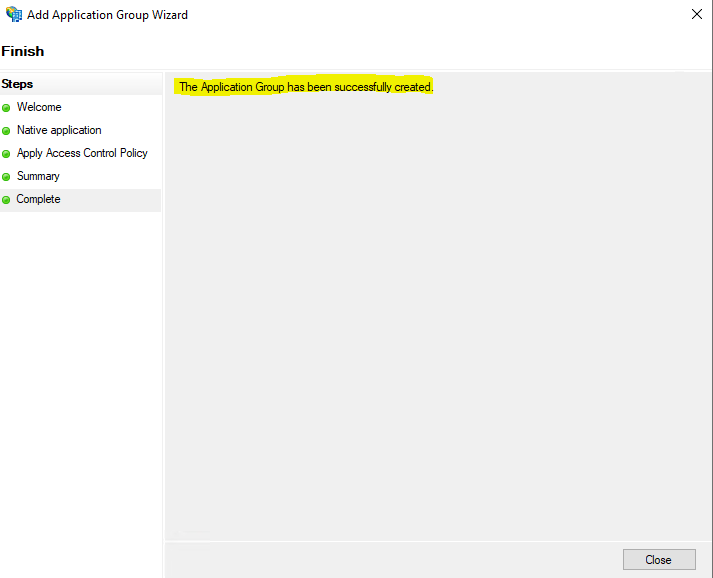
Now as we know the project URL we can create the Application Group in AD FS as follows.
Rigth click on Application Group in AD FS to add a new group.
Here we need to enter a name for the new web application and select a template. We will use the Web browser accessing a web application template.
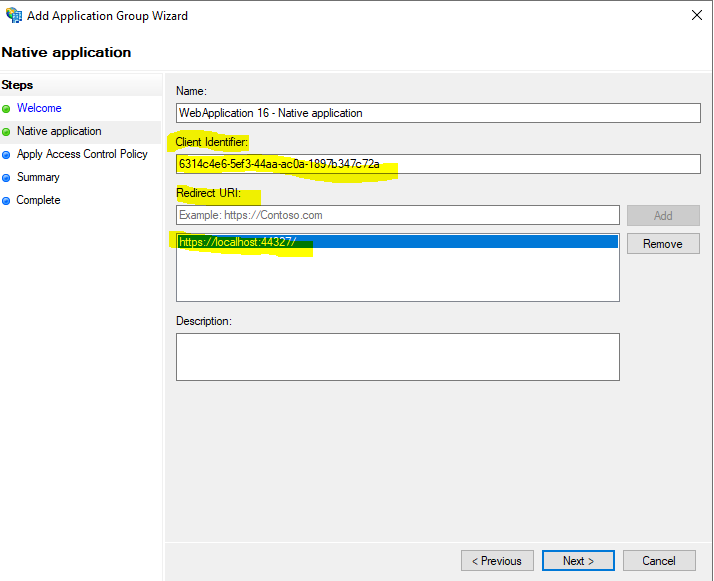
On the next page we have to enter our previously determined project URL in Visual Studio as the redirect URI.
You will also see that AD FS here created an Client Identifier which we need to copy and paste into our web application later. So copy this identifier.
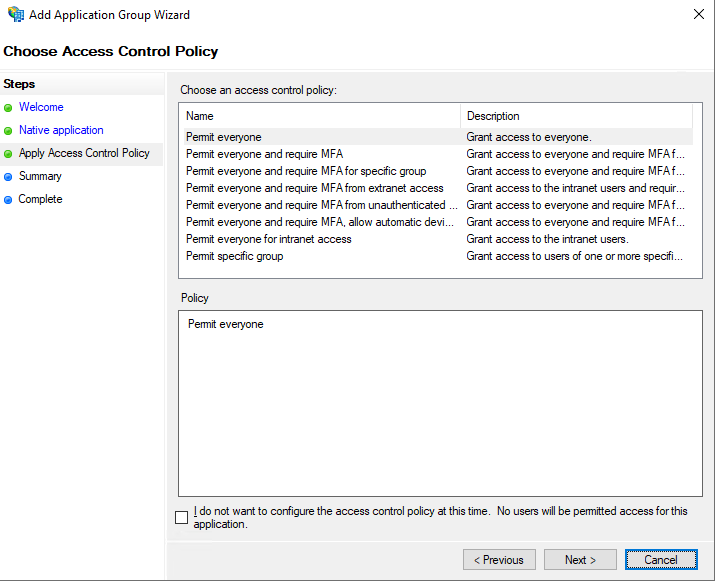
Here I will leave the default permit everyone policy.
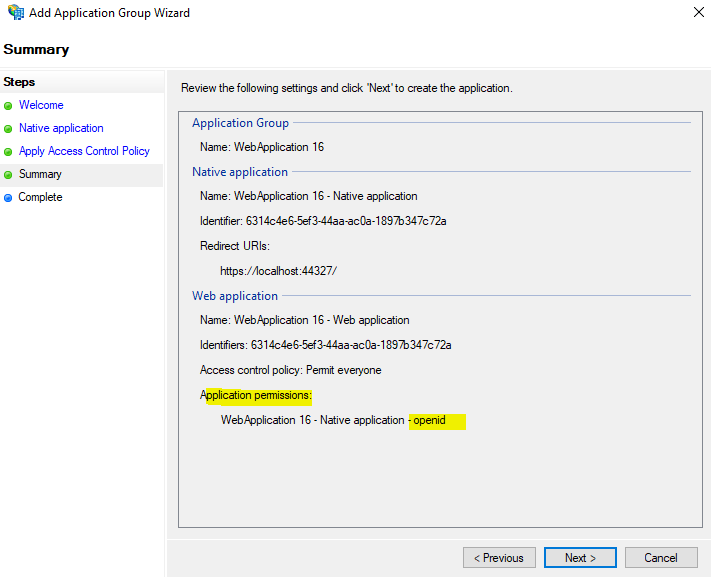
On the summary page you will also see that AD FS creates an OpenID web application under application permissions.
This was all in AD FS and we have not to configure an claim issuance policy as for relying trust party web applications as mentioned.
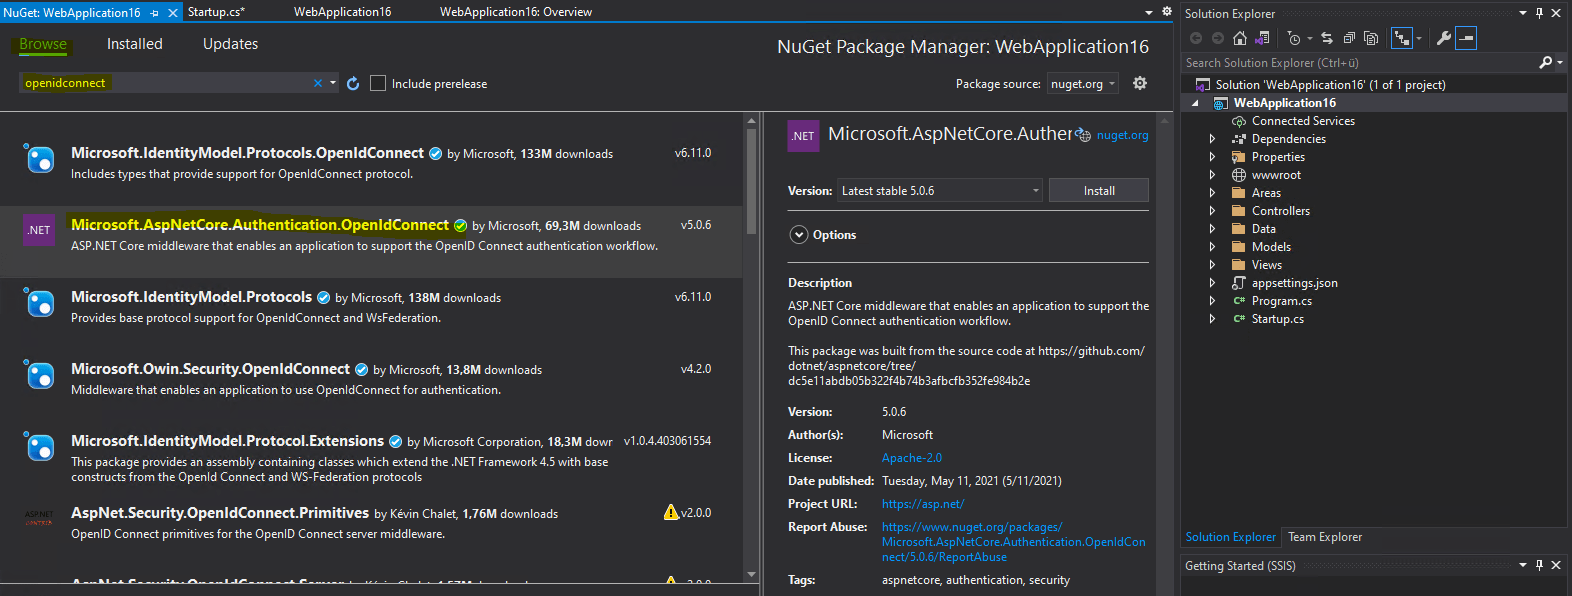
Now we have finally to finish the configuration for our web app in Visual Studio.
We will first add the NuGet Package Microsoft.AspNetCore.Authentication.OpenIDConnect.
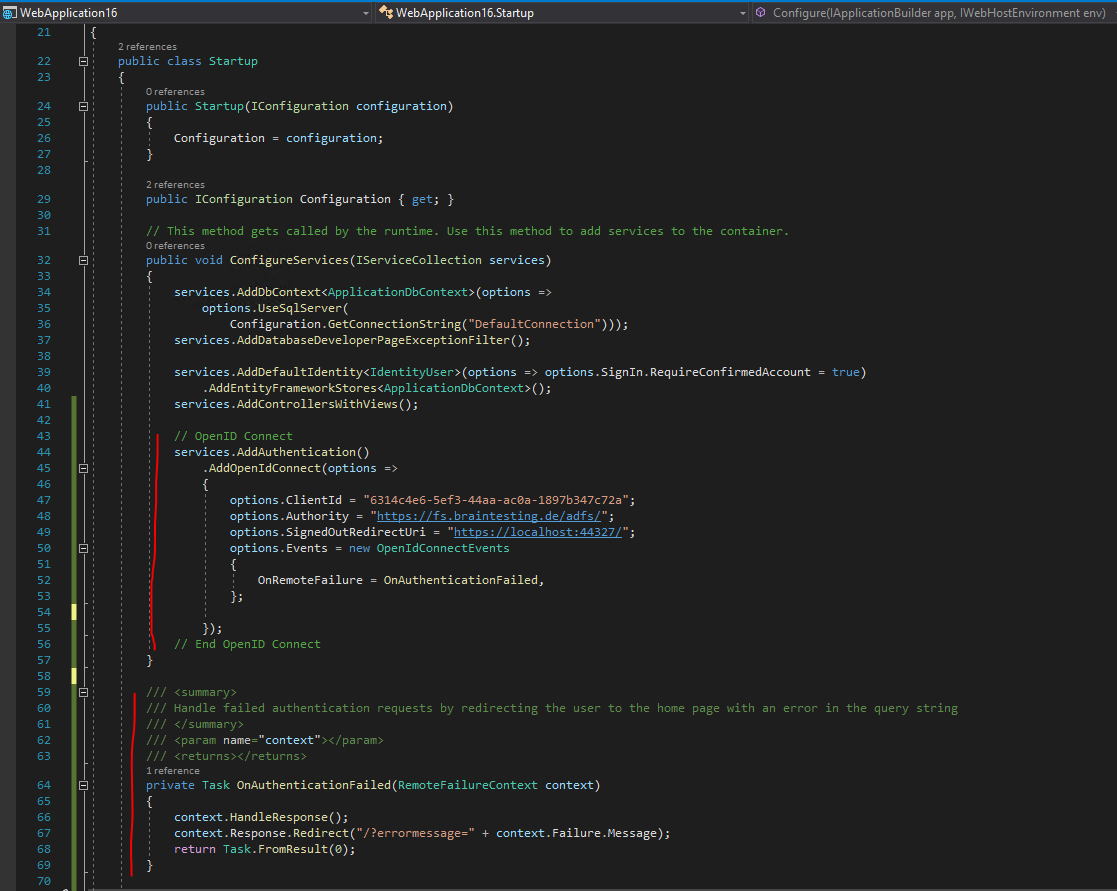
Open the Startup.cs class and add the following code into the public void ConfigureServices(IServiceCollection services) method after Services.AddControllersWithViews()
 // OpenID Connect
            services.AddAuthentication()
                .AddOpenIdConnect(options =>
                {
                    options.ClientId = "6314c4e6-5ef3-44aa-ac0a-1897b347c72a";
                    options.Authority = "https://fs.braintesting.de/adfs/";
                    options.SignedOutRedirectUri = "https://localhost:44327/";
                    options.Events = new OpenIdConnectEvents
                    {
                        OnRemoteFailure = OnAuthenticationFailed,
                    };

                });
            // End OpenID Connect
Further we need the OnAuthenticationFailed Task insert into the Startup class.
/// <summary>
        /// Handle failed authentication requests by redirecting the user to the home page with an error in the query string
        /// </summary>
        /// <param name="context"></param>
        /// <returns></returns>
        private Task OnAuthenticationFailed(RemoteFailureContext context)
        {
            context.HandleResponse();
            context.Response.Redirect("/?errormessage=" + context.Failure.Message);
            return Task.FromResult(0);
        }
So your code should looks like this.
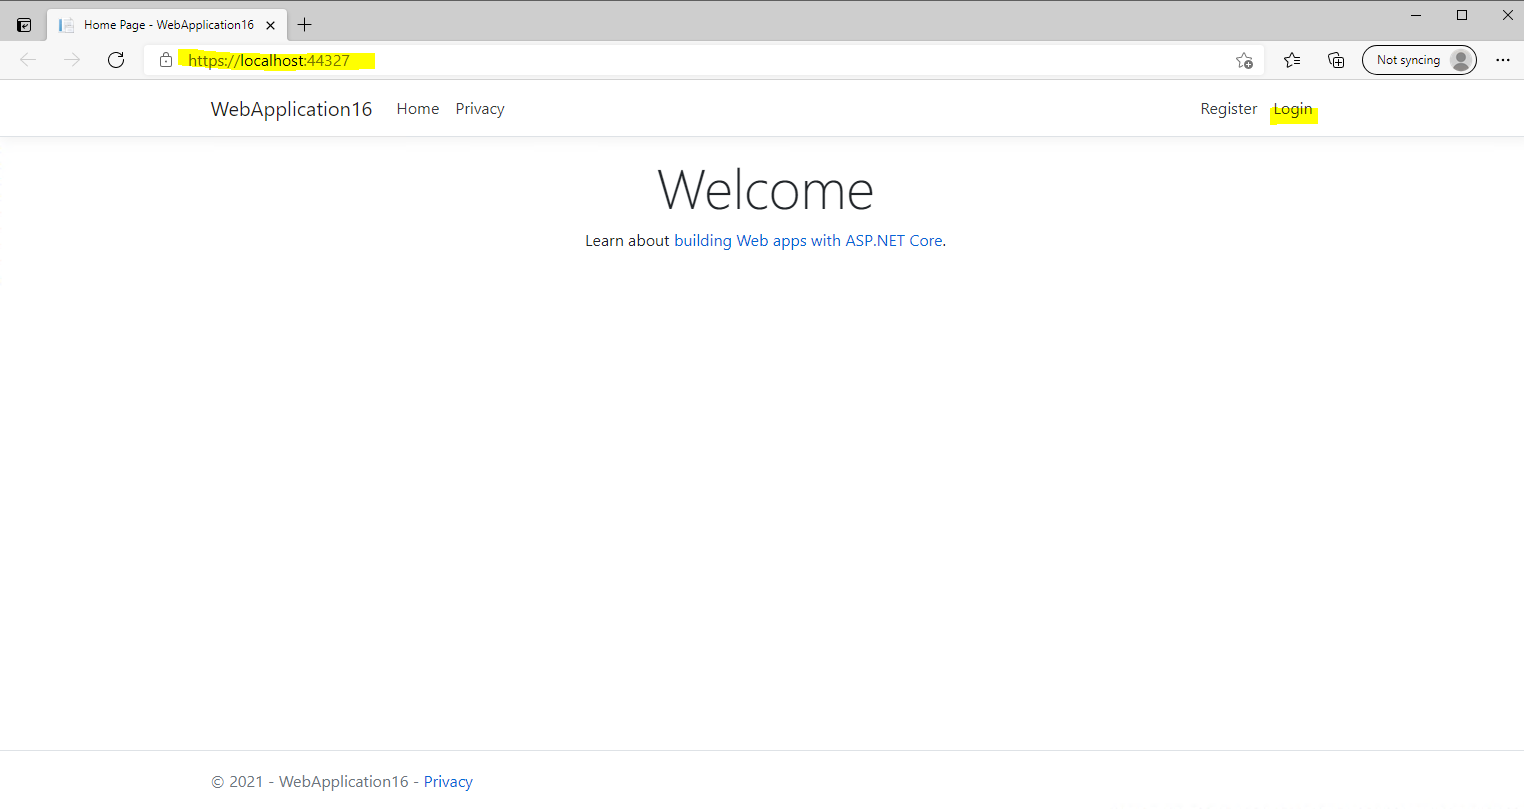
Finally we can test if the authentication against the AD FS server and using OpenID connect will work, so hit the F5 key to start debugging and open the web application.
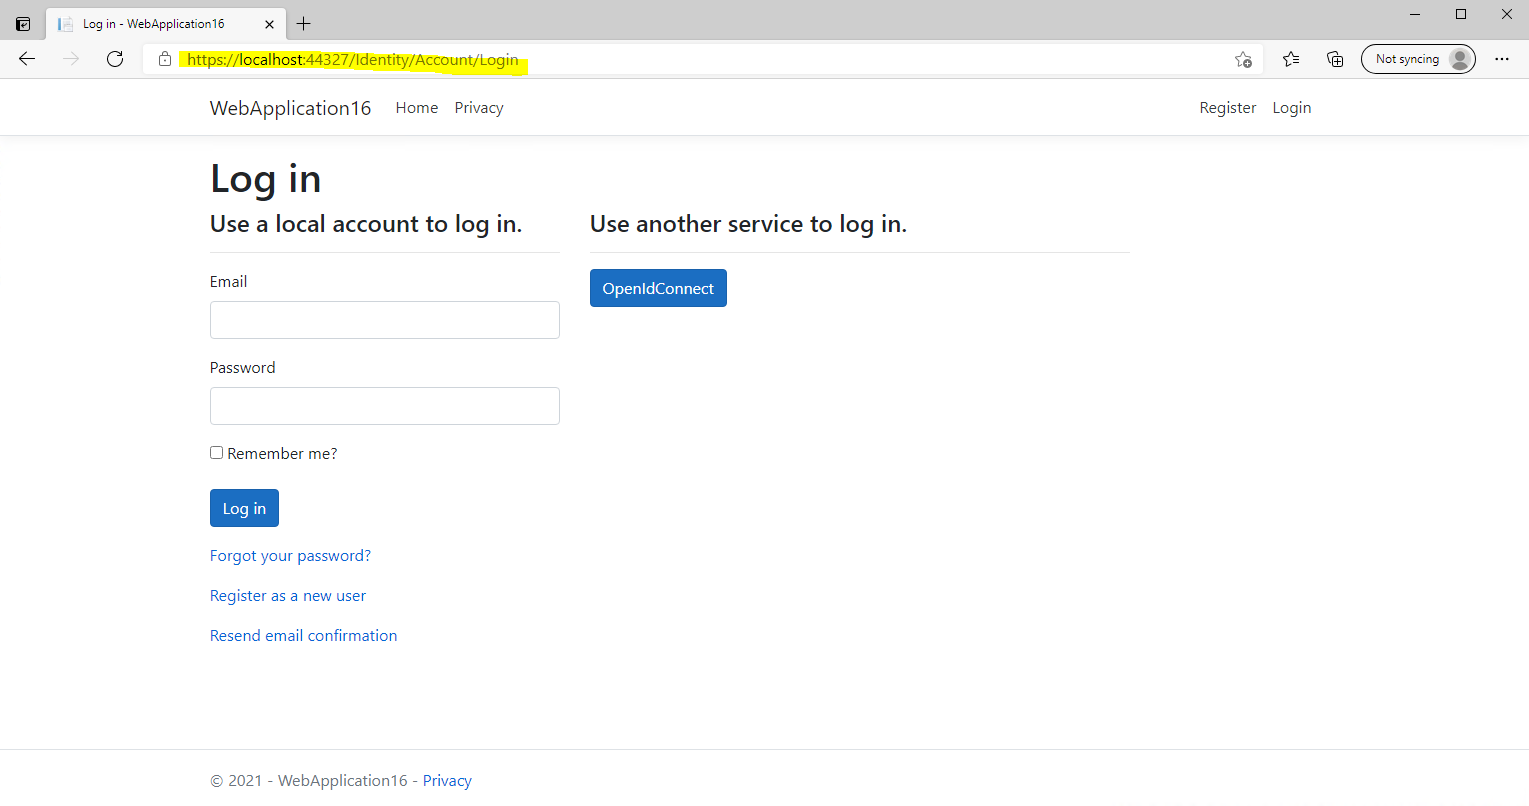
Click on Login.
Here we need to click on the OpenID Connect button and will be redirected to the federation server for sign-in.
You can see from the parameters in the URL, that we using OAuth 2.0 and OpenID Connect to authenticate the user. OpenID Connect is build on top of OAuth.
OAuth is an authorization protocol and OpenID Connect is used for authentication.

More about OAuth 2.0 and OpenID Connect you will find in my following post.
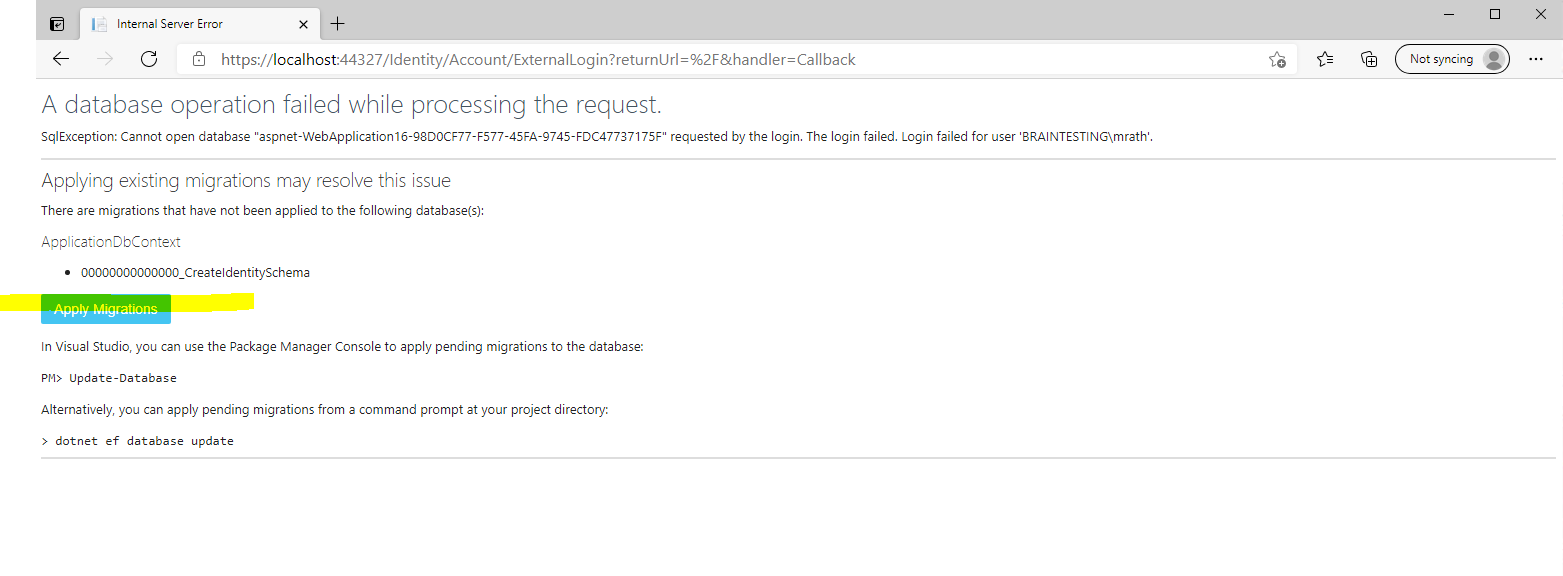
Click on Apply Migrations below and follow the instructions. Finally you had to refresh the page after the migration is applied.
Behind the scenes our web application will create a Microsoft SQL Server LocalDB database to store the users in. So this process and page below will only appear for the first user registration.
The user is created in the database table dbo.AspNetUsers, after you click the register button below. In this table the email will be used also as username. During the process also your on-premises user principal name from the issued claim token and your AD FS server is written to the database and the table dbo.AspNetUserLogins.
More about the Microsoft SQL Server LocalDB you can read in my following post https://blog.matrixpost.net/microsoft-sql-server-localdb/
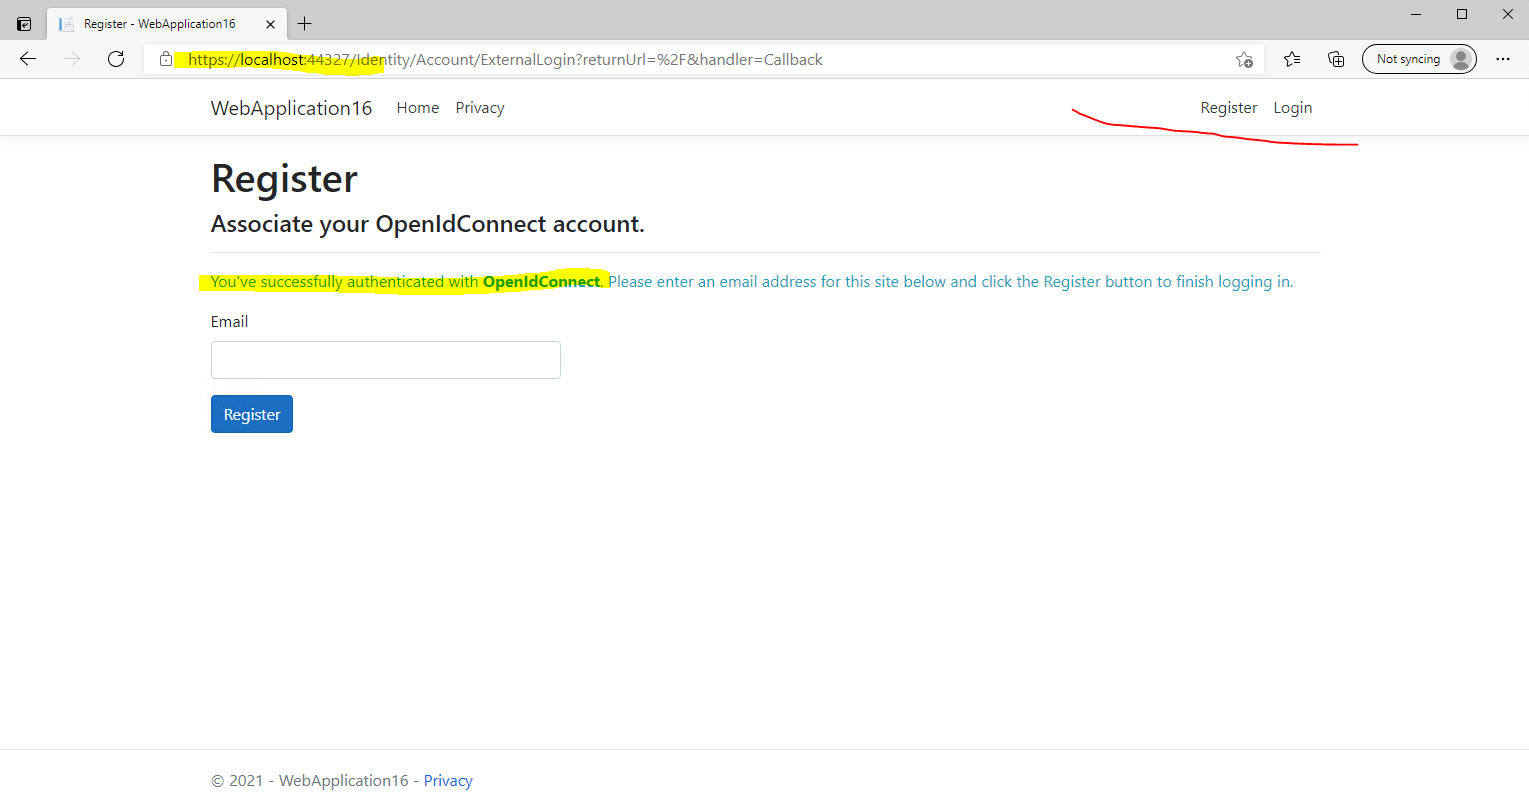
We are signed-in successfully but unfortunately our username is not showing up at the top right.
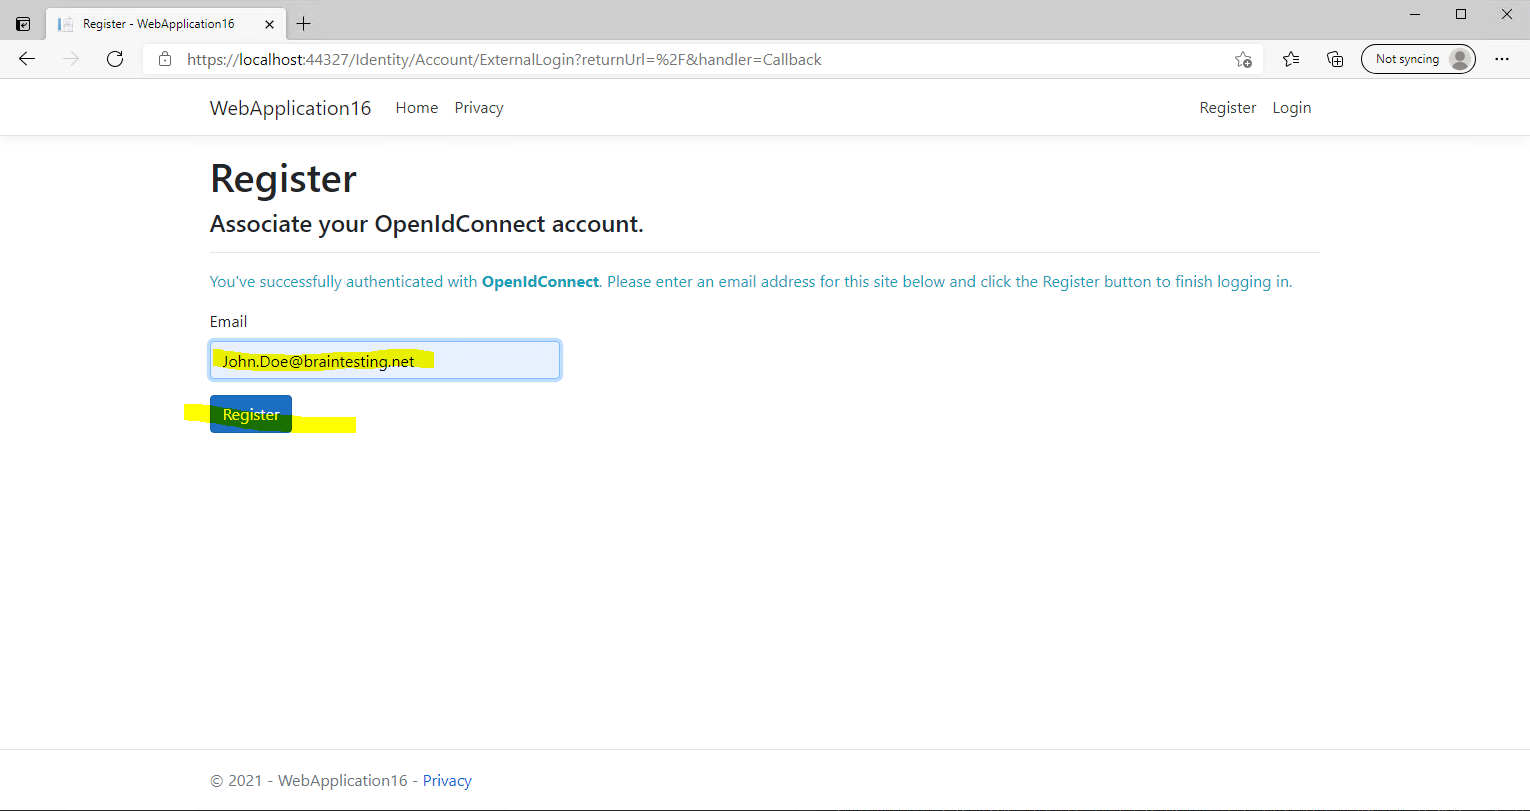
Therefore we finally need to enter an email address for this account and have to click on register, after that the email address is shown up at the top right as username.
It would be much nicer, if the above field with the email address, would be prepopulated through the JSON Web Token (JWT), issued from the federation server.
Similar as in my following post about WS-Federation authentication.
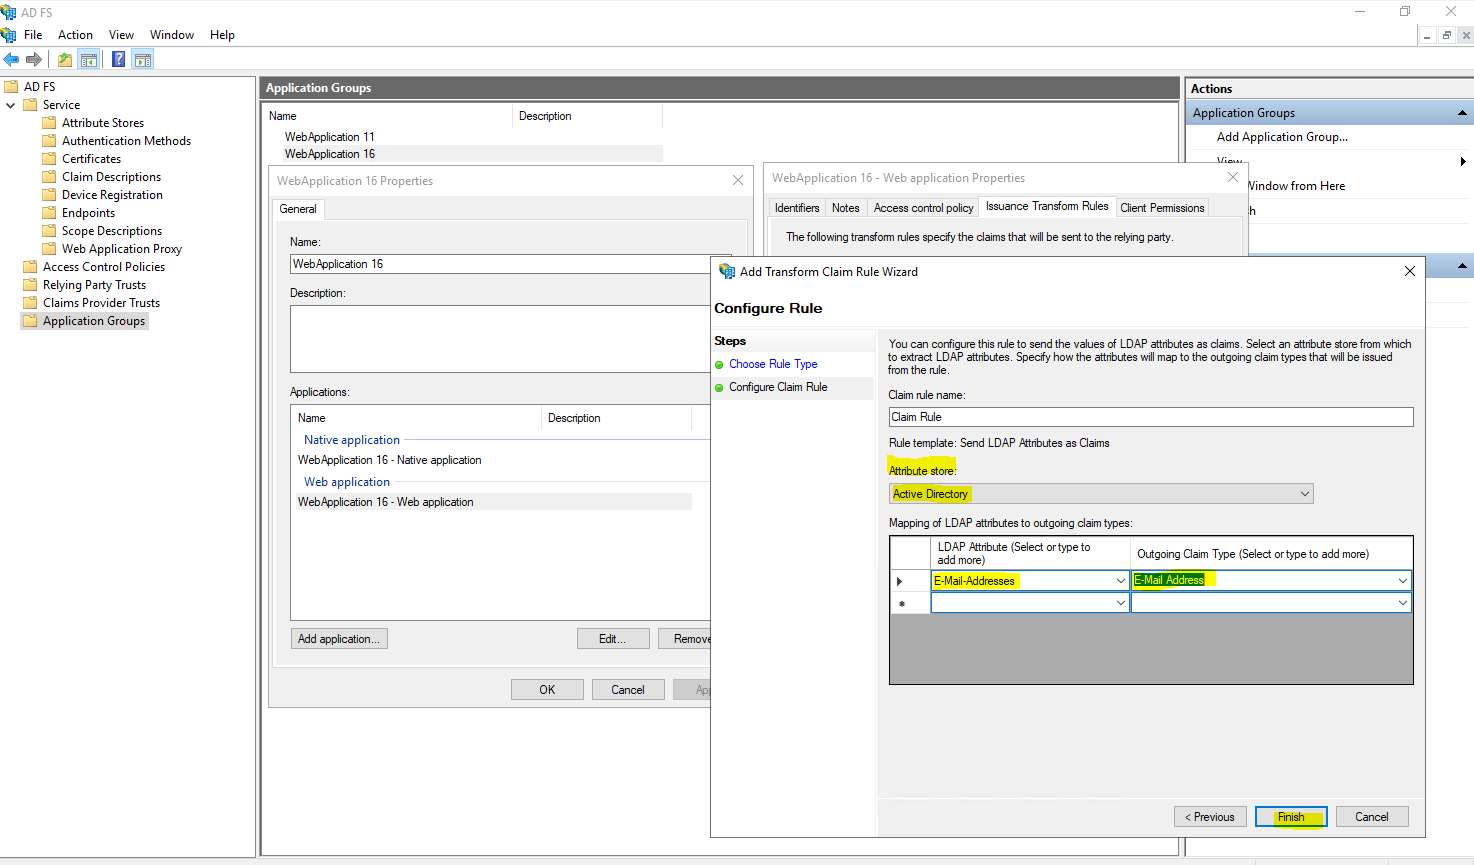
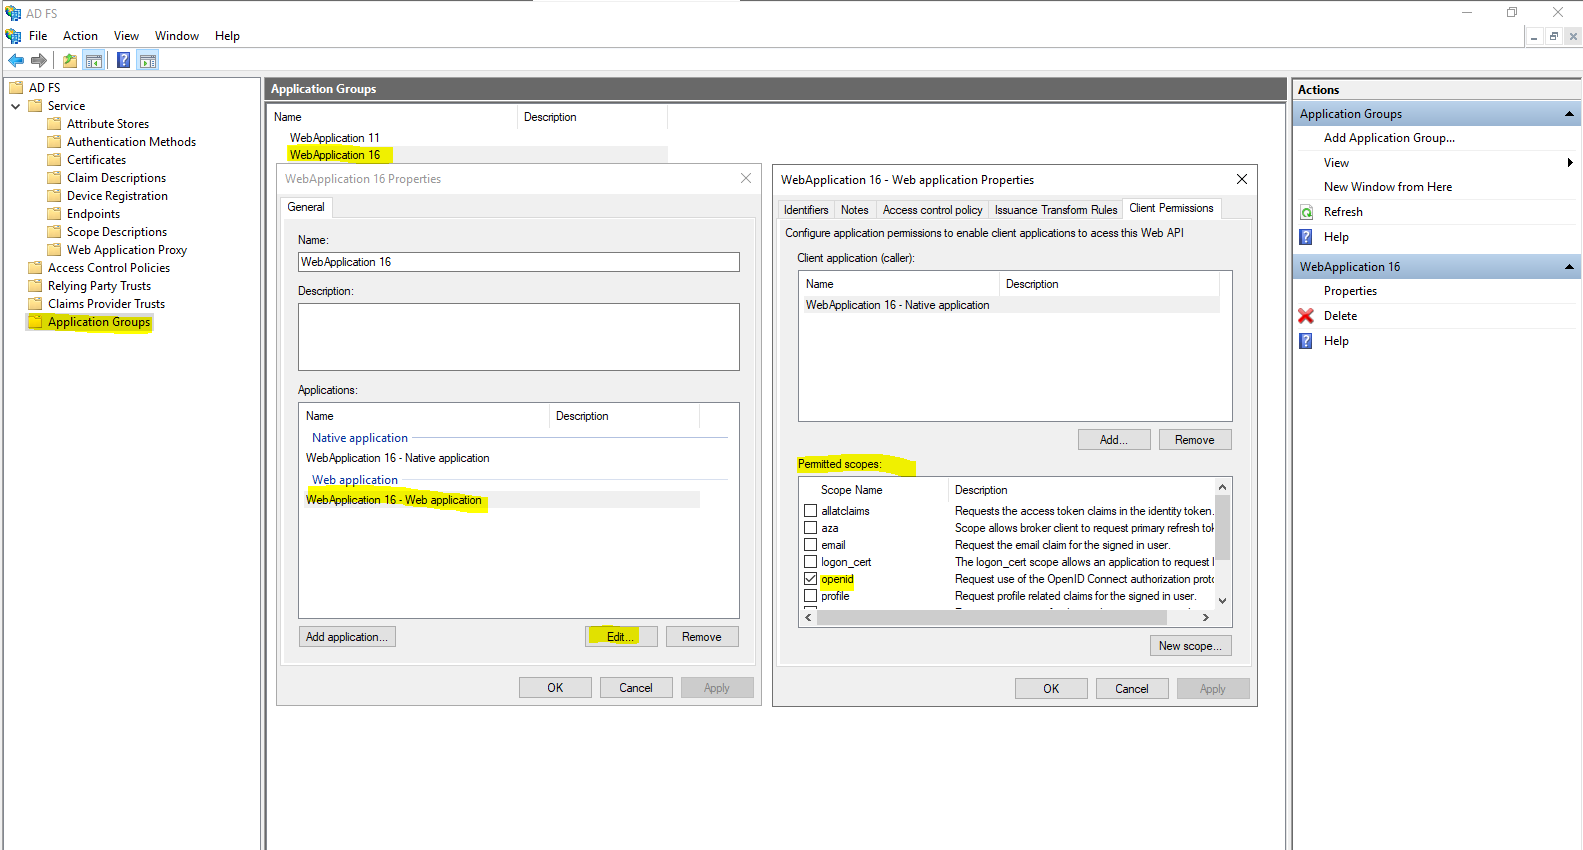
To do so, we need to add an Issuance Transform Rule for the Application Group, our web application is assigned to, previously configured on the AD FS server as follows.
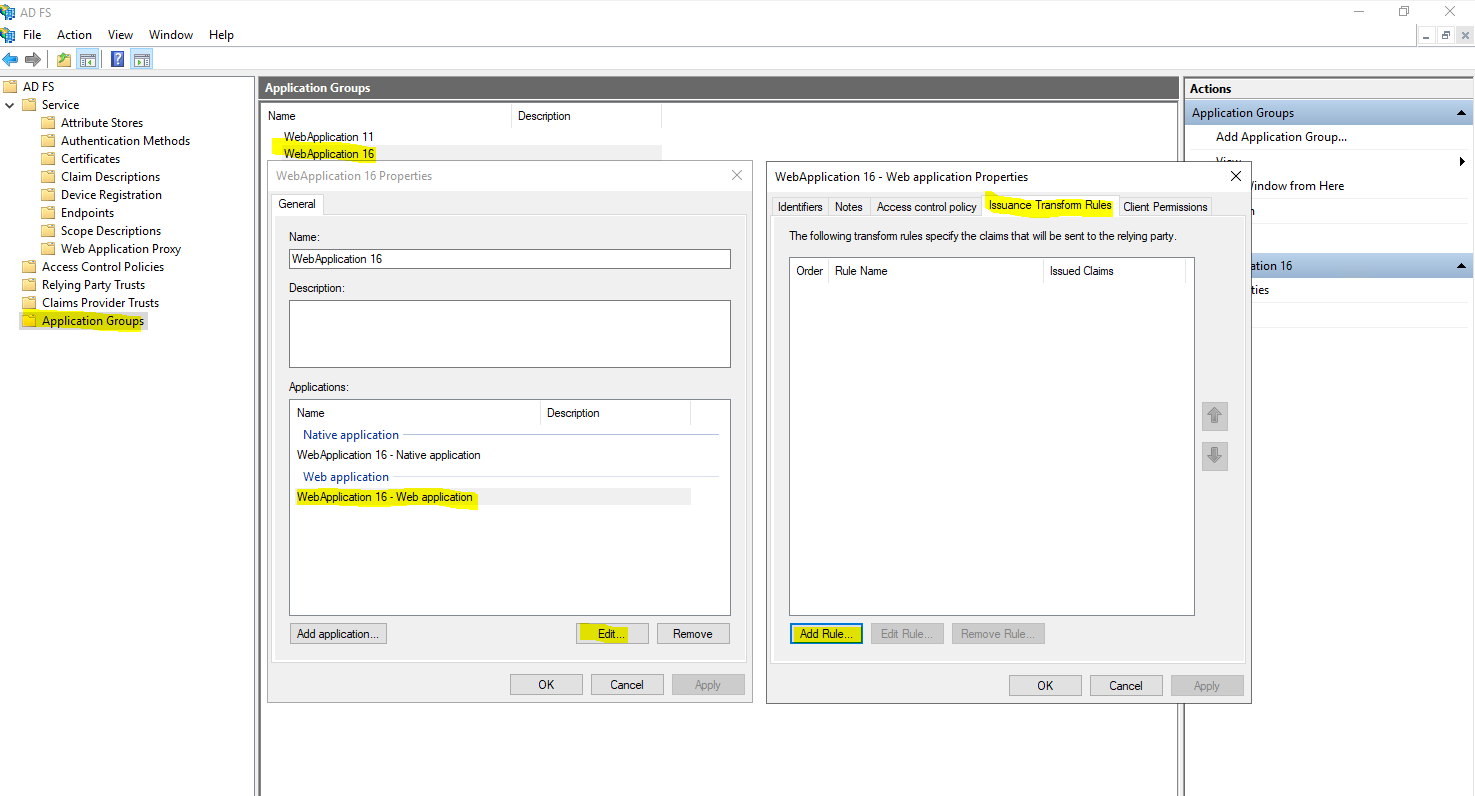
Select Send LDAP Attributes as Claims

Select as Attribute store Active Directory and under Mapping select the LDAP Attribute E-Mail Addresses and as outgoing claim type E-Mail Address.
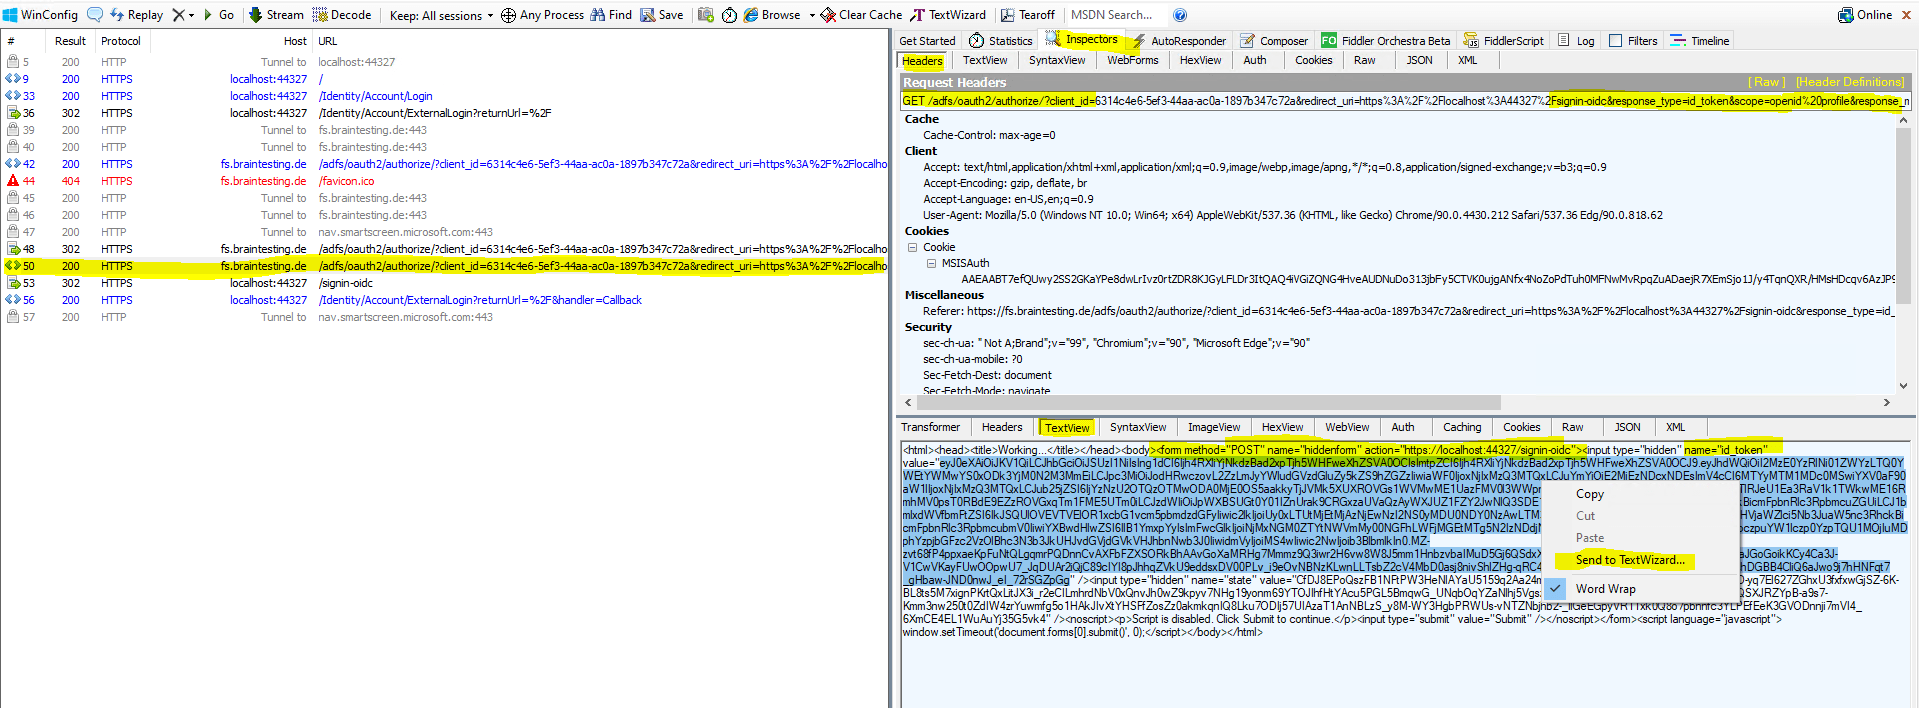
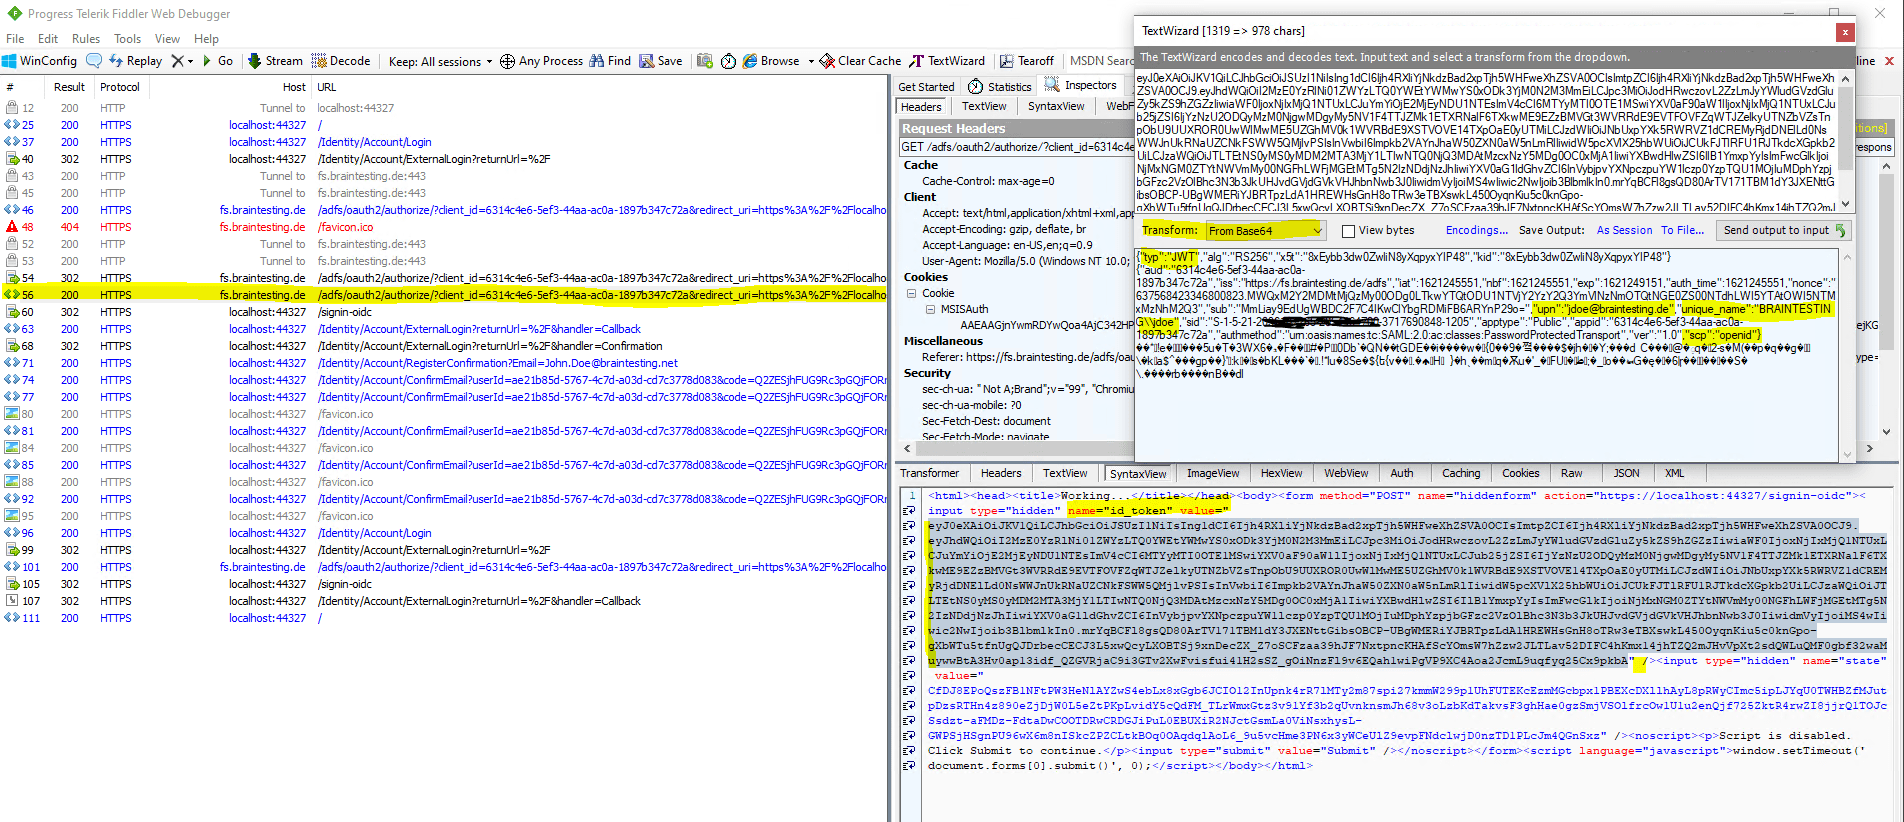
After that the Email field on the Register page will be prepopulated through the JSON Web Token (JWT), issued from the federation server and sending form the client to the web application as HTTP POST as show below.
Here I tested prepopulation for the email field with the user Lucifer Morningstar, as the user John Doe already registered his emai address manually previously.
You can see that the JSON Web Token (JWT) includes the email address.

Click on Register
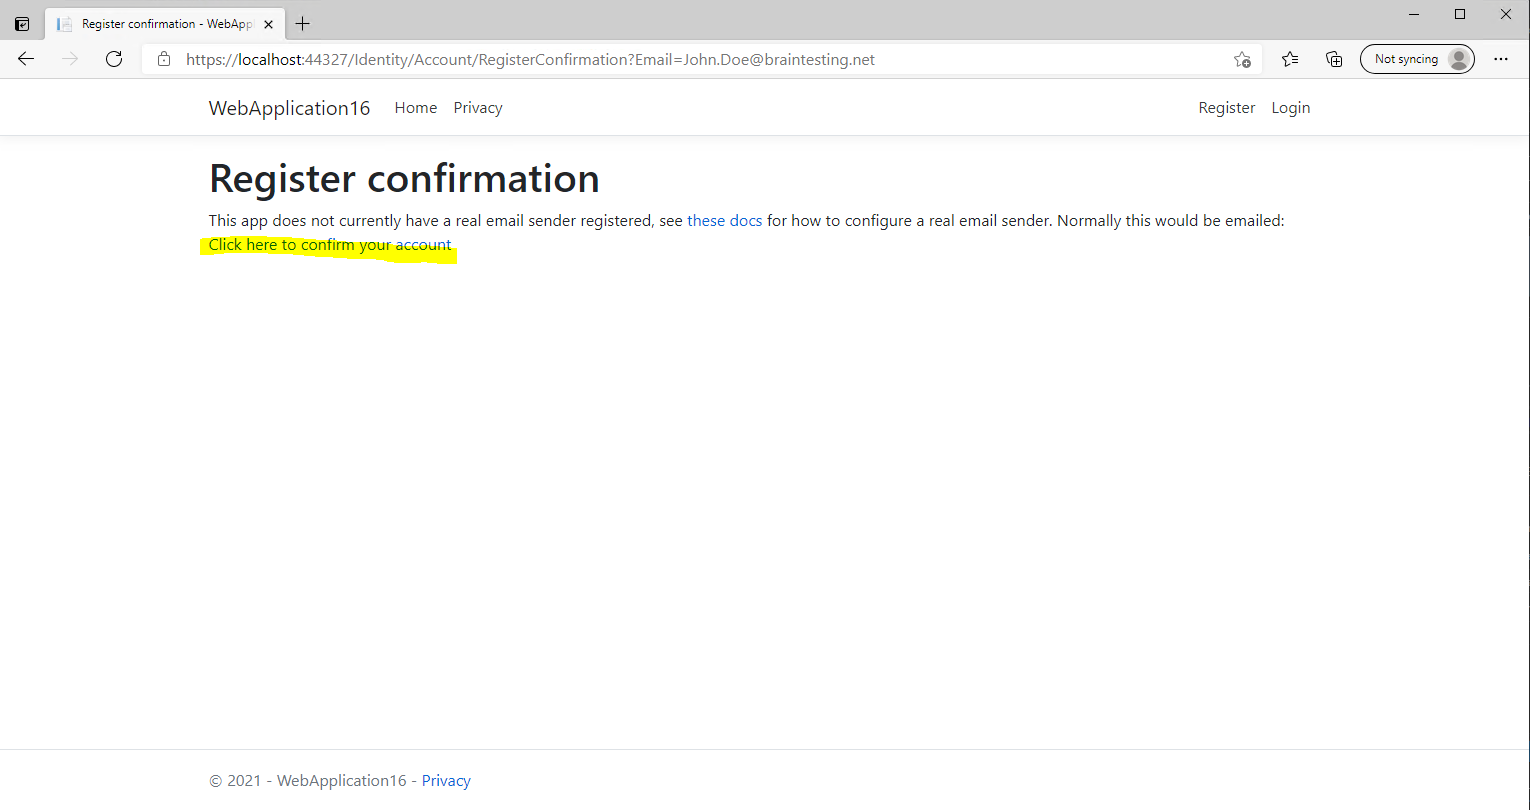
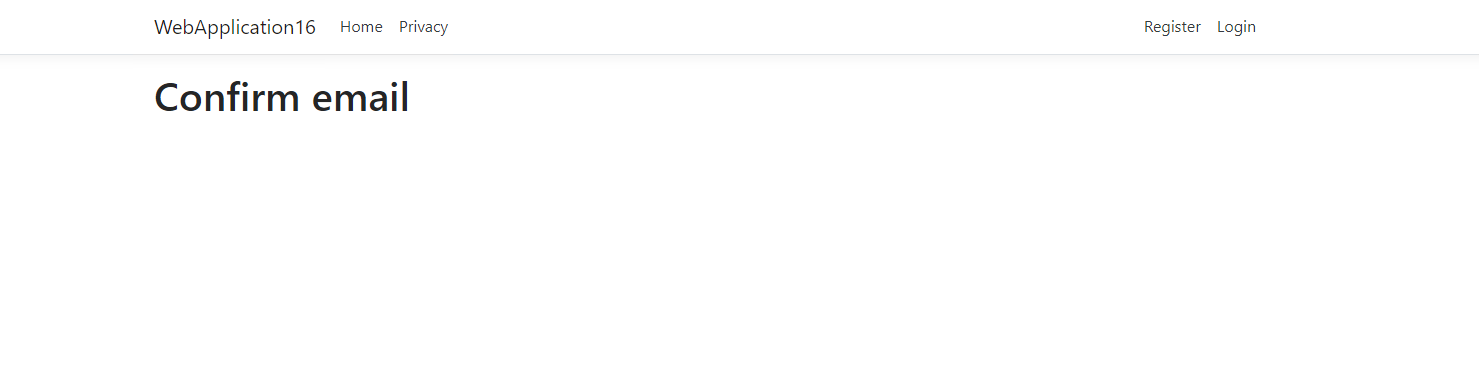
Click the link below to confirm the account.
From now on the account is successfully registered to the web application. If you click on Login your email address appears as username on the top right.
As show up in the message above, this app is not configured for real email confirmation and simulates this process.

The trace from fiddler for this whole process, shows us here, that the AD FS server is issuing a JSON Web Token (JWT) to the client after the authentication.
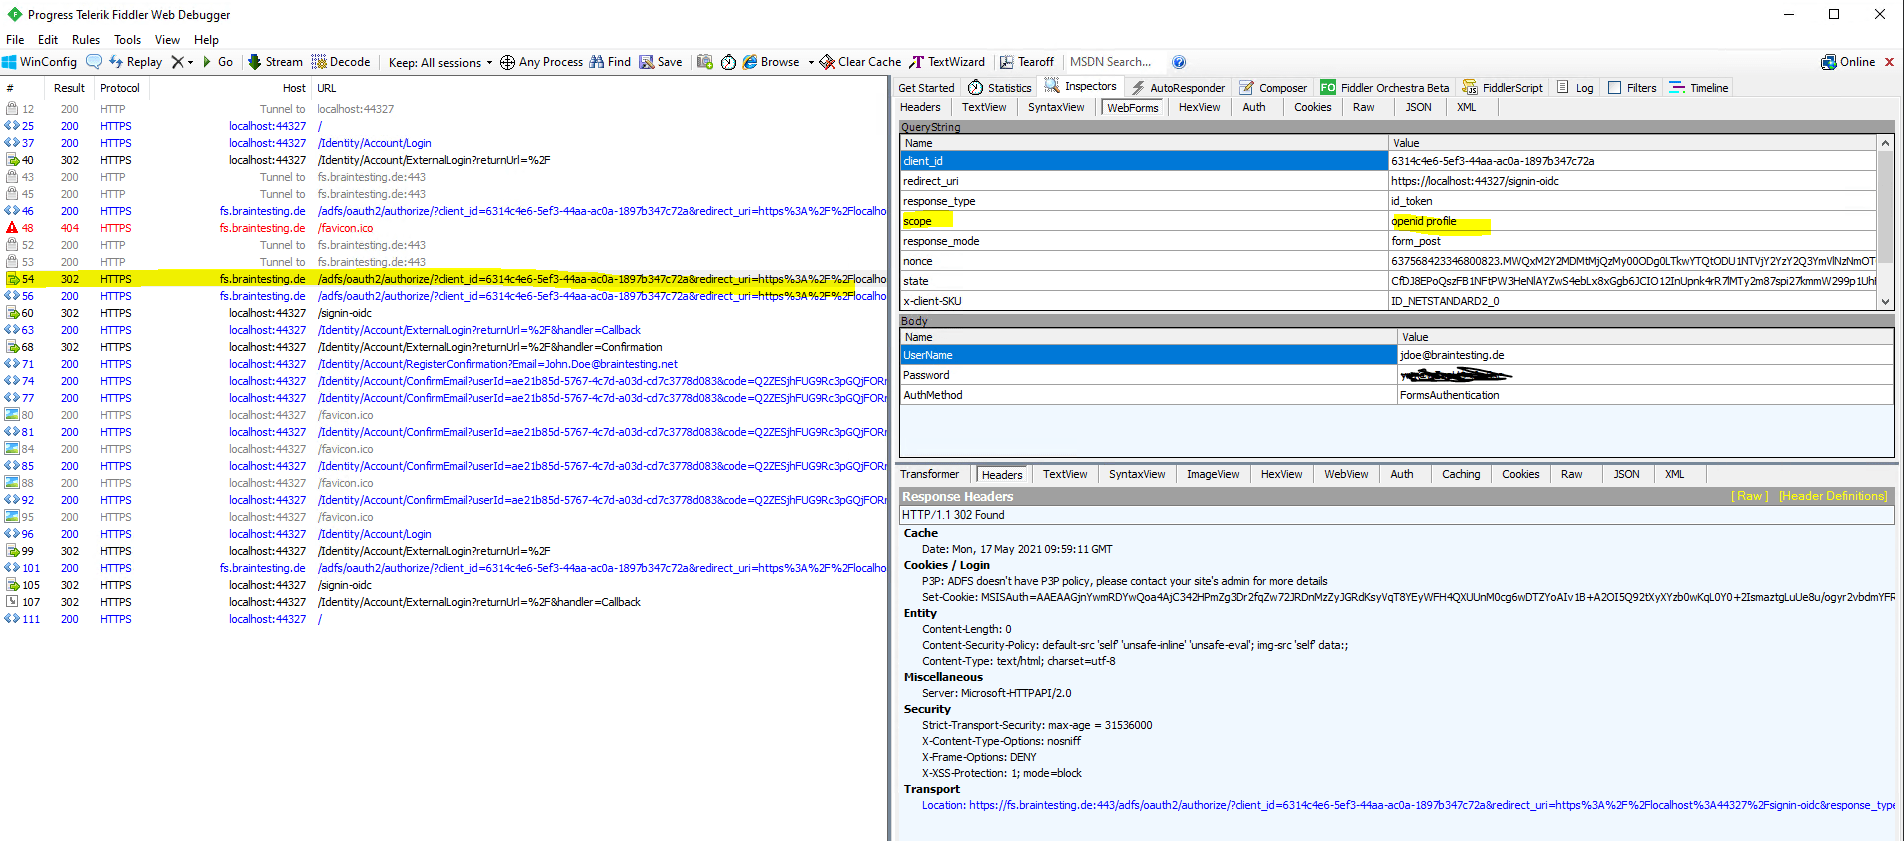
You can see the user principal name and more Active Directory attributes (outgoing claims) and also the OpenID Connect Scope with openid. Further you can see that the web application also includes the configured ClientID from the Startup.cs class as parameter in the URL.
You can see below that the email claim type is missing, therefore previously for the user John Doe, the email field under registration was not prepopulated.
By default, this claim type is not included in the JWT for OIDC.
You can define in AD FS for OpenConnect ID several permission sets which are called scopes. A web application will specify the permissions it needed or want in the scope query.
Which scopes the web application finally can query and is allowed to, you define on your federation server as below.
Below you can see that in the redirect URL the web application included the scope query parameter with openid and profile. Btw. profile is not allowed to query for this application as you can see below, only openid.
Each permission is indicated by appending the permission value to the resource’s identifier or application ID URI.
More under: https://docs.microsoft.com/en-us/windows-server/identity/ad-fs/development/ad-fs-openid-connect-oauth-concepts#scopes
These scopes can be configured for the web application in AD FS as follows
Here as mentioned you can see the redirect URL the web application included the scope parameter with openid and profile.

More about the protocols AD FS is using, including the OpenID Connect protocol, you will find in my following post.
Links
Account confirmation and password recovery in ASP.NET Core
https://docs.microsoft.com/en-us/aspnet/core/security/authentication/accconfirm
AD FS OpenID Connect/OAuth Concepts
https://docs.microsoft.com/en-us/windows-server/identity/ad-fs/development/ad-fs-openid-connect-oauth-concepts
The best home for modern WordPress sites built on the Google Cloud Platform