Set up Active Directory Federation Services (AD FS 5.0) – Create an ASP.NET Web Application (.NET Framework – MVC) by using OAuth 2.0 & OpenID Connect – Part 6
In this post I want to show you, how you can create a claim aware ASP.NET web application (.NET Framework) with C# in Visual Studio, in order to authenticate users with OpenID Connect through an AD FS server.
This post is split into multiple parts
Part 1 … will cover the installation from the internal ADFS ServerPart 2 … will cover the installation from the ADFS Reverse Proxy Server in the perimeter network
Part 3 … will cover all about certificates for an ADFS environmentPart 4 … we will create an ASP.NET Web Application (.NET Framework -Web Forms) and configure it to be claim aware using WS-FED.
Part 5 … we will create an ASP.NET Core Web Application (MVCs) and configure it to be claim aware using WS-FED.
Part 6 … we will create an ASP.NET Web Application (.NET Framework – MVC) and configure it to be claim aware by using OAuth 2.0 and OpenID Connect.
Part 7 … we will create an ASP.NET Core Web Application (MVC) and configure it to be claim aware by using OAuth 2.0 and OpenID Connect.
Part 8 … will explain and list all identity protocols, AD FS supports.
For this post I used the information from the following tutorial from Microsoft, which documents how to configure an ASP.NET web application to authenticate against the Microsoft identity platform with OpenID Connect.
Tutorial: Add sign-in to Microsoft to an ASP.NET web app
https://docs.microsoft.com/en-us/azure/active-directory/develop/tutorial-v2-asp-webapp
I modified this in order to authenticate against an on-premises AD FS server using OpenID Connect.
First I will create the web application in Visual Studio and after that I will show you how to configure OpenID Connect in AD FS server.
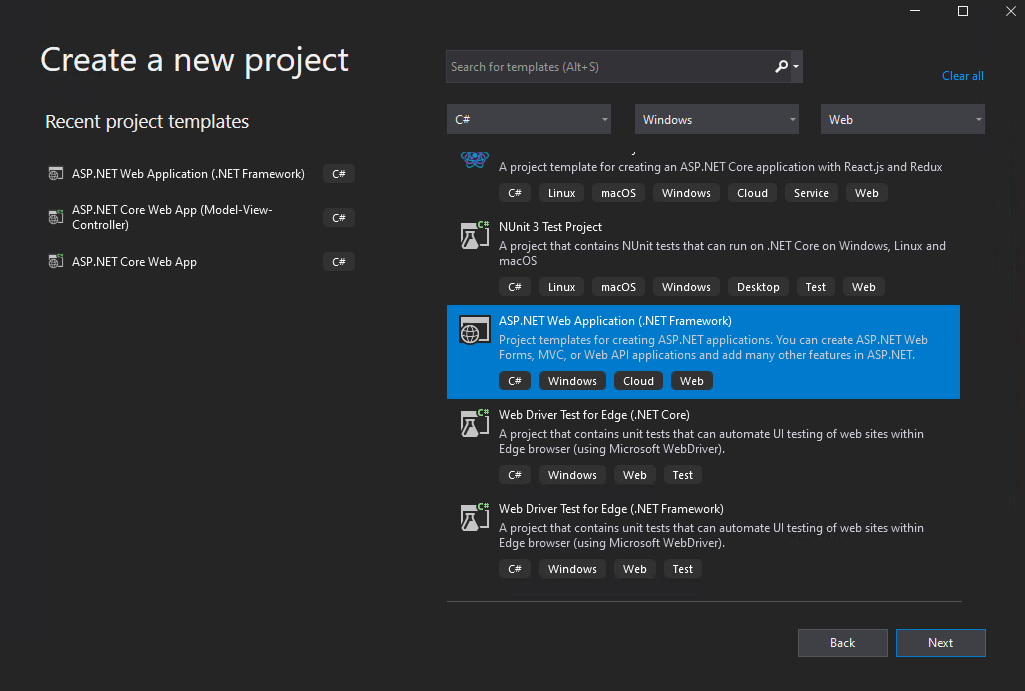
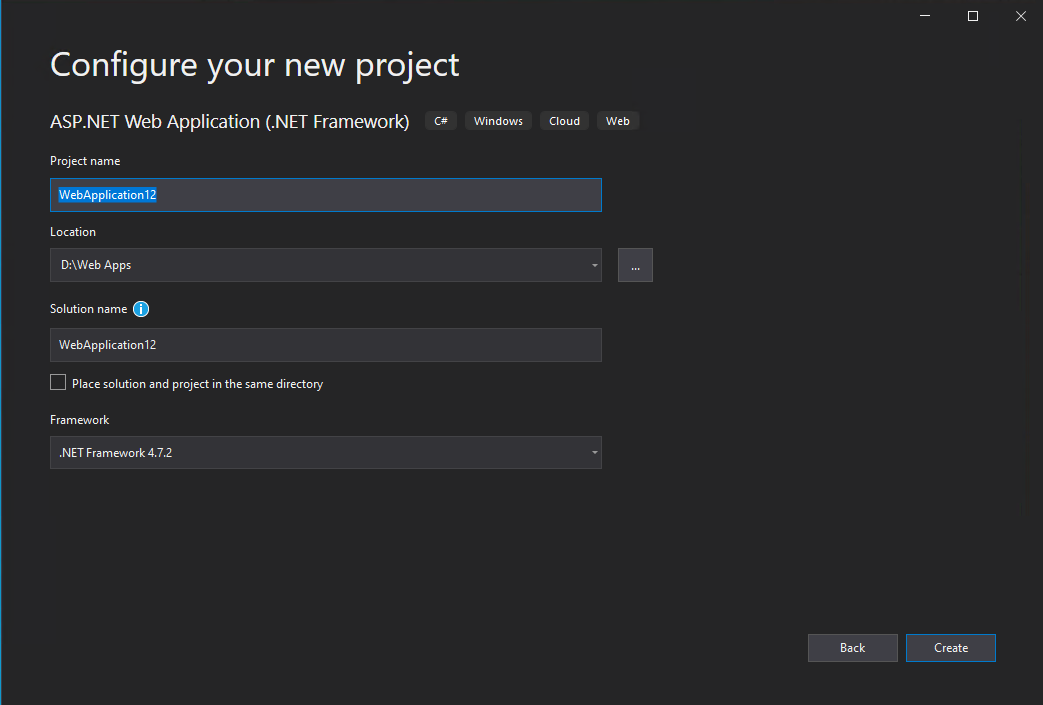
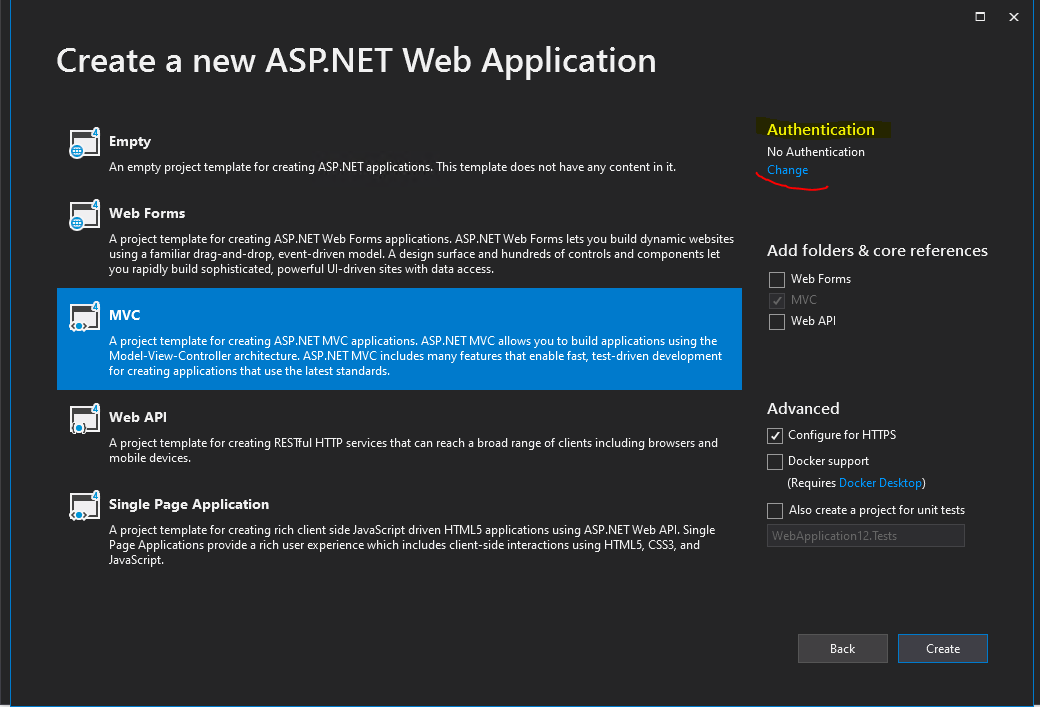
Here I will use the Web Application (Model-View-Controller) template.
ASP.NET MVC
https://en.wikipedia.org/wiki/ASP.NET_MVC
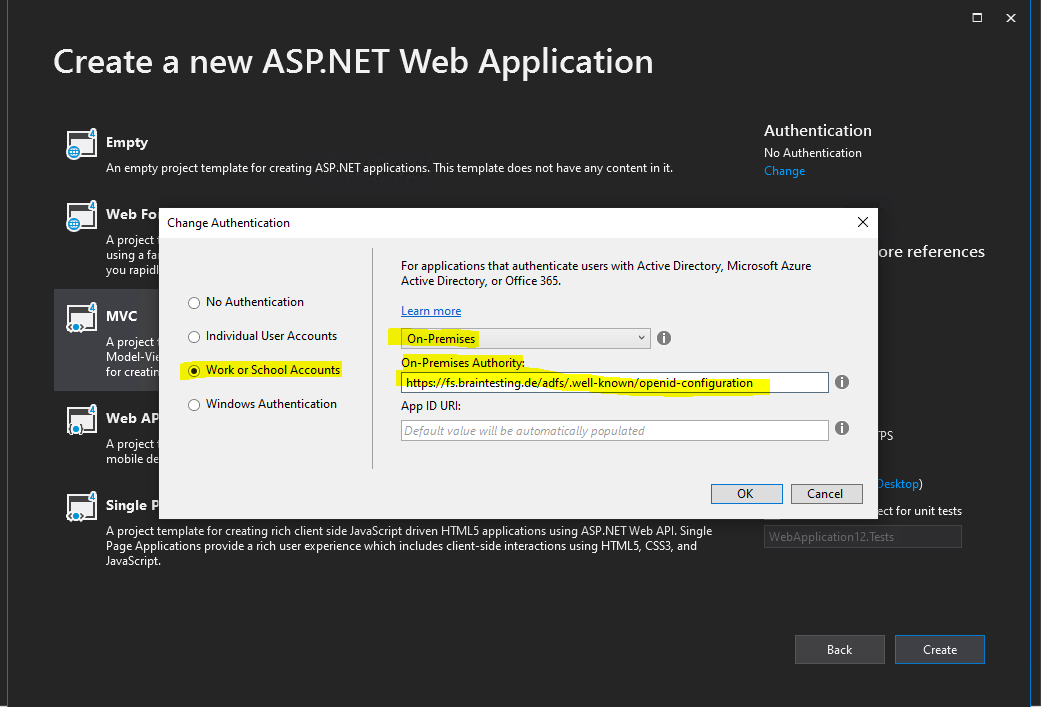
Click on Change under Authentication
In the following drop-down select On-Premises.
Under On-Premises Authority we need to enter the OpenID Connect Discovery URL from the AD FS server.
The App ID URI you can leave blank, the tool will fill it up for you with the URL assigned to your project by IIS express.
https://<FQDN federation server>/adfs/.well-known/openid-configuration
The OpenID Connect Discovery URL you can determin in the AD FS console under Endpoints.

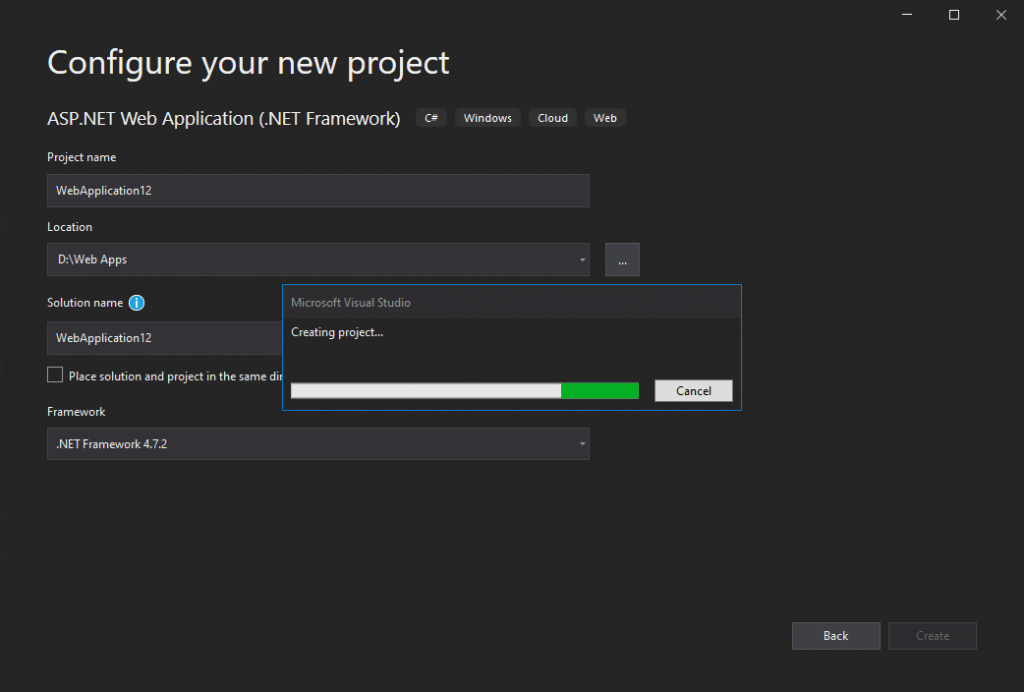
Now we can click on Create.
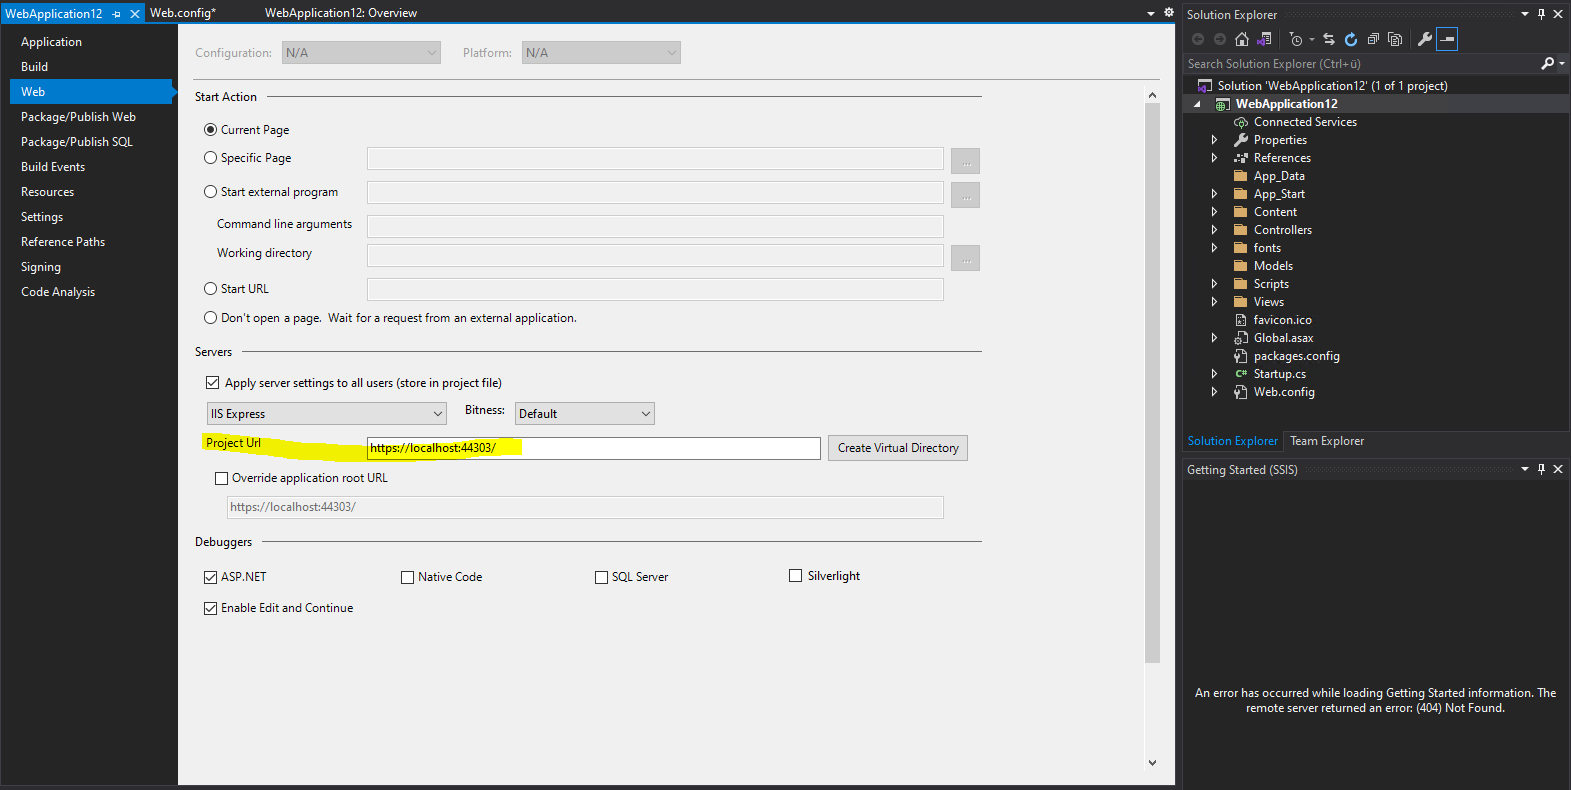
At this point I will check the URL from the web application in order to create an Application Group on the AD FS server, which we will need to create to use OpenID Connect. This is different from the WS-Trust, WS-Federation and SAML 2.0 WEB SSO protocol, where we have to create a relying party trust and have to configure which claims have to be issued.
The URL from your web application you can check in the properties of your project, so right click on your project and navigate to the Web tab as follows.
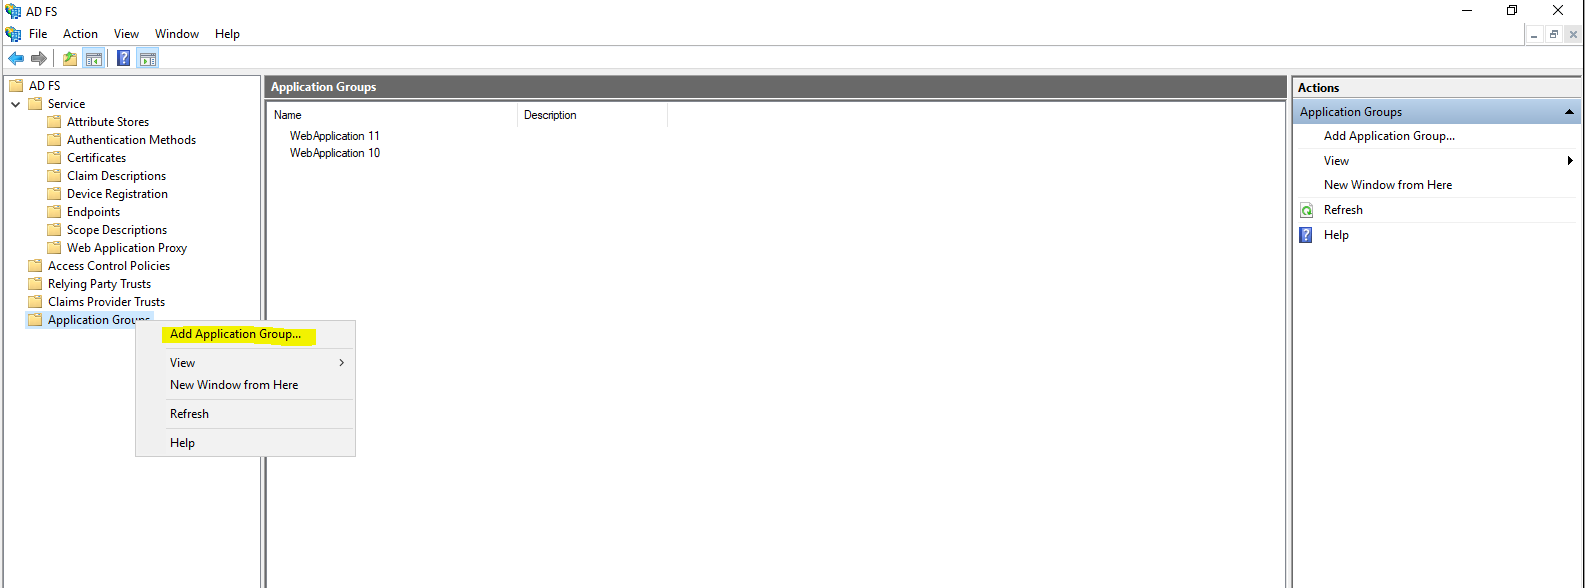
Now as we know the project URL we can create the Application Group in AD FS as follows.
Rigth click on Application Group in AD FS to add a new group.
Here we need to enter a name for the new web application and select a template. We will use the Web browser accessing a web application template.

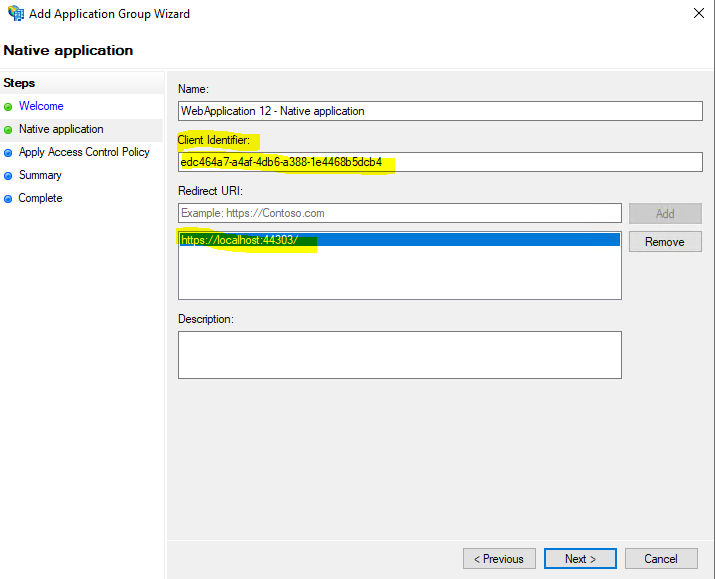
On the next page we have to enter our previously determined project URL in Visual Studio as the redirect URI.
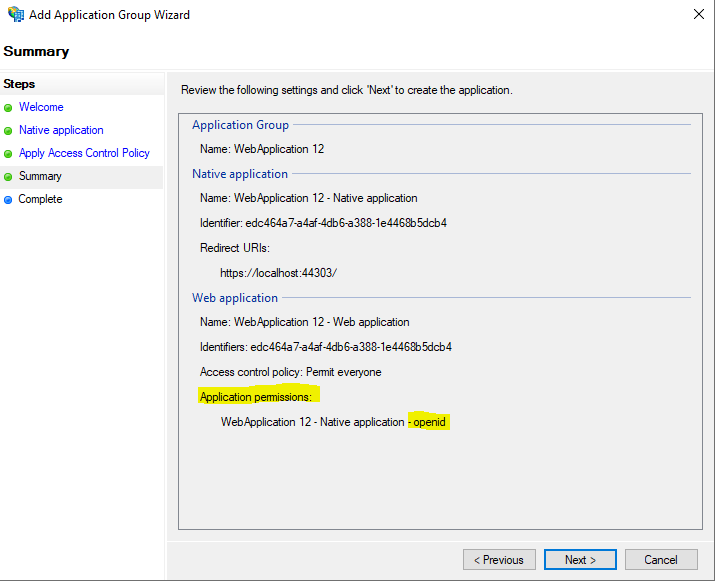
You will also see that AD FS here created an Client Identifier which we need to copy and paste into our web application later. So copy this identifier.
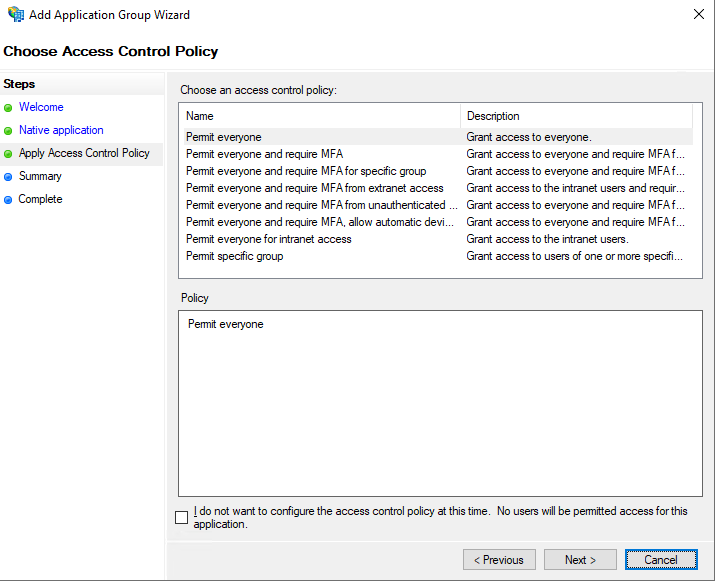
Here I will leave the default permit everyone policy.
On the summary page you will also see that AD FS creates an OpenID web application under application permissions.
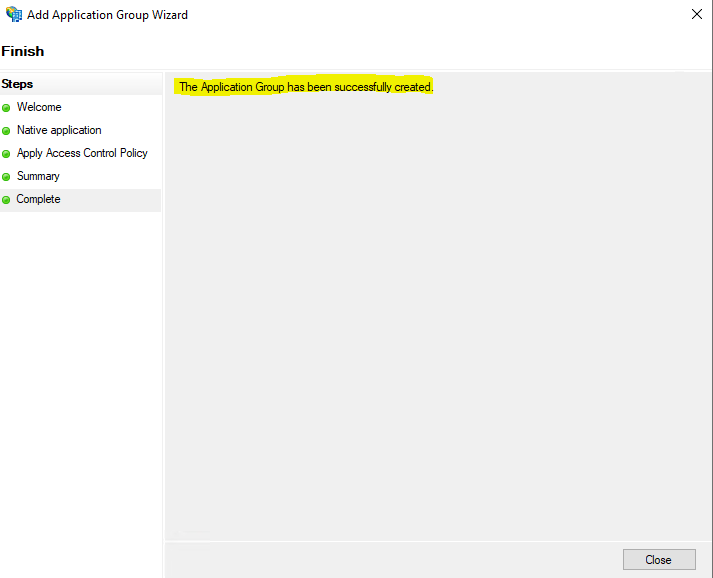
This was all in AD FS and we have not to configure an claim issuance policy as for relying trust party web applications as mentioned.
Now we have finally to finish the configuration for our web application in Visual Studio.
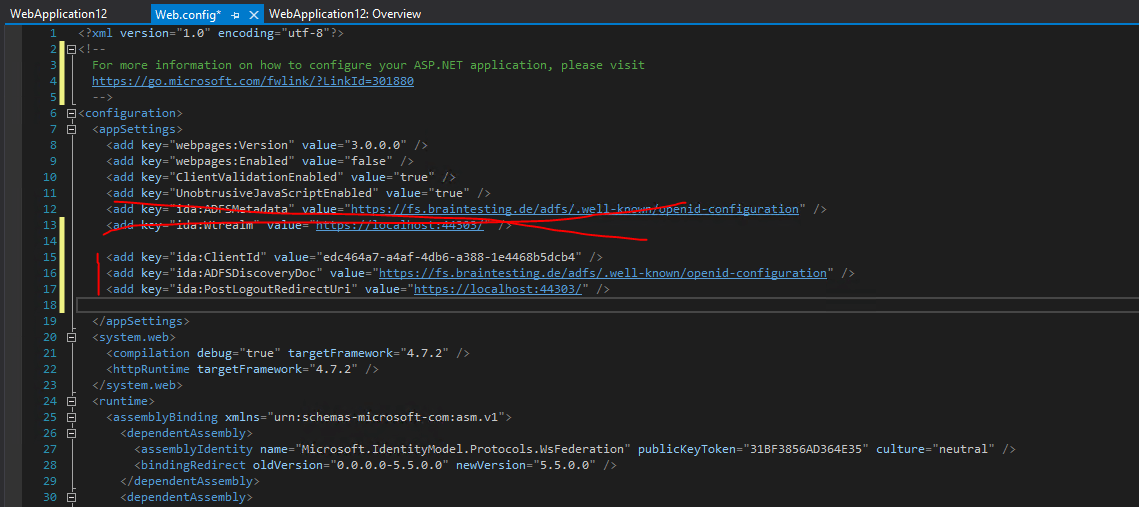
First we have to add the following lines to the web.config file in the root folder.
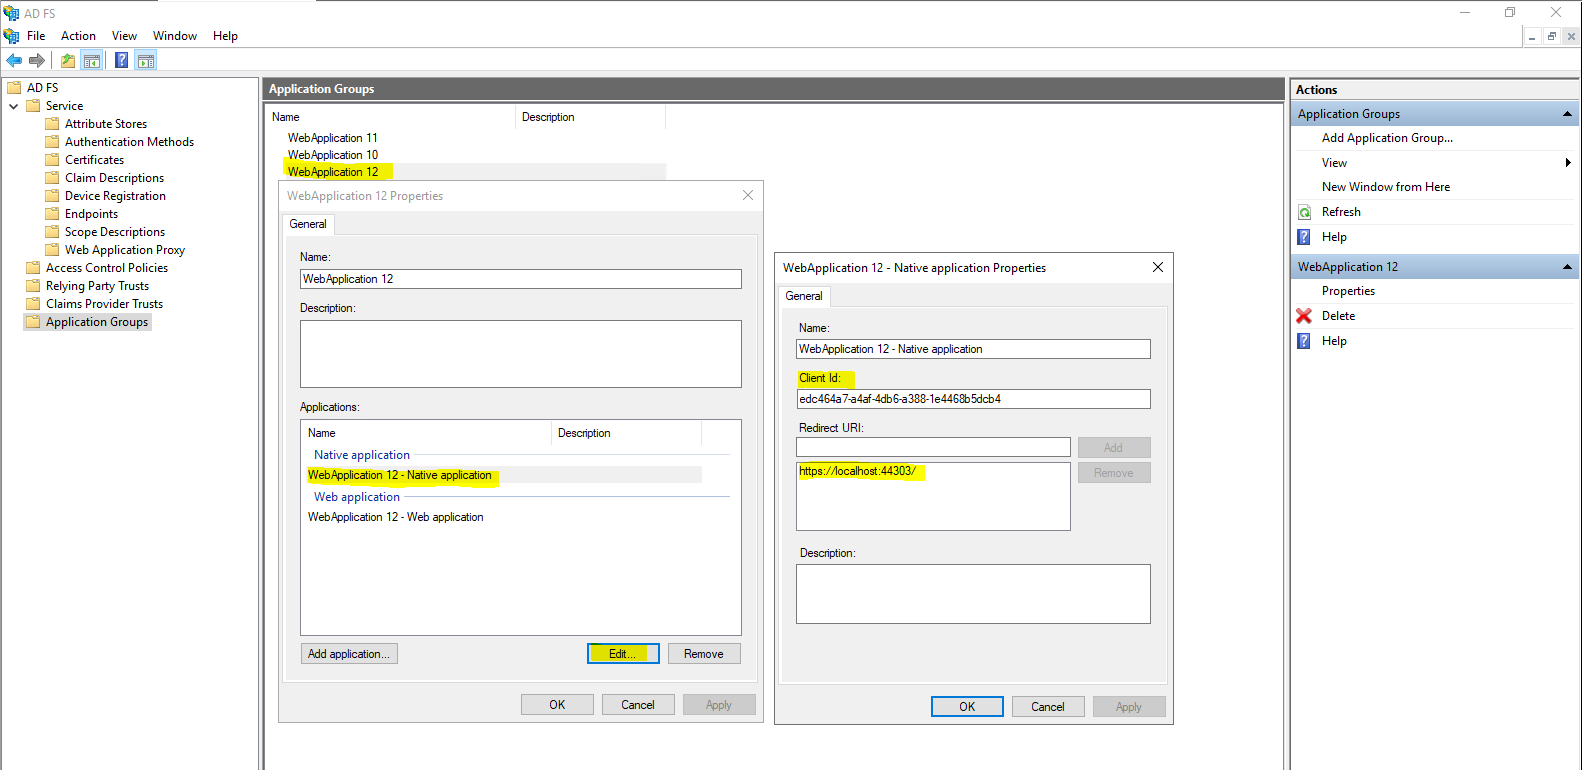
The ClientID we previously copied in AD FS during creating the Application Group. If not you can simply click on the group in AD FS as below.
Further we need the OpenID Discovery URL and our project URI.
<add key="ida:ClientId" value="edc464a7-a4af-4db6-a388-1e4468b5dcb4" />
<add key="ida:ADFSDiscoveryDoc" value="https://fs.braintesting.de/adfs/.well-known/openid-configuration" />
<add key="ida:PostLogoutRedirectUri" value="https://localhost:44303/" />
Add these three lines to you web.config as follows and delete the two existing lines as marked in the <appSettings> section.
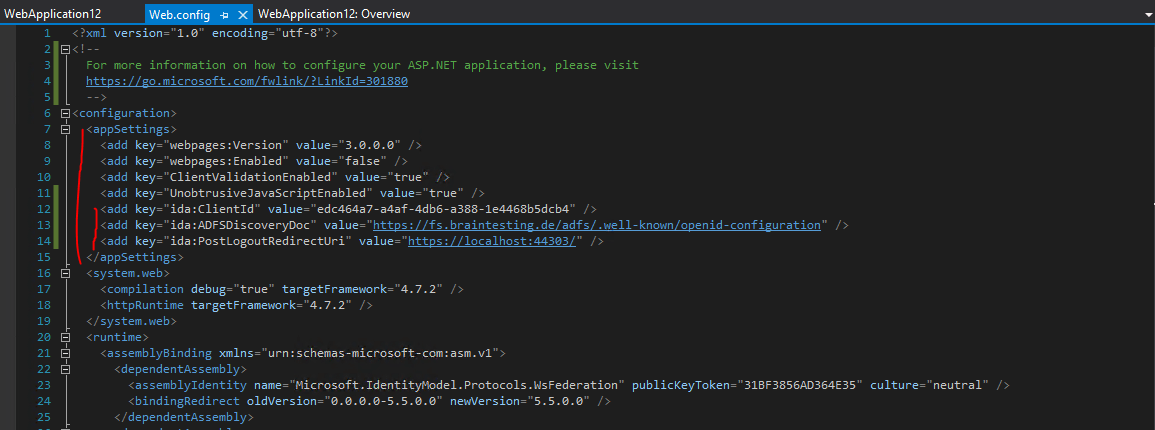
Finally my web.config <appSettings> section looks like this
Save your web.config and switch to the Startup.cs class.
First we need to add the following Owin NuGet packages.
Open Web Interface for .NET (OWIN) middleware
http://owin.org/
https://en.wikipedia.org/wiki/Open_Web_Interface_for_.NET
- In Visual Studio: Go to Tools > NuGet Package Manager > Package Manager Console.
- Add OWIN middleware NuGet packages by typing the following in the Package Manager Console window:
Install-Package Microsoft.Owin.Security.OpenIdConnect
Install-Package Microsoft.Owin.Security.Cookies
Install-Package Microsoft.Owin.Host.SystemWeb
These libraries enable single sign-on (SSO) by using OpenID Connect through cookie-based authentication. After authentication is completed and the token representing the user is sent to your application, OWIN middleware creates a session cookie. The browser then uses this cookie on subsequent requests so that the user doesn’t have to retype the password, and no additional verification is needed.
Source: https://docs.microsoft.com/en-us/azure/active-directory/develop/tutorial-v2-asp-webapp#about-these-libraries
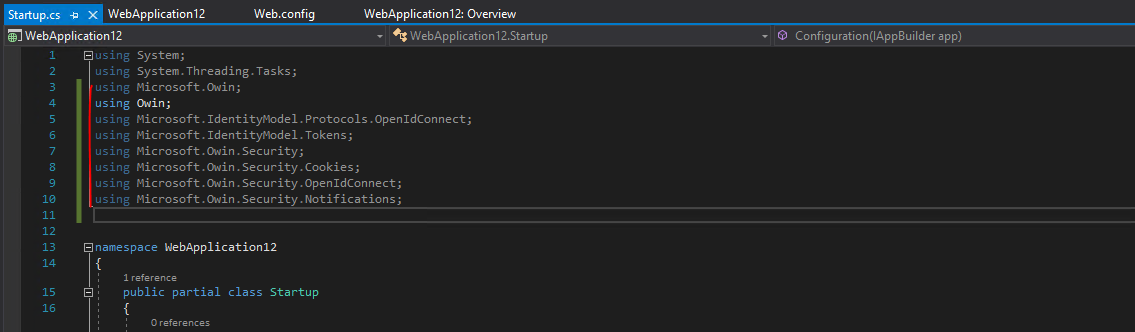
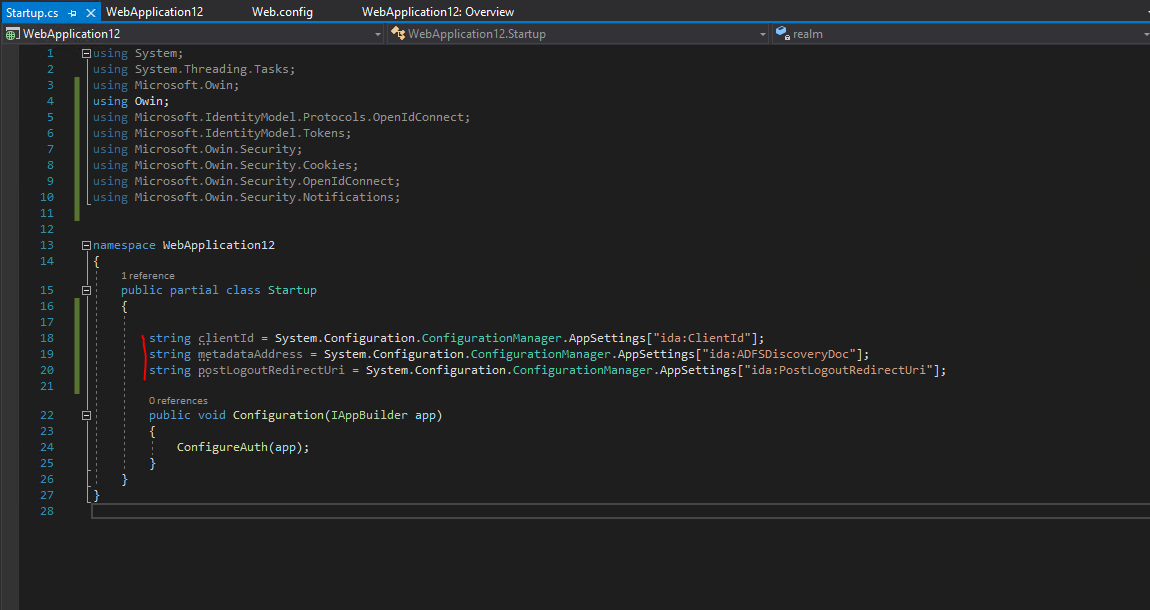
Further we need to add some OWIN and Microsoft.IdentityModel references to the Startup.cs class.
using Microsoft.Owin;
using Owin;
using Microsoft.IdentityModel.Protocols.OpenIdConnect;
using Microsoft.IdentityModel.Tokens;
using Microsoft.Owin.Security;
using Microsoft.Owin.Security.Cookies;
using Microsoft.Owin.Security.OpenIdConnect;
using Microsoft.Owin.Security.Notifications;
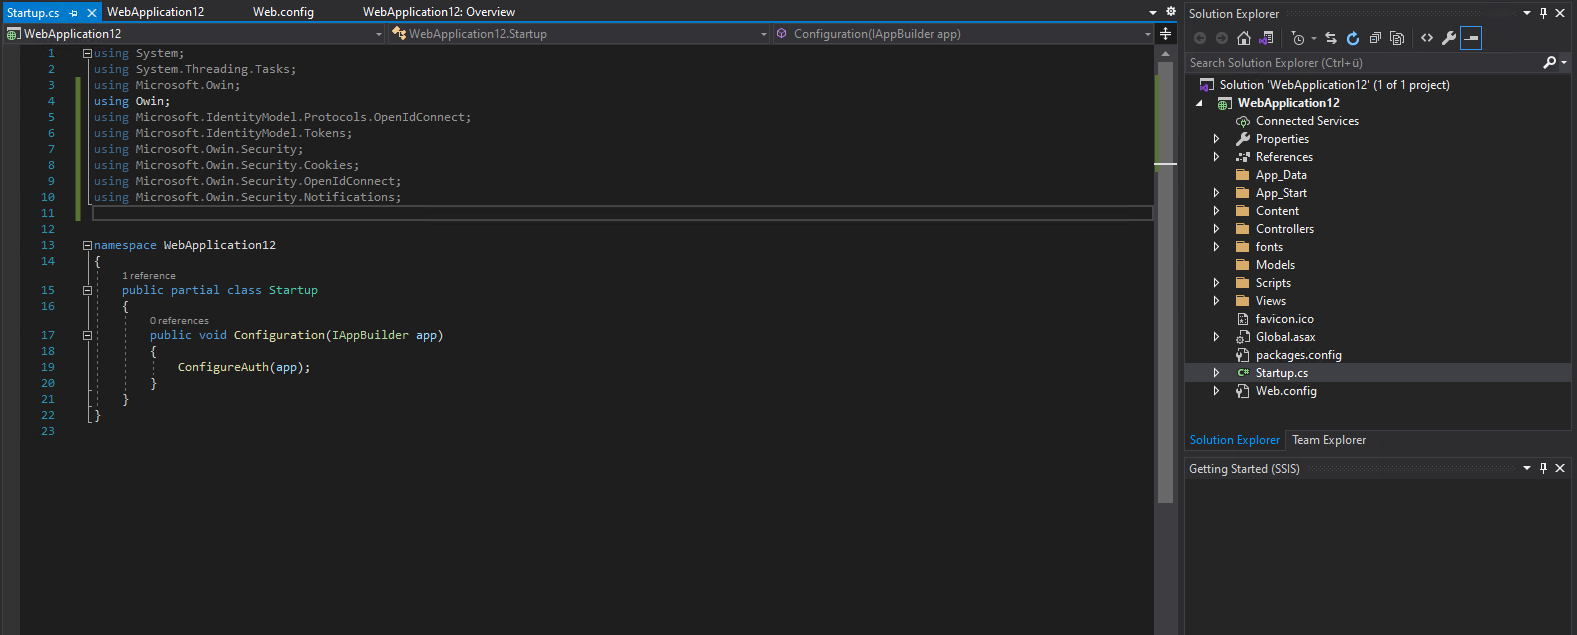
After that we need to add some code into the Startup.cs class, at the moment it looks like this.
I will first add the following three lines in order to initialize the three parameters from our web.config file with the CientID, OpenID Connect Discovery URL and our local project URI:
string clientId = System.Configuration.ConfigurationManager.AppSettings["ida:ClientId"];
string metadataAddress = System.Configuration.ConfigurationManager.AppSettings["ida:ADFSDiscoveryDoc"];
string postLogoutRedirectUri = System.Configuration.ConfigurationManager.AppSettings["ida:PostLogoutRedirectUri"];
Next I will first delete the existing ConfigureAuth(app) method in the Configuration(IAppBuilder app) method.
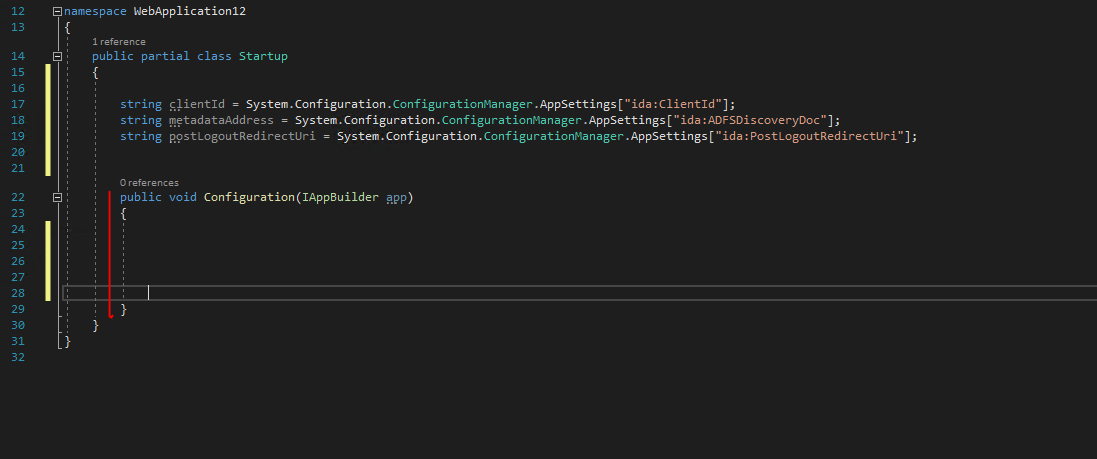
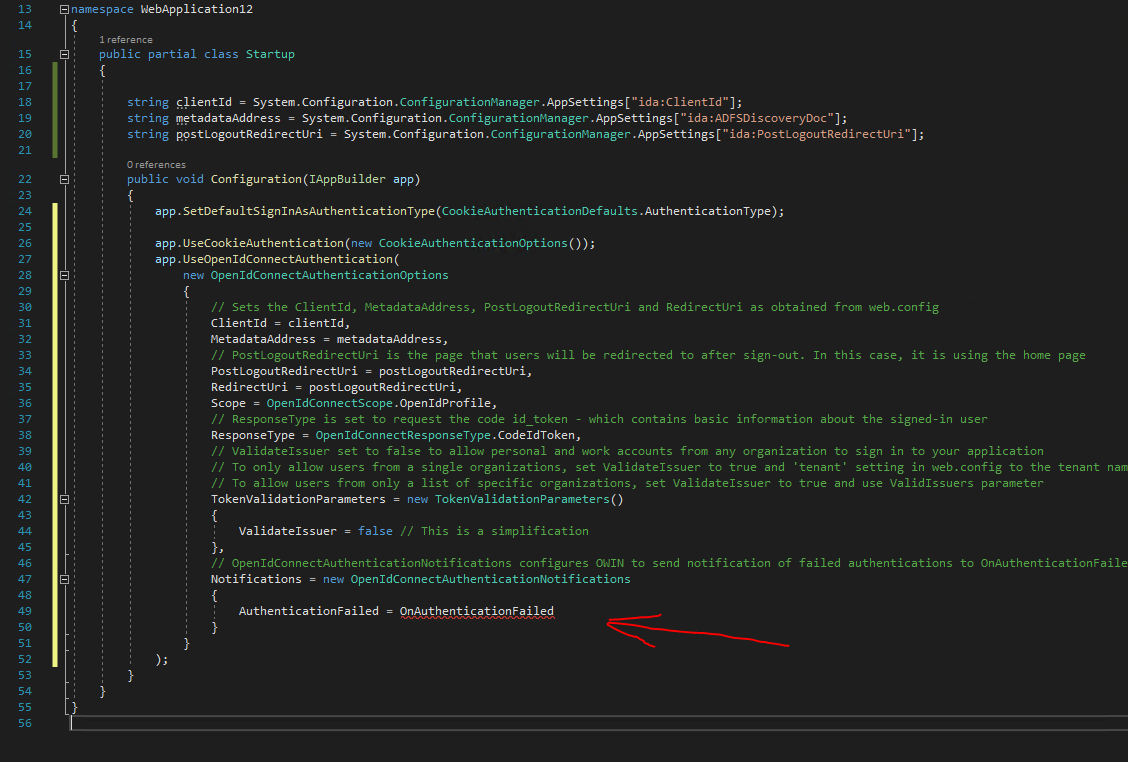
Now we have to add the following code into the public void Configuration(IAppBuilder app){} method.
 app.SetDefaultSignInAsAuthenticationType(CookieAuthenticationDefaults.AuthenticationType);

            app.UseCookieAuthentication(new CookieAuthenticationOptions());
            app.UseOpenIdConnectAuthentication(
                new OpenIdConnectAuthenticationOptions
                {
                    // Sets the ClientId, MetadataAddress, PostLogoutRedirectUri and RedirectUri as obtained from web.config
                    ClientId = clientId,
                    MetadataAddress = metadataAddress,
                    // PostLogoutRedirectUri is the page that users will be redirected to after sign-out. In this case, it is using the home page
                    PostLogoutRedirectUri = postLogoutRedirectUri,
                    RedirectUri = postLogoutRedirectUri,
                    Scope = OpenIdConnectScope.OpenIdProfile,
                    // ResponseType is set to request the code id_token - which contains basic information about the signed-in user
                    ResponseType = OpenIdConnectResponseType.CodeIdToken,
                    // ValidateIssuer set to false to allow personal and work accounts from any organization to sign in to your application
                    // To only allow users from a single organizations, set ValidateIssuer to true and 'tenant' setting in web.config to the tenant name
                    // To allow users from only a list of specific organizations, set ValidateIssuer to true and use ValidIssuers parameter
                    TokenValidationParameters = new TokenValidationParameters()
                    {
                        ValidateIssuer = false // This is a simplification
                    },
                    // OpenIdConnectAuthenticationNotifications configures OWIN to send notification of failed authentications to OnAuthenticationFailed method
                    Notifications = new OpenIdConnectAuthenticationNotifications
                    {
                        AuthenticationFailed = OnAuthenticationFailed
                    }
                }
            );
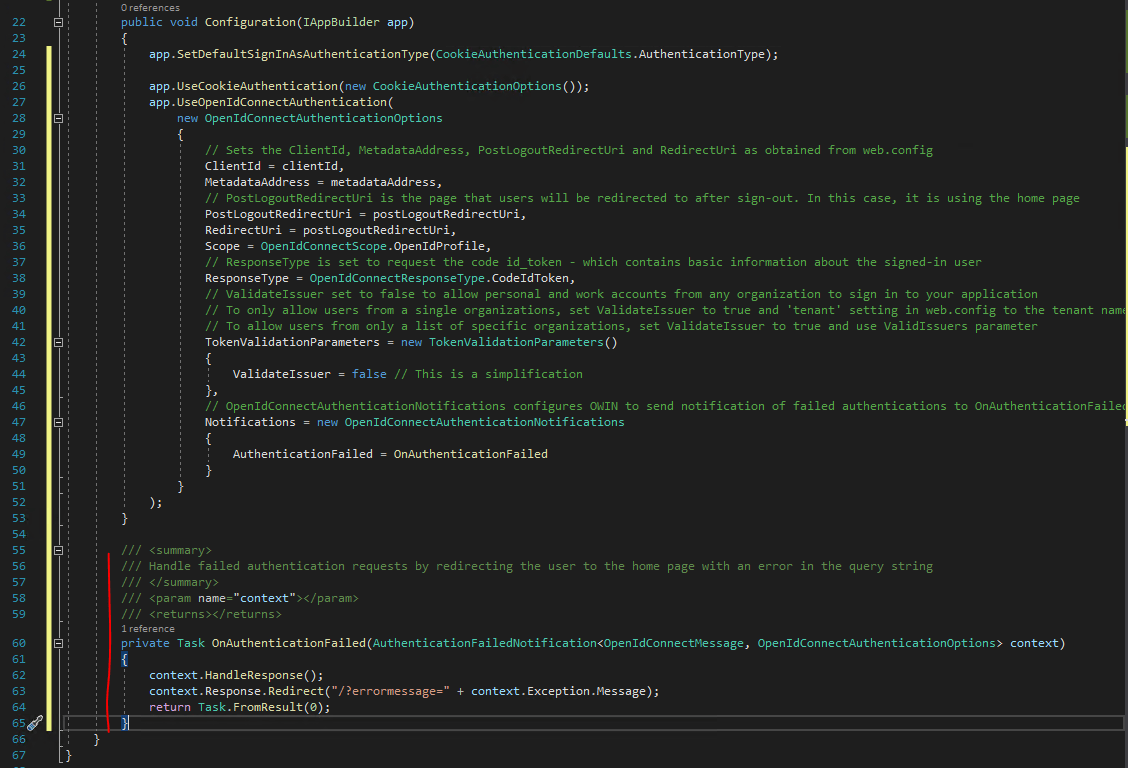
At the moment Visual Studio is complaining about the OnAuthentificationFailed name is not existing in the current context. The reason for is that this is a Task method we first have to define.
So finally we need to add the following Task method inside the Startup class and below the Configuration(IAppBuilder app) method.
 /// <summary>
        /// Handle failed authentication requests by redirecting the user to the home page with an error in the query string
        /// </summary>
        /// <param name="context"></param>
        /// <returns></returns>
        private Task OnAuthenticationFailed(AuthenticationFailedNotification<OpenIdConnectMessage, OpenIdConnectAuthenticationOptions> context)
        {
            context.HandleResponse();
            context.Response.Redirect("/?errormessage=" + context.Exception.Message);
            return Task.FromResult(0);
        }
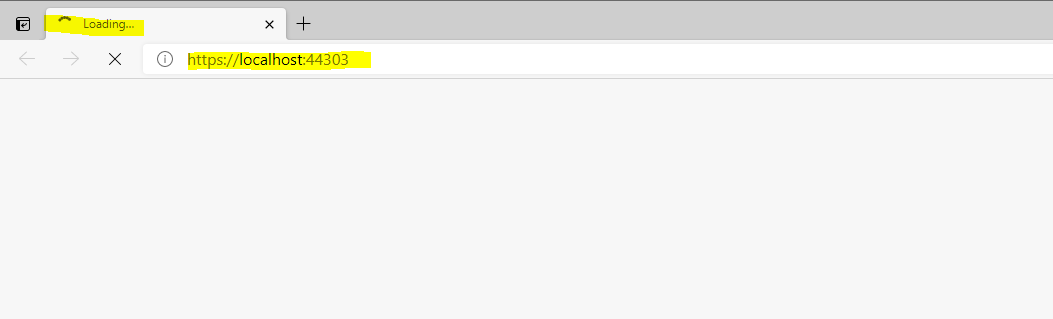
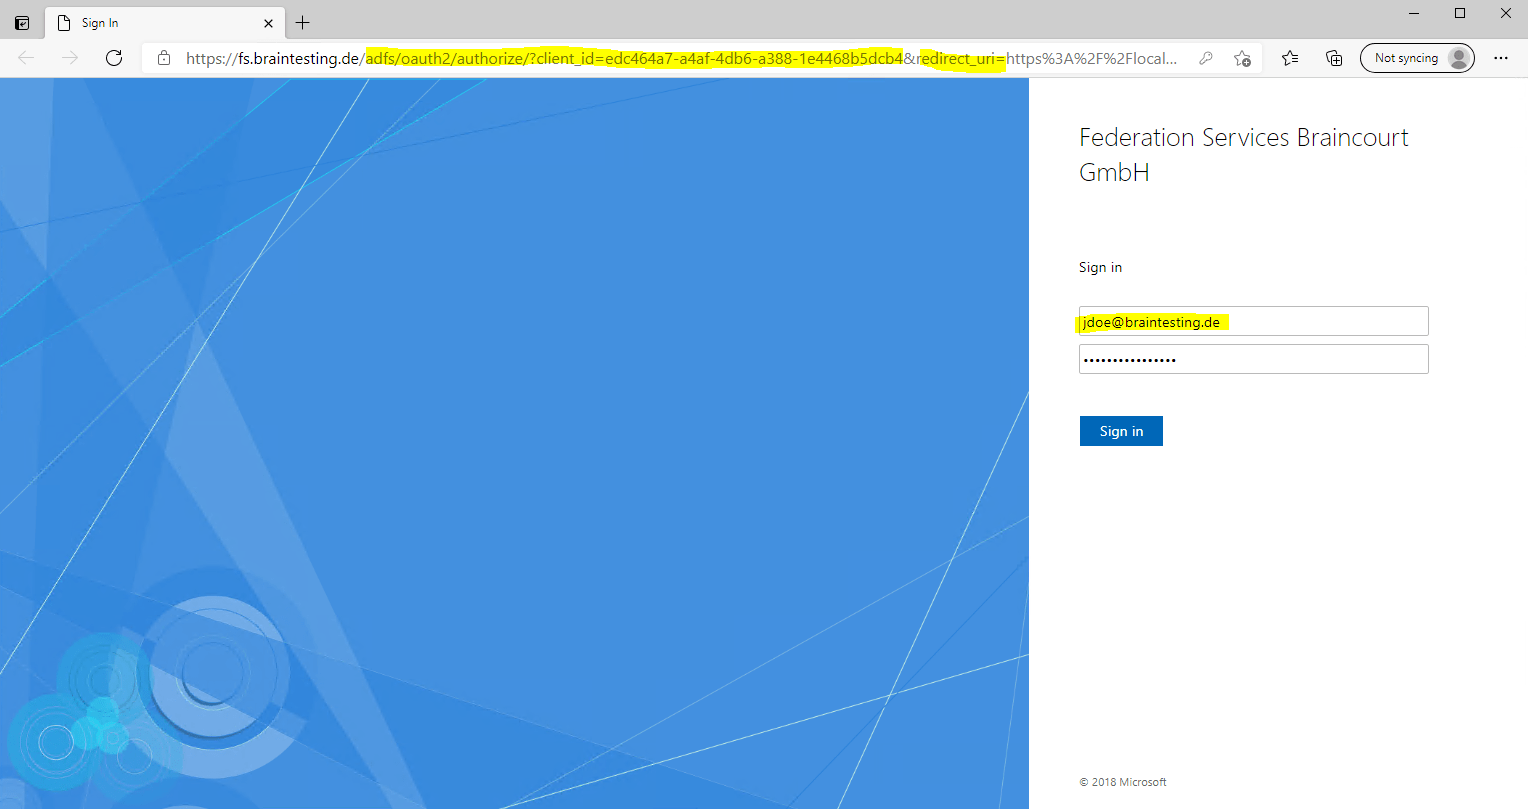
Finally we can test if the authentication against the AD FS server and using OpenID connect will work, so hit the F5 key to start debugging and open the web application.
Our web application will redirect us to the federation server. From the URL and the parameters with OAuth and client_id you can see at first view that we will authenticate by using OAuth 2.0 and OpenID Connect.
More about OAuth 2.0 and OpenID Connect you will find in my following post.
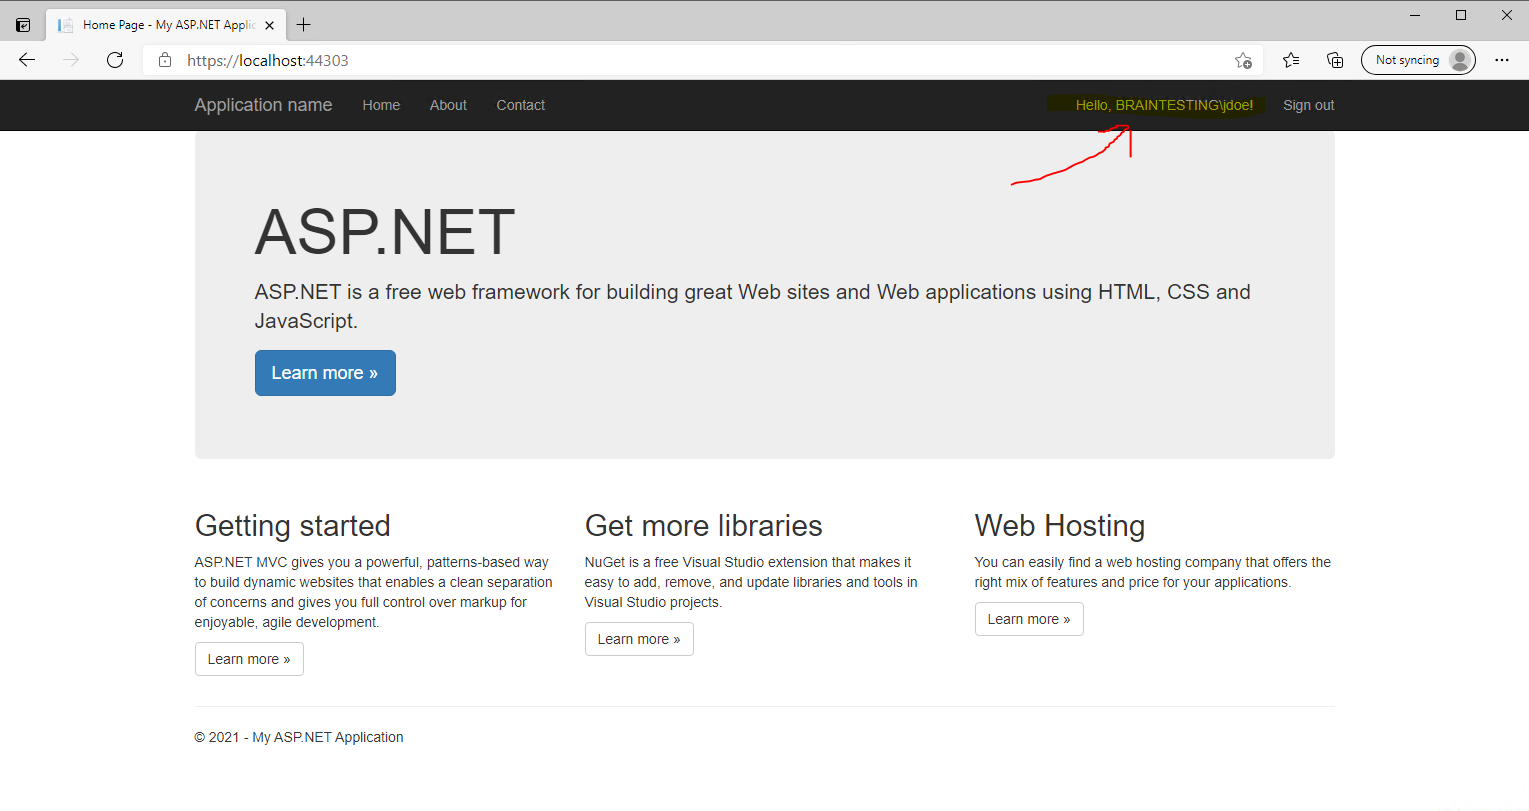
Looks fine!
Links
Tutorial: Add sign-in to Microsoft to an ASP.NET web app
https://docs.microsoft.com/en-us/azure/active-directory/develop/tutorial-v2-asp-webapp
The best home for modern WordPress sites built on the Google Cloud Platform