Set up GFI FaxMaker with XCAPI and AudioCodes Mediant VE SBC with DTAG SIP Trunk
This post will show how to install and configure the GFI FaxMaker with XCAPI utilizing the AudioCodes Mediant VE SBC (Ver. 7.20A.258.119) with an DTAG SIP Trunk. (Deutsche Telekom AG).
Documentation – GFI FaxMaker
https://www.gfi.com/products-and-solutions/email-and-messaging-solutions/gfi-faxmaker/resources/documentations
Installation GFI FaxMaker on Windows Server 2019
The GFI FaxMaker supports the installation on an Hyper-V VM with Windows Server 2019.
Supported operating systems
https://manuals.gfi.com/en/fax20/Content/GSG/System_Requirements.htm

As I will install the GFI FaxMaker on an dedicated VM, I will install the IIS SMTP MTA on this VM.
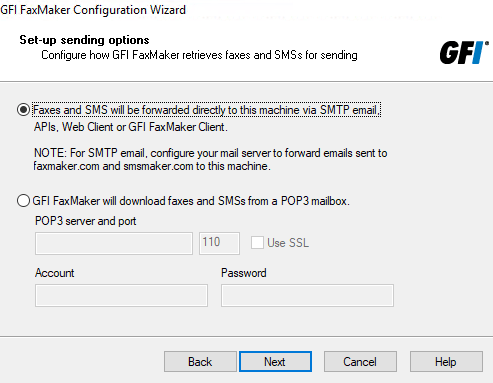
The FaxMaker needs an SMTP MTA to send incoming faxes per mail to the recipient and also to receive outbound faxes the user is sending per mail to the fax server.
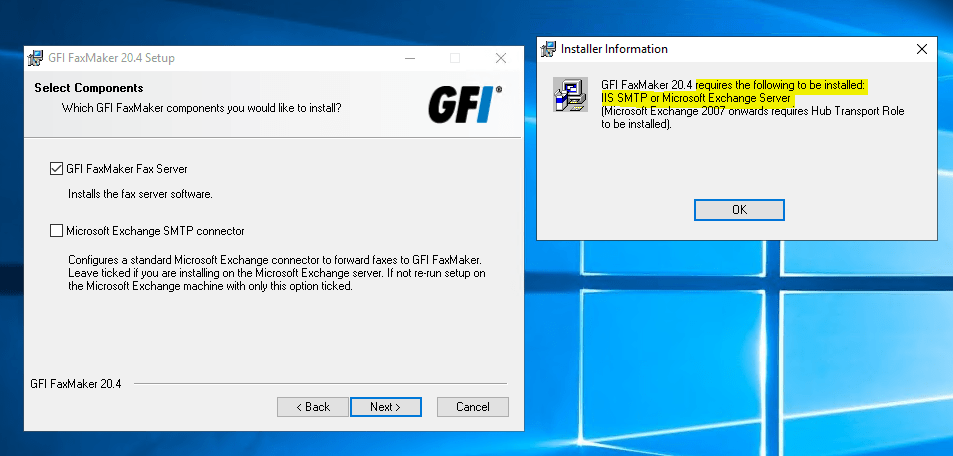
Installing the IIS SMTP MTA on the VM.
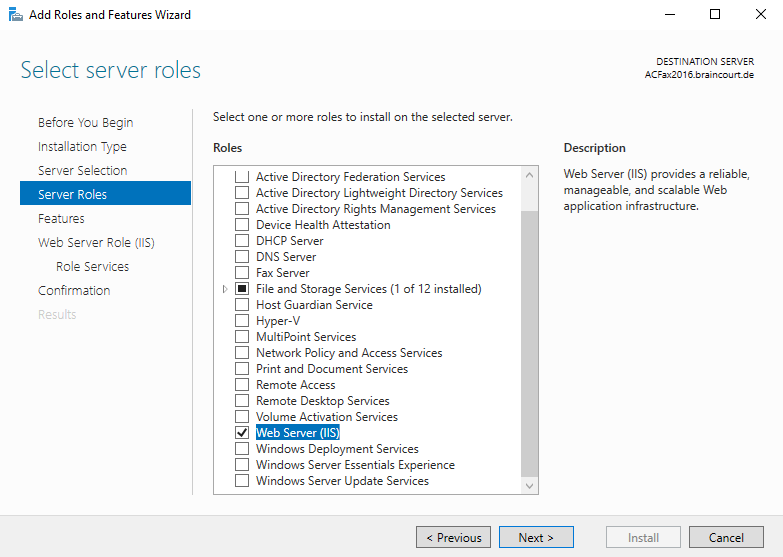
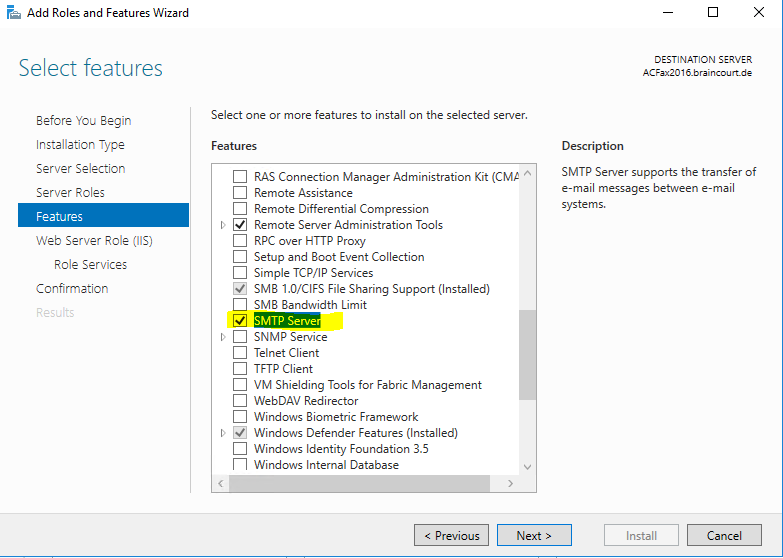
You also have to configure the IIS SMTP MTA to send mails to your organization mail server.

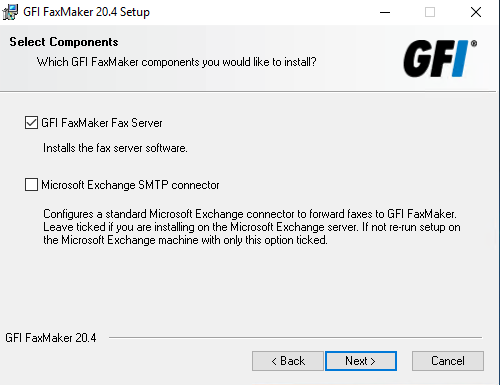
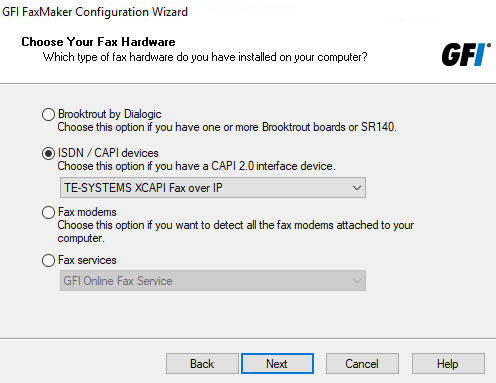
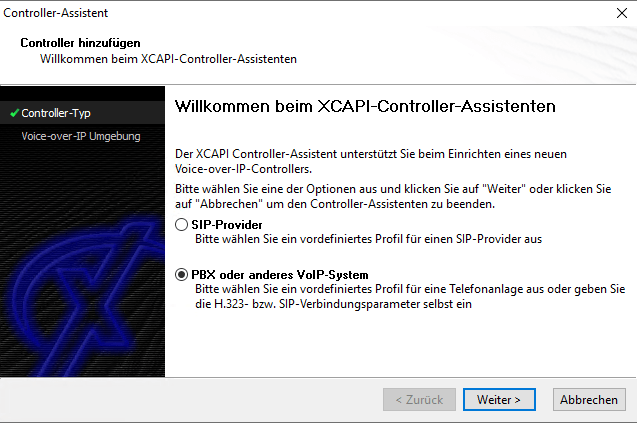
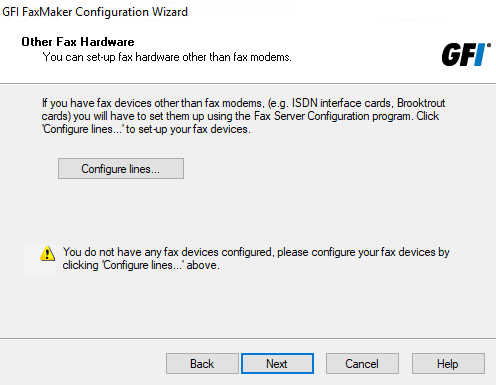
For the Fax Hardware we select XCAPI which we need to install besides.
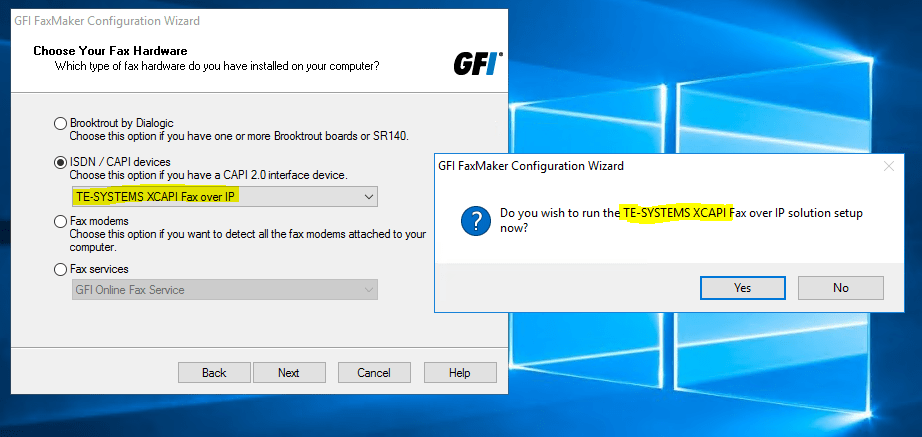
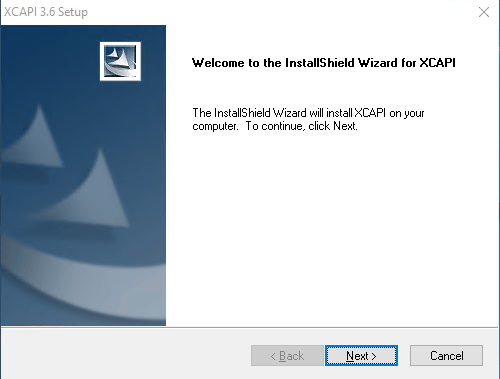
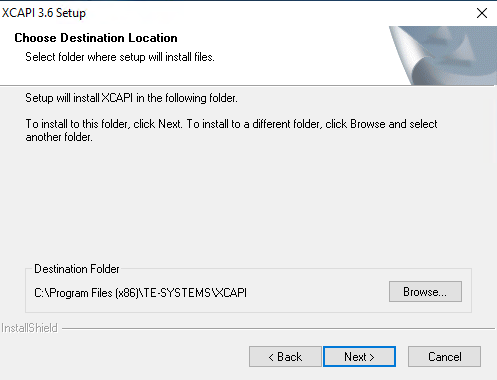
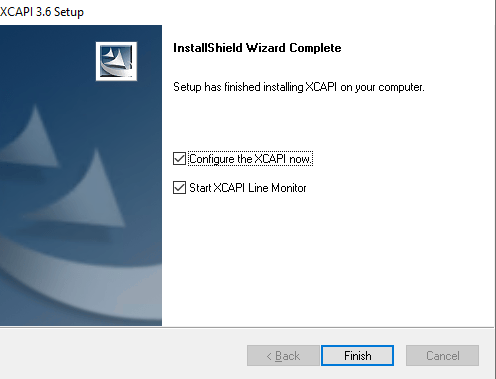
XCAPI Installation and Configuration
XCAPI is included with the FaxMaker setup but can also be downloaded and installed separat.
Downloads
https://community.te-systems.de/
TechNote XCAPI – AudioCodes Mediant Series
https://blog.matrixpost.net/xcapi-technote-en-audiocodes-mediant-series-sip/


Unfortunately even the language setting for the setup is set to English, also the OS itself runs in English, the setup from XCAPI supposedly determine that the OS region settings of the OS points to German and therefore switch the dialogs also to German.
So therefore sorry that I am to lazy to try it with different region settings again 🙂
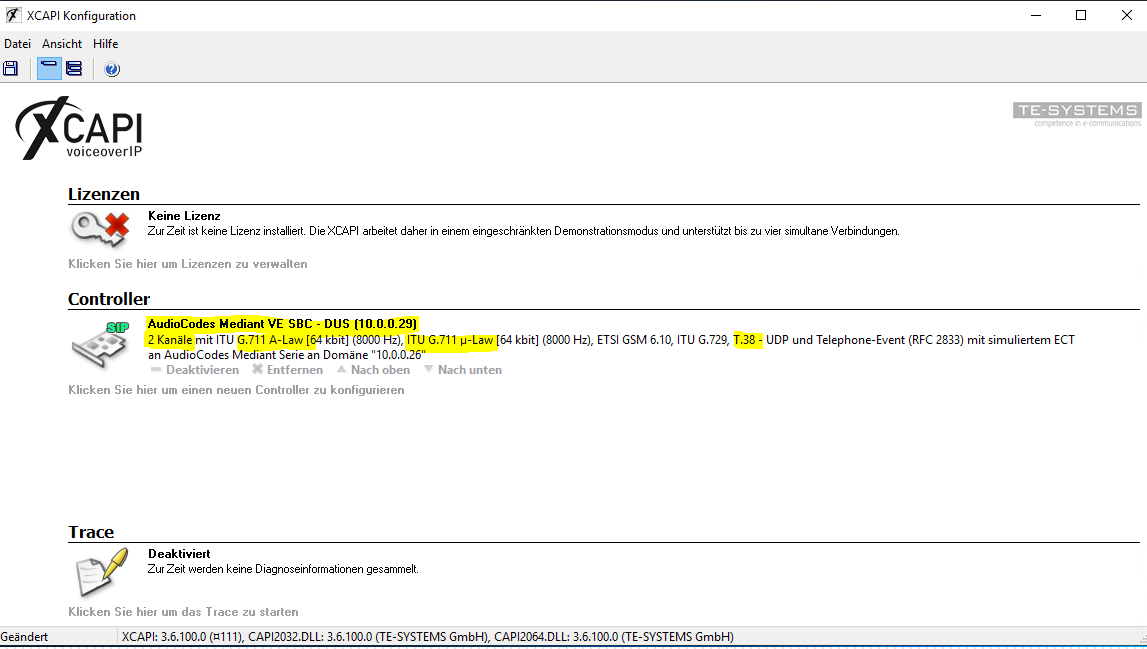
The controller you’ve just created now will appear on the main page of the XCAPI configuration.
As we’re now finished with all XCAPI-related configuration tasks, please save the changes you’ve made and exit the configuration tool.


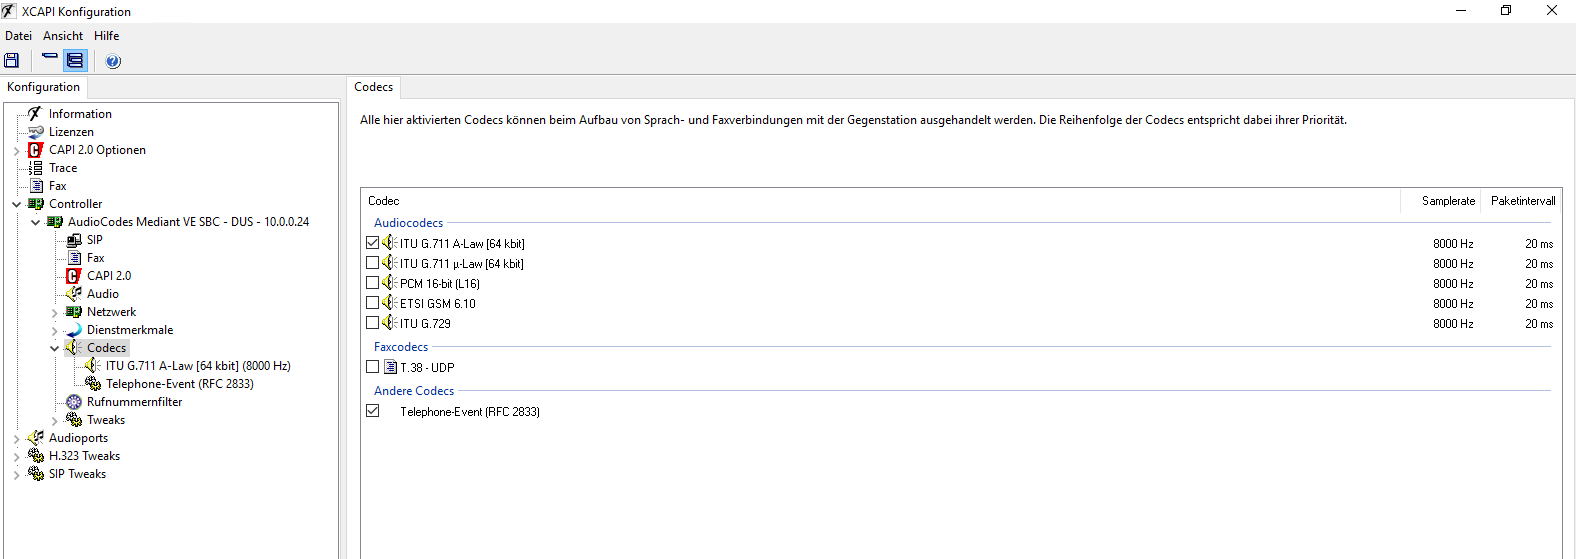
As DTAG only supports T.38 within its own network and regarding my informations (Technical Specification below) not provides gateways to and from foreign networks for T.38, I will disable it.
For DTAG you have to use the G.711 A-Law codec.
1TR118
Technical Specification of the SIP – Trunking Interface between a SIP-PBX with DDI and the NGN Platform of Telekom Deutschland
https://www.telekom.de/hilfe/downloads/1tr118.pdf
2.6 Fax and Modem
SIP-PBXs used for SIP-trunk must support fax based on G.711a at least.
The NGN (Next Generation Network – replacement and successor of the PSTN/ISDN network of Telekom Deutschland) supports the transmission of T.38 fax, in a passive, transparent way, if both user entities (caller and callee) are attached to the NGN using SIP-Trunks and they agree to use T.38 fax (offer-answer).
Note: T.38 over UDPTL media encryption is not supported.
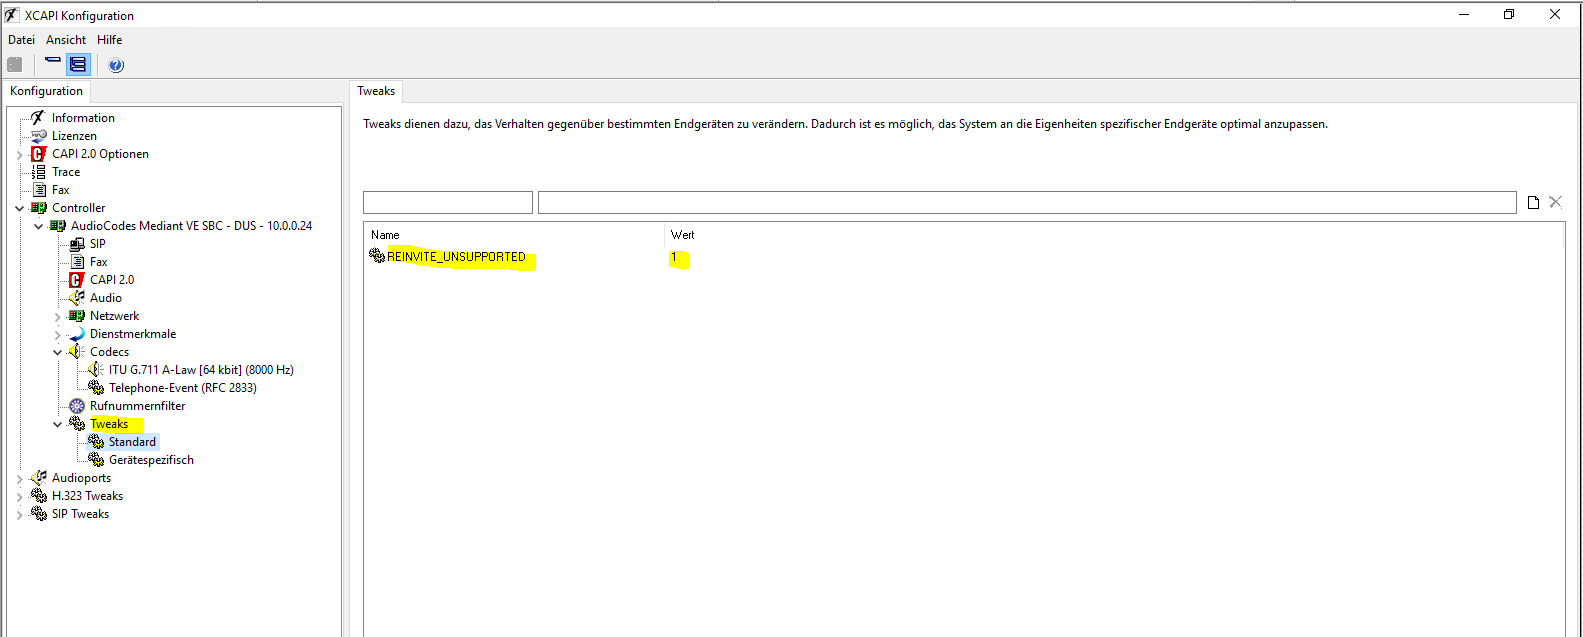
For DTAG I will also disable Re-Invites as this can break the connection with some parties.

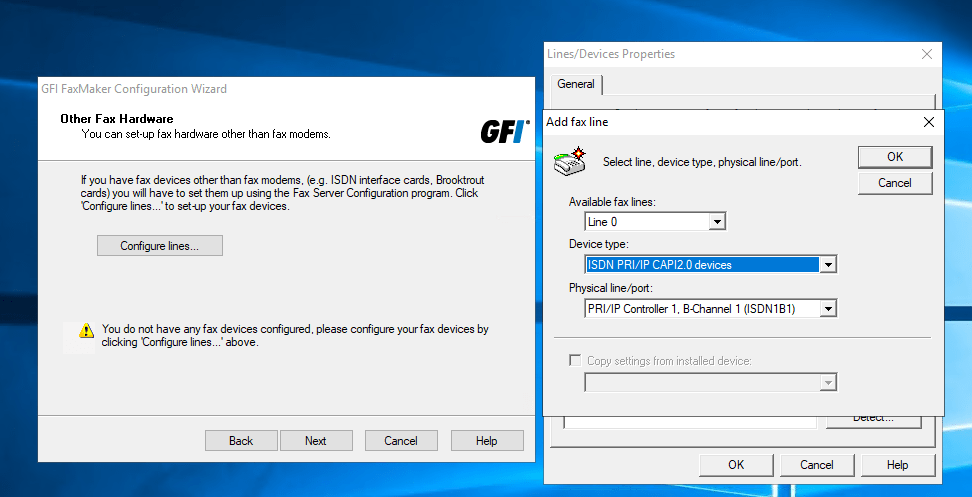
Configure lines, therefore XCAPI has to be successfully installed
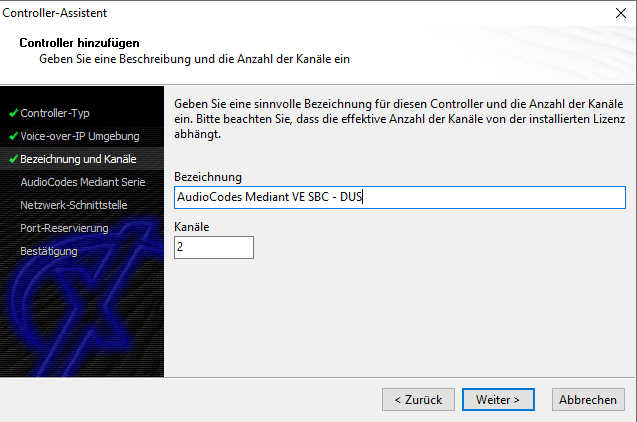
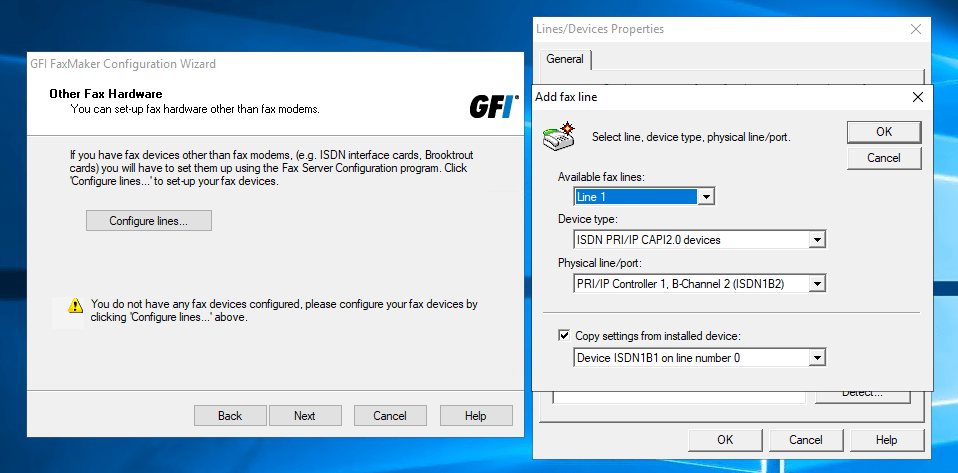
I will configure two lines as this is the maximum for the test licence.
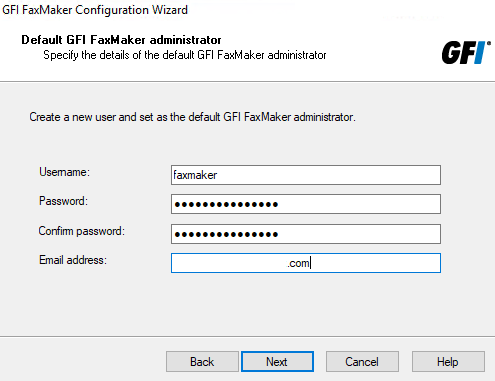
Create a new user as FaxMaker administrator.

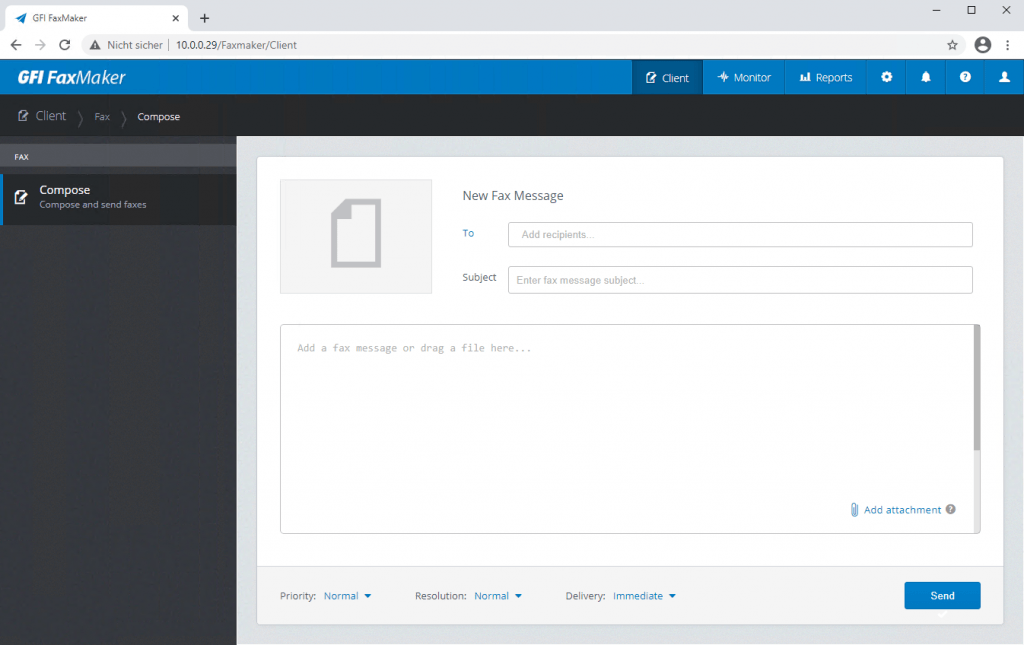
http://<ip FaxMaker>/FaxMaker

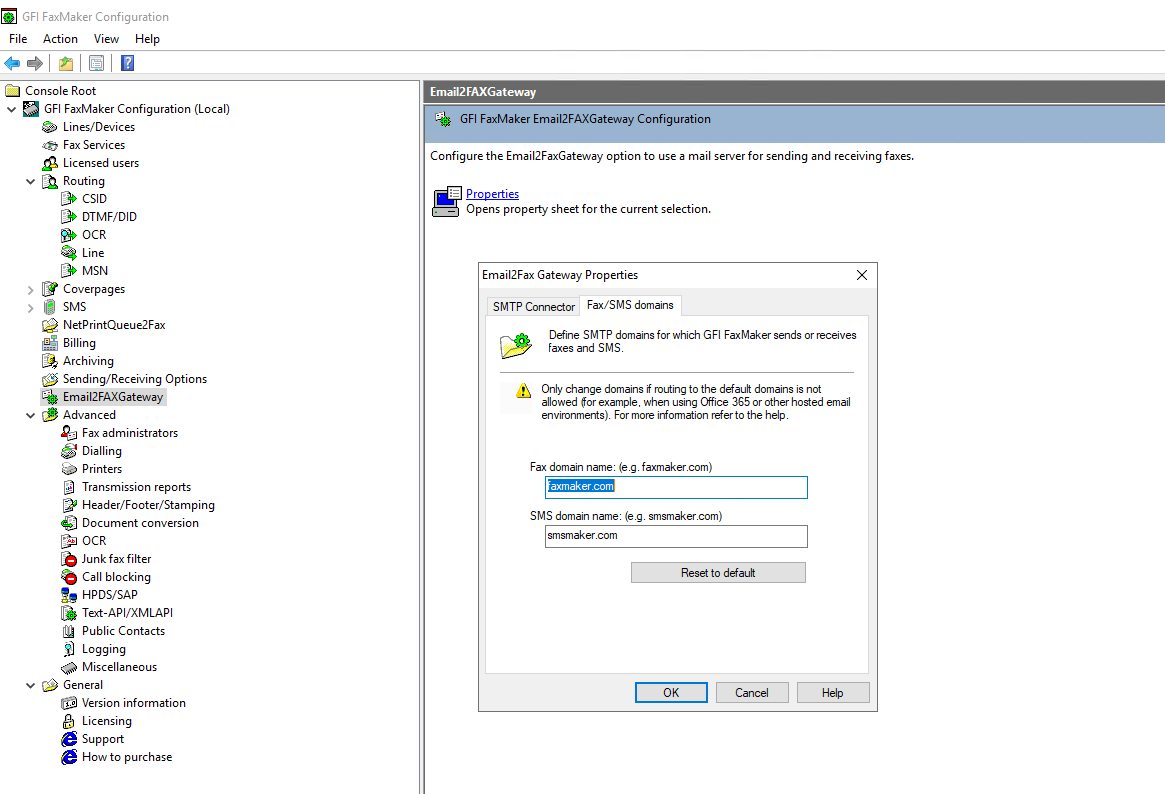
For the fax domain you can also use a different domain like fax.server.
This domain you also have to configure on a dedicated send connector on the Exchange Server to route mail to the fax server.

Configuration AudioCodes Mediant VE SBC (7.20A.258.119)
Media Settings – Voice

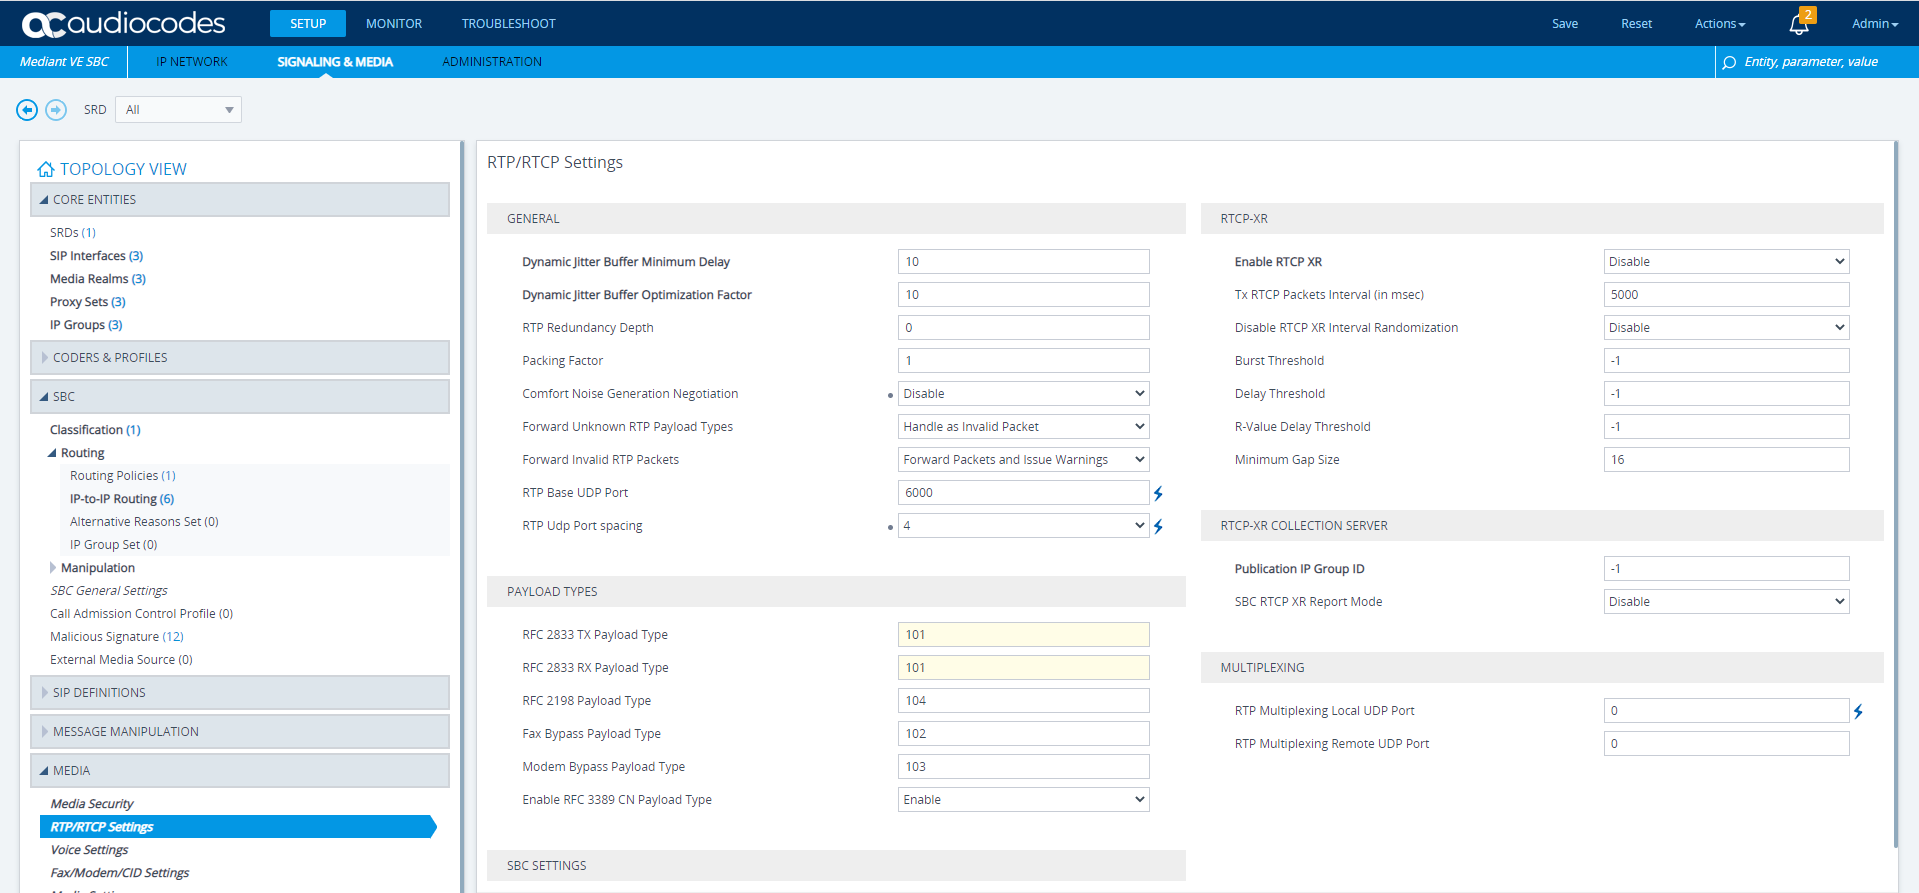
Fax/Modem/CID Settings

The payload type for signaling Telephone Events via RFC 2833 is by default set to value 101. For DTMF interoperability please ensure that the DTMF Transport Method, as shown in the chapter Coders on page 12, is selected as Out-of-Band using RTP method and that the Payload Type is also set to 101.


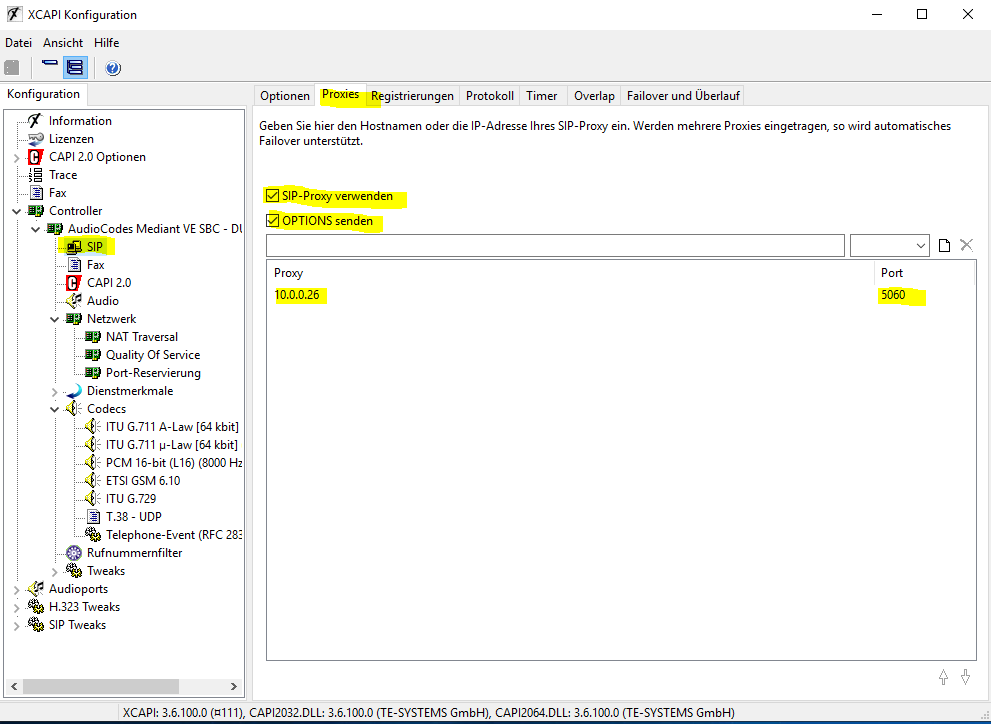
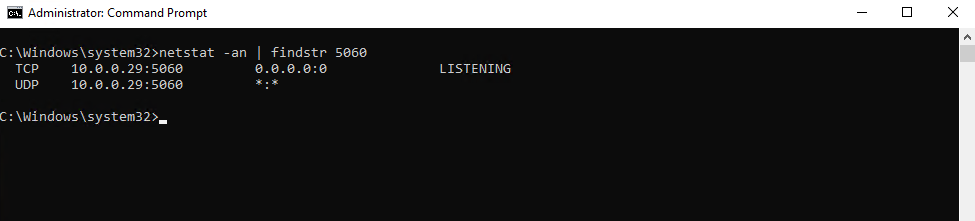
XCAPI Server is listening now on TCP and UDP Port 5060
Note
Check that the firewall on the XCAPI Server is not filtering traffic from the AC SBC
To configure the AudioCodes Mediant SBC to route inbound and outbound faxes to and from the GFI FaxMaker, you can follow the documentation on my post below about the AudioCodes Fax Server.
You will also see at this post how to configure the Exchange SMTP Send Connector from on-premise and Office 365 to route outbound faxes from Outlook/Exchange to the Fax Server.
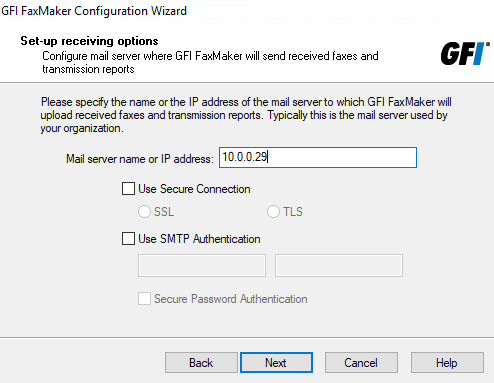
Configure routing of inbound and outbound fax calls
You can configure on the GFI FaxMaker the routing of inbound and outbound fax calls.
In my case I want to route inbound fax calls depending on the Direct Inward Dialing (DID) Number of the user (recipient).
Direct Inward Dialing (DID)
https://en.wikipedia.org/wiki/Direct_inward_dial
So I have a few dedicated fax numbers and in case of incoming fax calls, GFI FaxMaker should convert the fax into an PDF and send this per mail dependent on the fax number (DID number) to the corresponding users mailbox.
Therefore I will select on the GFI FaxMaker the menu point Routing – DTMF/DID and click New to add a new rule for inbound fax calls as follows.

You can define the DID number and the amount of digits it represents.
So in my case the last 3 digits of the complete phone/fax number distinguishes the recipients and is my DID number provided by the DTAG SIP Trunk.
As you can see I already assigned two recipients with the DIDs 188 and 577 for testing purpose.
After defining the DID number you can select the user, if already configured under Licensed users menu point, to which the fax should be sent to its mailbox. Under the Printers tab you can also select a printer if already configured to print the fax directly out.

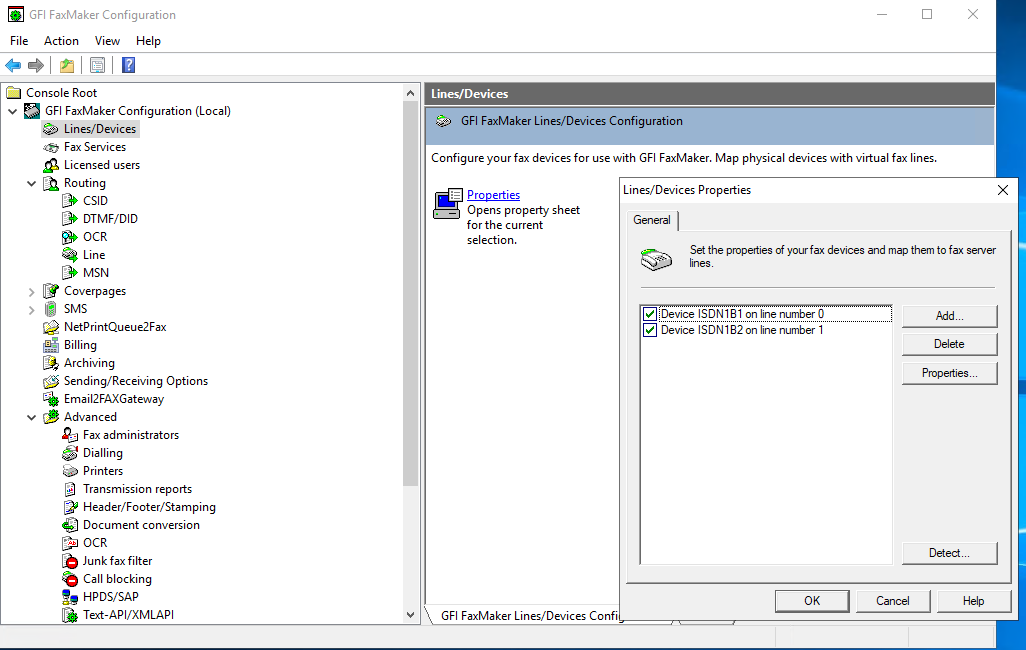
In order that the configuration above works and GFI FaxMaker can determine the DID numbers, you also need to configure the Lines/Devices for inbound fax calls.
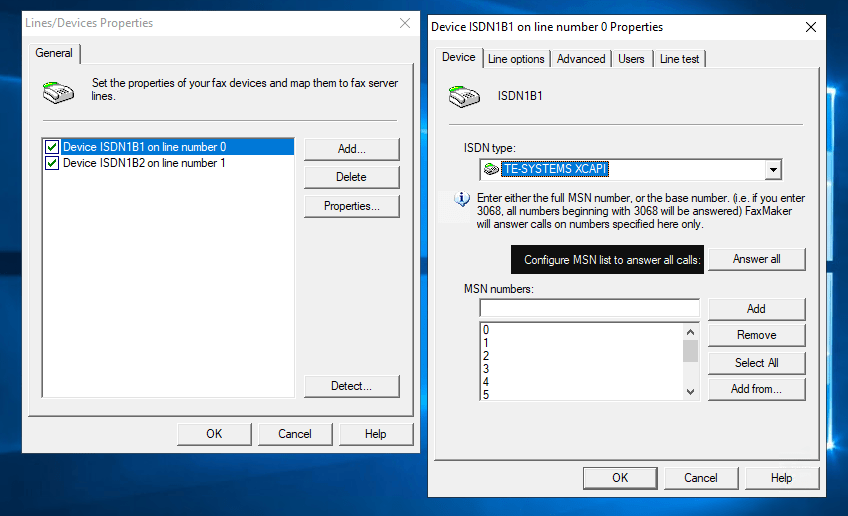
So go to Lines/Devices and click on Properties. In my case I have 4 Lines as follows with TE-SYSTEMS XCAPI (Software Fax).
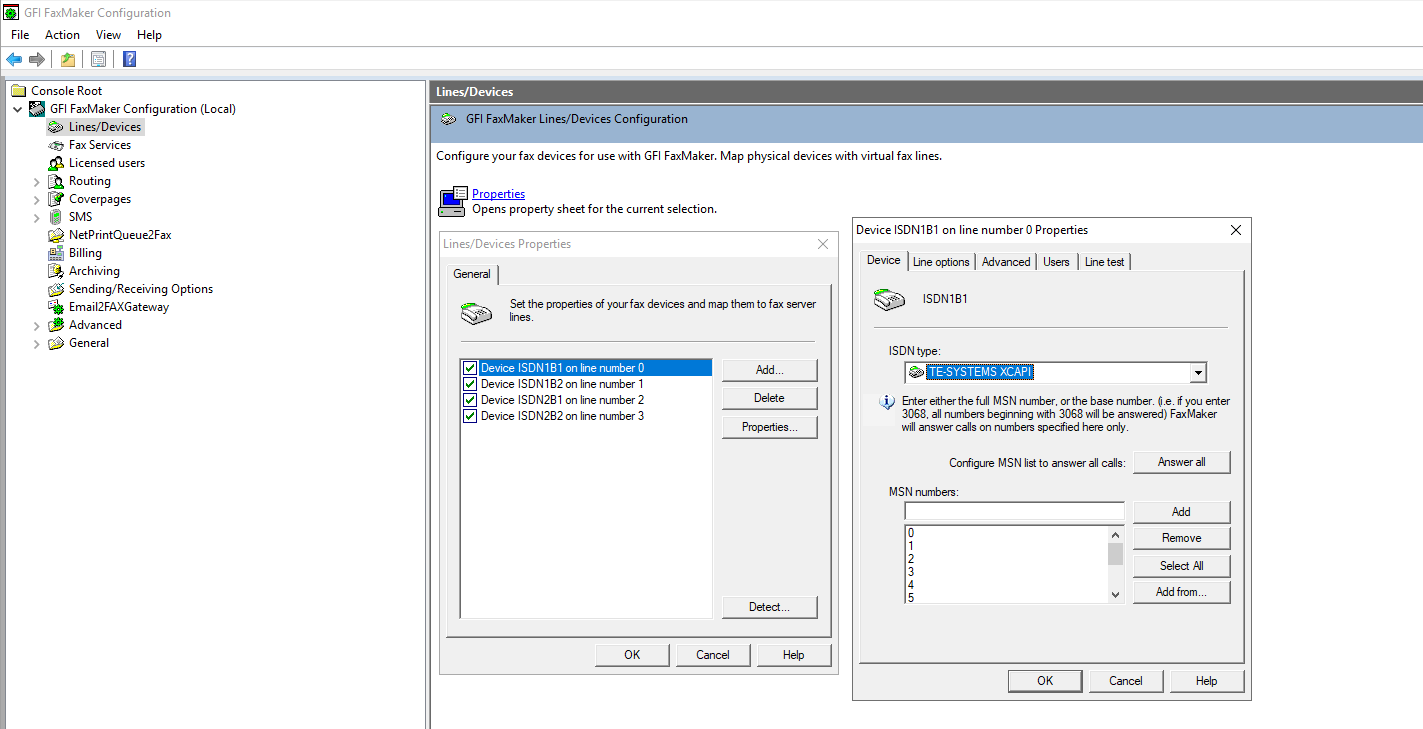
In the tab Line options you can specify if the line should be used for inbound or outbound fax calls or both.
I configured two lines for inbound receiving fax calls and two lines for outbound send out fax calls.
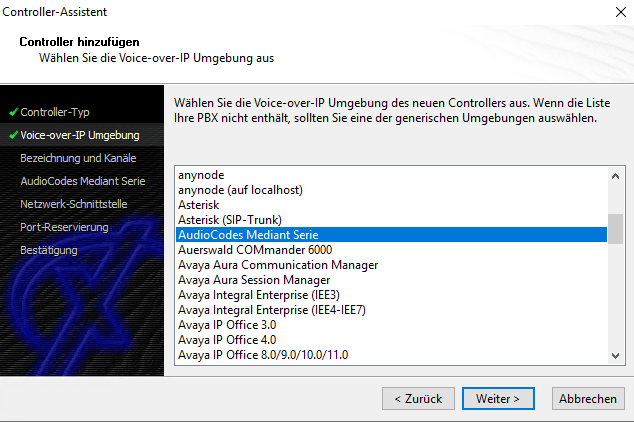
Btw. the 4 lines you will see above are provided from XCAPI to the GFI FaxMaker. On XCAPI I configured as shown previously above two PBX/VOIP System Controller using the AudioCodes Mediant Serie template.
Each controller provides two lines to the GFI FaxMaker.
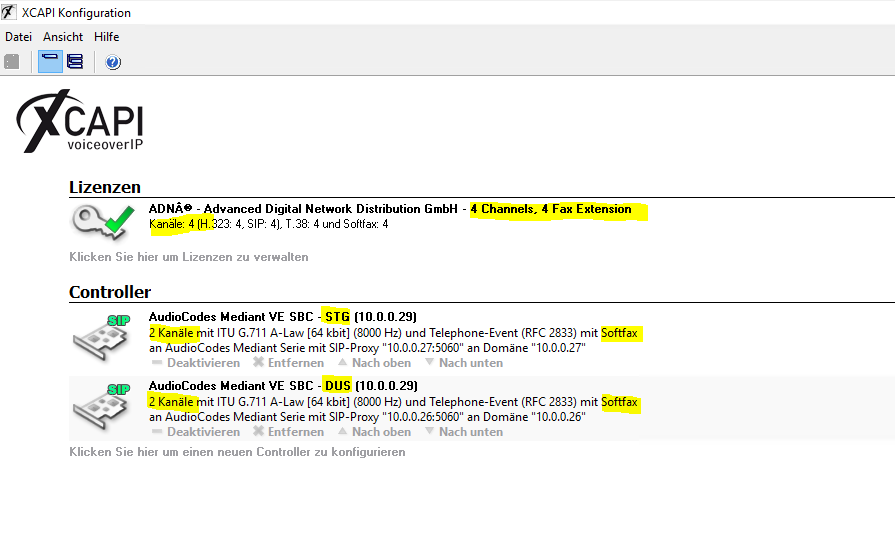
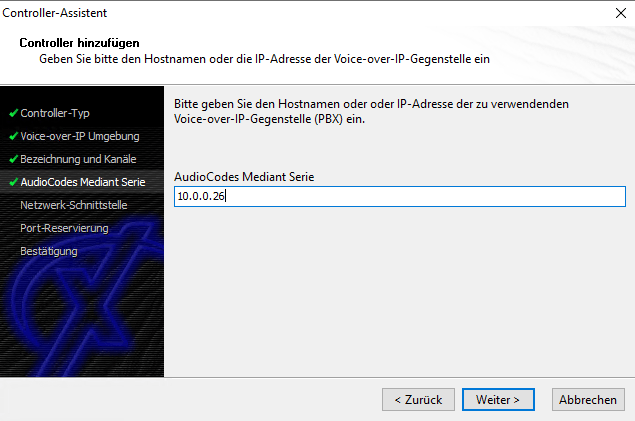
The first controller connects XCAPI per SIP to the AudioCodes Mediant VE SBC for our headquaters in Stuttgart and the second to the AudioCodes Mediant VE SBC for the branch office in Dusseldorf to provide fax to both sites.
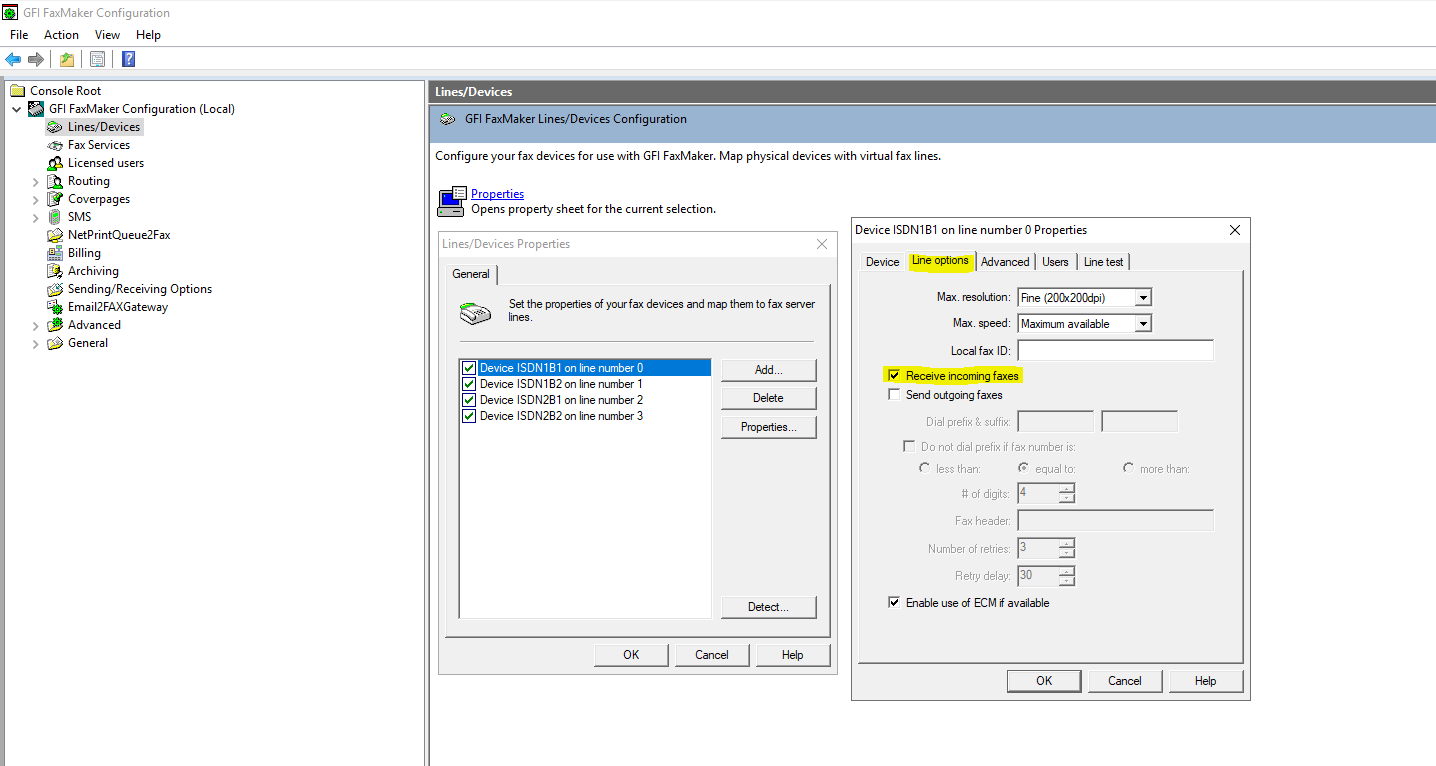
Now select the tab Line options to specify as mentioned above if the line is used for inbound or outbound or both.
As each of the controller I configured on XCAPI includes 2 lines, you will see below the 4 lines as mentioned.
The sequence of the 4 lines with 0,1,2,3 and which line belongs to which of the two controller depends on the position of the controller on XCAPI.
As you can see at the above screenshot from XCAPI controller you can move the position of the controllers up and down.
So in my case the first 2 lines in GFI FaxMaker represents the controller for the SBC in Stuttgart and the last 2 lines the controller in Dusseldorf.
So I will configure the first line (Stuttgart) only for receiving fax calls and the second for sending. The third line is for receiving again (Dusseldorf) and the fourth for sending.
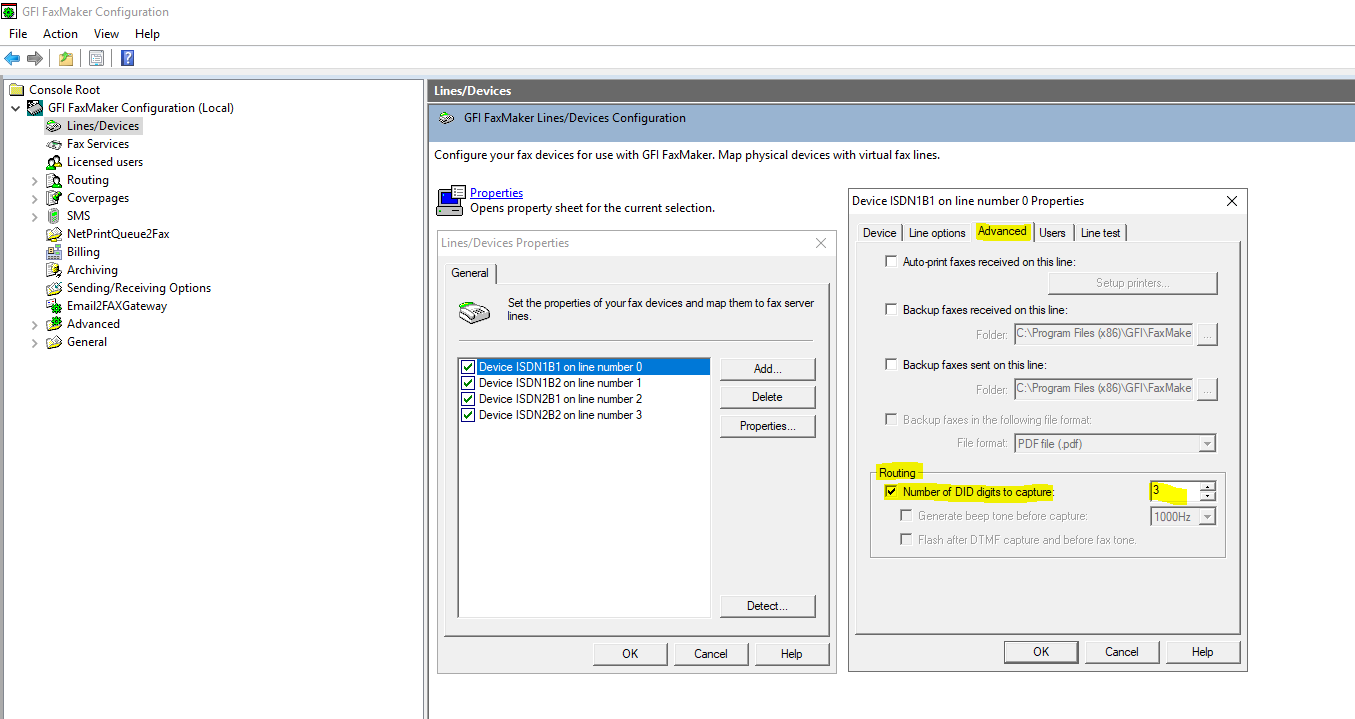
Now to come back to enable FaxMaker to determine the DID number we have to set on the tab Advanced in the section Routing the amount of the DID digits to capture. As mentioned in my case the last three digits distinguishes the recipient.
We only need this setting on receiving lines, in my case on line 1 and 3 as 2 and 4 only for sending outbound fax calls.
That’s all for inbound routing of fax calls. Now in my case as the GFI FaxMaker provides fax calls to both sites, Stuttgart and Dusseldorf and using two controller with two different SBCs, I want to route outbound fax calls from Stuttgart through the SBC for Stuttgart and outbound fax calls from Dusseldorf should be routed through the SBC for Dusseldorf.
So in order to implement this requirement we only need to configure the two sending lines, the one from Stuttgart (line 1) and the one from Dusseldorf (line 4).
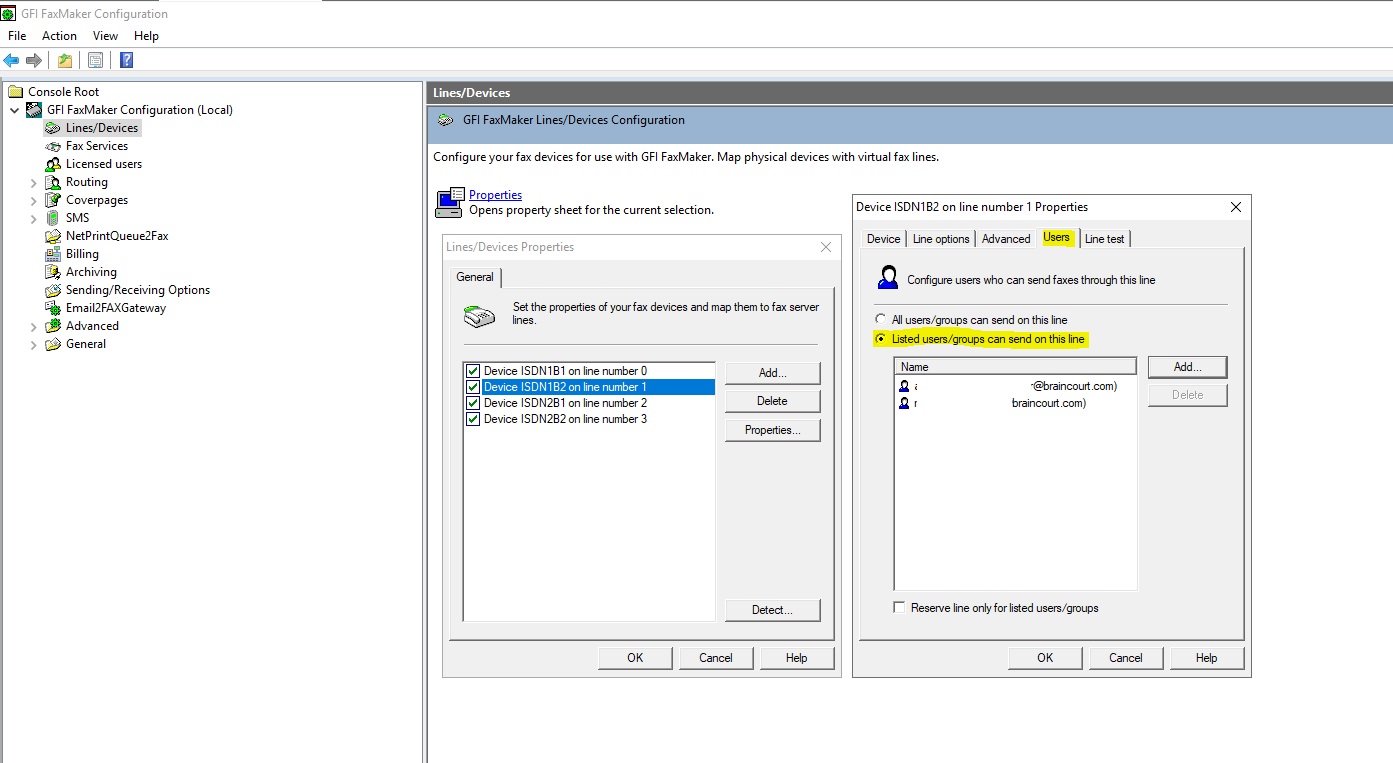
In the properties of the lines go to the tab Users and switch from All users … to Listed users … as follows.
So in this case, I will add all fax users from Stuttgart to Listed users for line number 1 which is connected to the SBC for Stuttgart. The same I will do for Dusseldorf and line number 4 which is connected to the SBC for Dusseldorf.
Without this configuration of Listed users for specific line numbers, all outbond fax calls no matter if from users in Stuttgart or Dusseldorf, will use the first free (Idle) line which will result in that outbound fax calls from Dusseldorf will use in most cases the SBC from Stuttgart and therefore the wrong fax id (number) is represented to the recipient of the fax call.
The Local fax ID btw. you can set also in the properties for the sending line number in the Line options tab. You can also set there the Fax header.
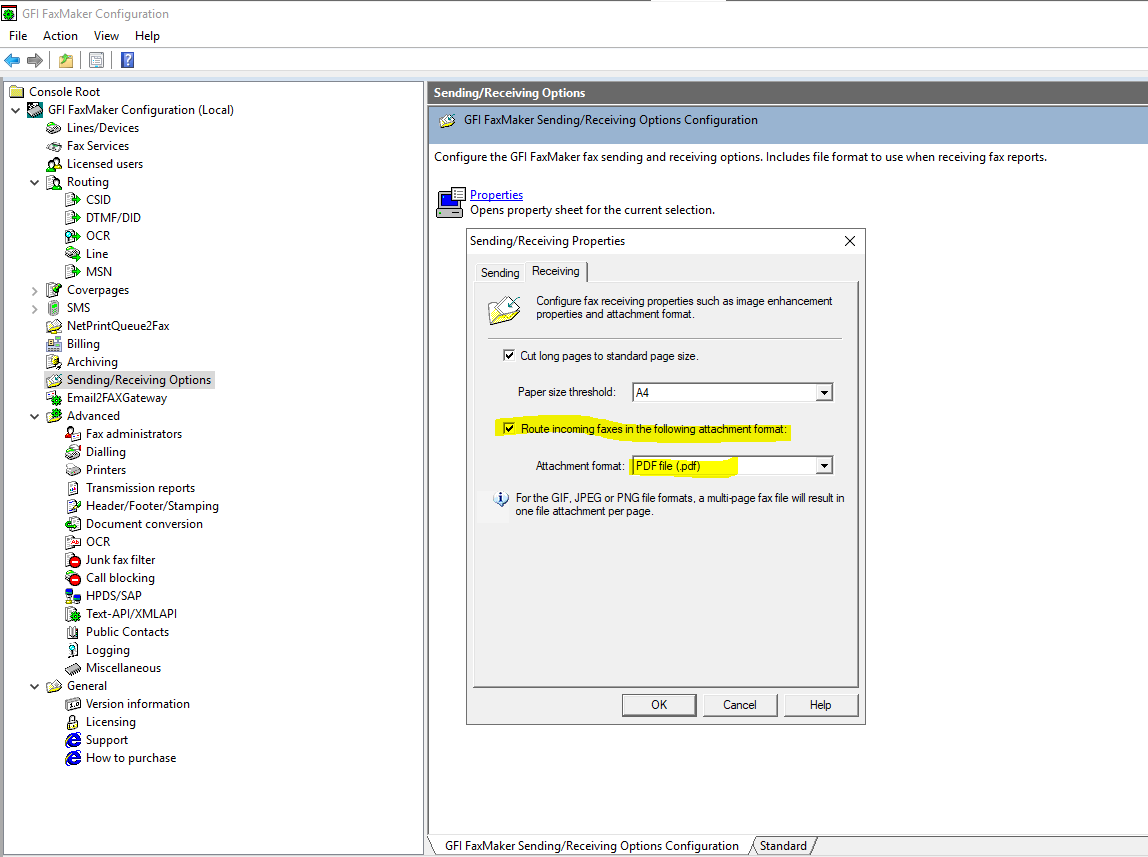
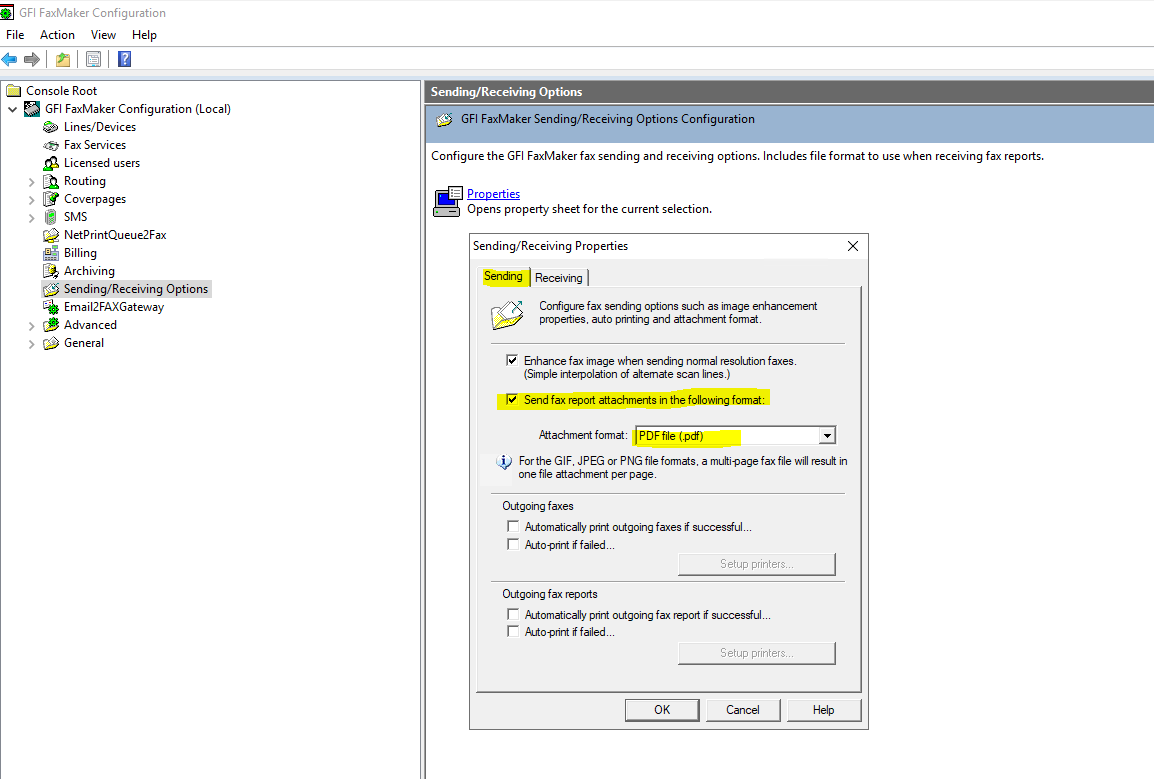
One last point, as mentioned above, I will route receiving fax calls as PDF per mail to the recipients user mailbox. You need to set this first in the Sending/Receiving Options in FaxMaker and is not set by default.

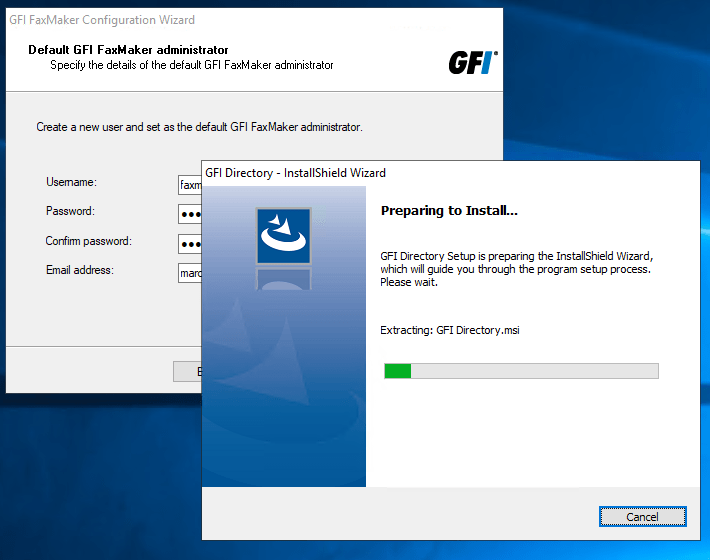
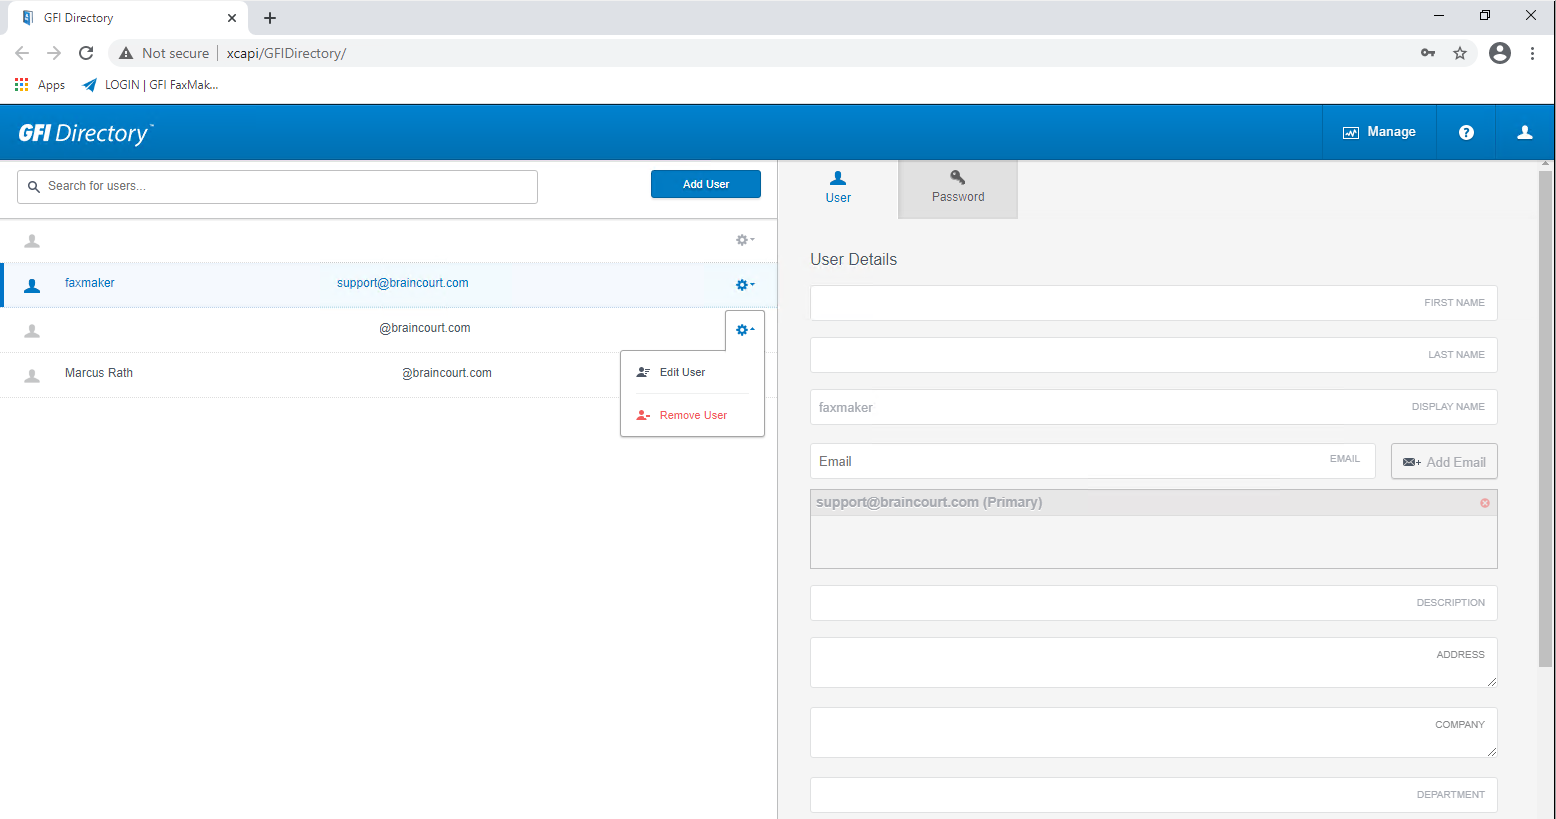
GFI Directory
If you delete an user in the GFI FaxMaker Configuration console and after that adding a new user with the same e-mail address as the deleted user, you will run into the following error.
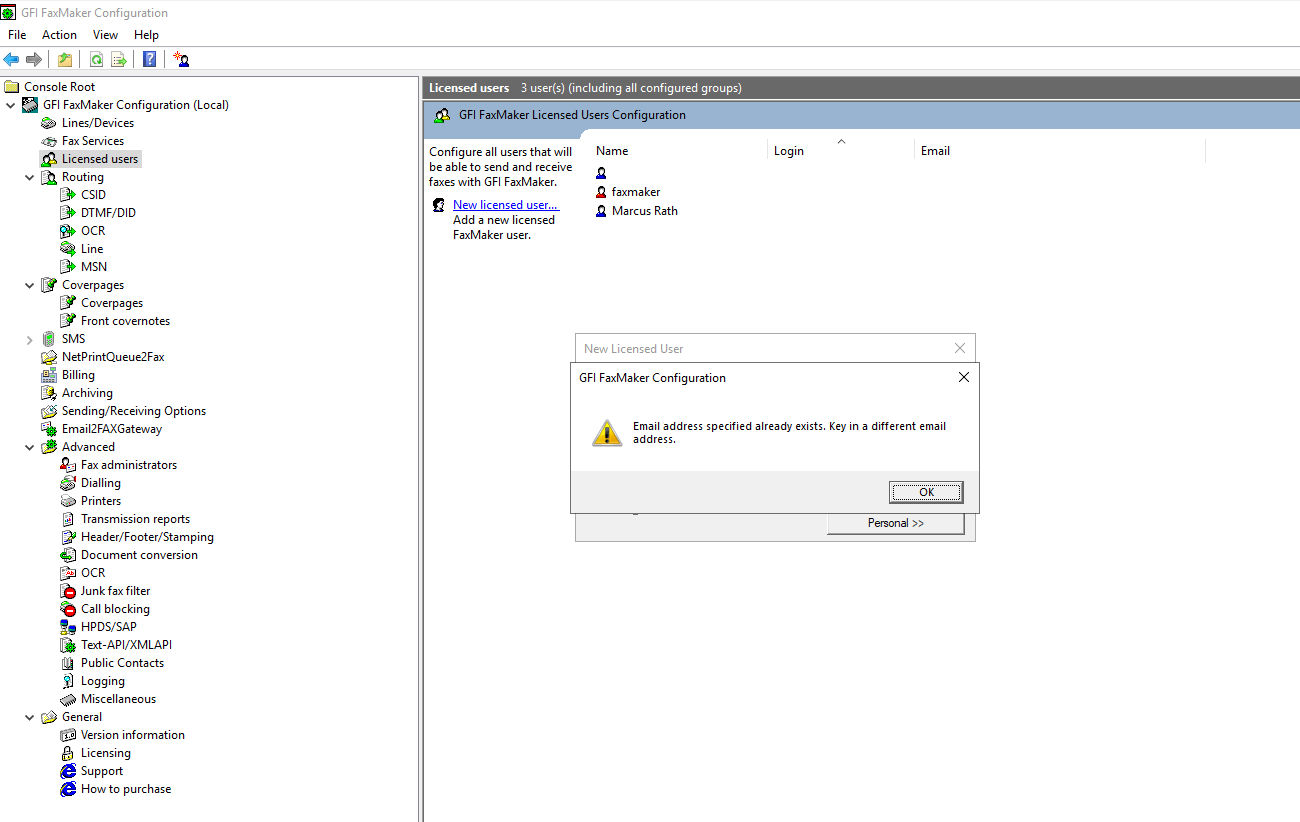
This deleted user is still in the GFI Directory and you also need to delete it there as follows.
Configuring Exchange SMTP Send Connector on-premise and Exchange Online
About configuring the SMTP Send Connector on Exchange on-premise and Exchange Online, you can read my following post.
Troubleshooting
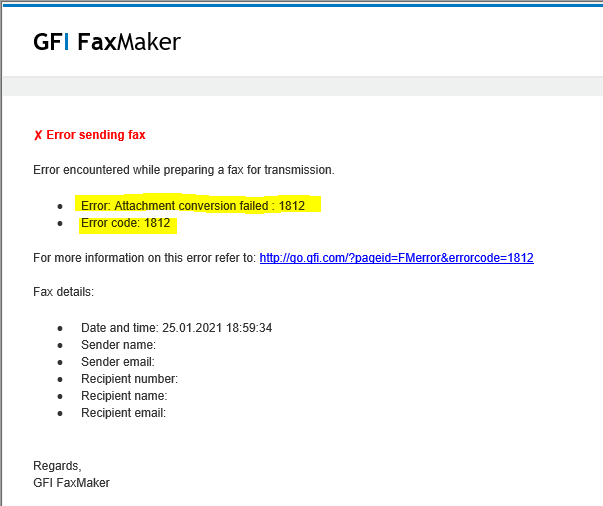
Receiving Error: Attachment Conversion Failed: 1812
https://support.faxmaker.gfi.com/hc/en-us/articles/360015153759-Receiving-Error-Attachment-Conversion-Failed-1812
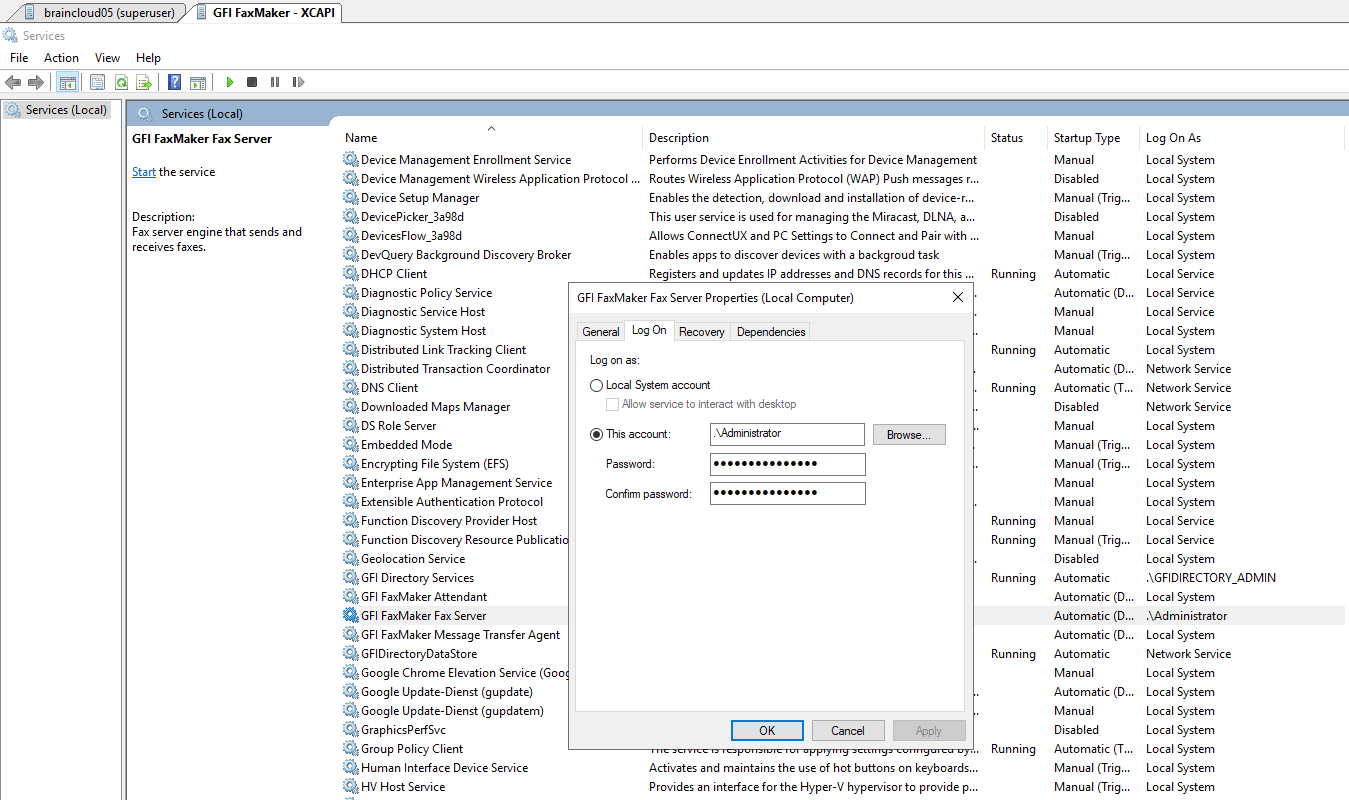
If you receive the following error during sending an outbound fax per mail with an PDF attachment, check that the FaxMaker Printer is set to default for the FaxMaker Fax Server service account.

Enabling FaxMaker’s Internal PDF Converter
https://support.faxmaker.gfi.com/hc/en-us/articles/360015151759-Enabling-FaxMaker-s-Internal-PDF-Converter
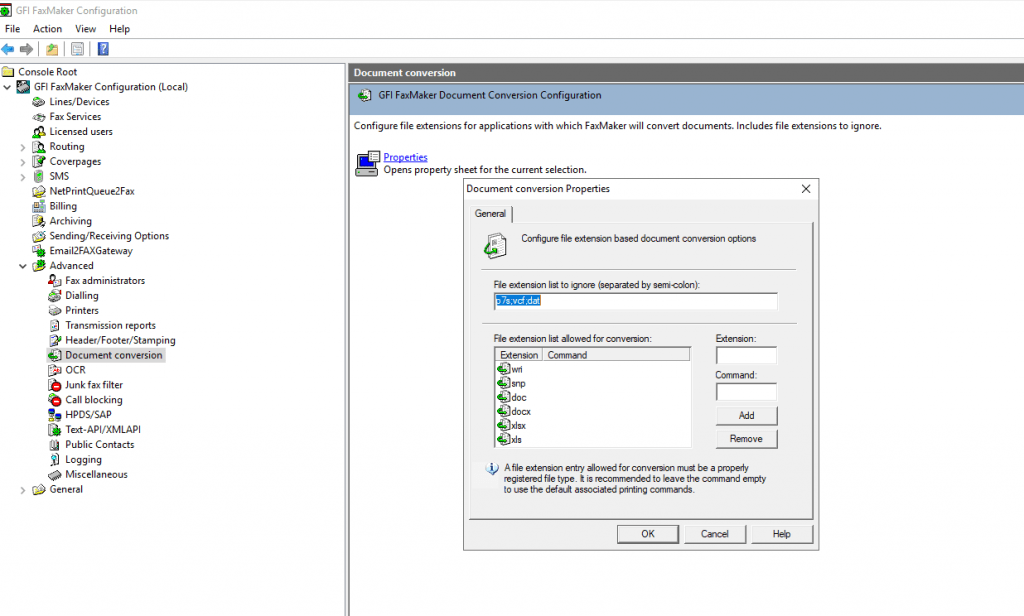
In order that the above FAXmaker printer is used, check that under Advanced- Document conversion – Properties no file extension with pdf is listed. If here pdf with command print is listed, FaxMaker try to use a third party PDF converter if installed.
Links
Documentation – GFI FaxMaker
https://www.gfi.com/products-and-solutions/email-and-messaging-solutions/gfi-faxmaker/resources/documentations
XCAPI 3.2.7
https://www.heise.de/download/product/xcapi-24353
Common ISDN Application Programming Interface (CAPI)
https://de.wikipedia.org/wiki/Common_ISDN_Application_Programming_Interface
TAPI und XCAPI
https://www.deutsche-telefon.de/cloud-telefonanlage/erweiterung-integrationen/tapi-und-xcapi.html
Changing the Logo in the Fax Coverpage
https://support.faxmaker.gfi.com/hc/en-us/articles/360015151919-Changing-the-Logo-in-the-Fax-Coverpage
The best home for modern WordPress sites built on the Google Cloud Platform