Set up pfSense as a Forward Proxy with Squid and configure access for Linux and Windows Clients
In this post you will see how to set up pfSense to function as a Forward Proxy using the squid package.
Squid is a caching and forwarding HTTP web proxy
http://www.squid-cache.org/
https://en.wikipedia.org/wiki/Squid_(software)
Although primarily used for HTTP and FTP, Squid includes limited support for several other protocols including Internet Gopher, SSL, TLS and HTTPS
Squid was originally designed to run as a daemon on Unix-like systems. A Windows port was maintained up to version 2.7. New versions available on Windows use the Cygwin environment
Install the squid package
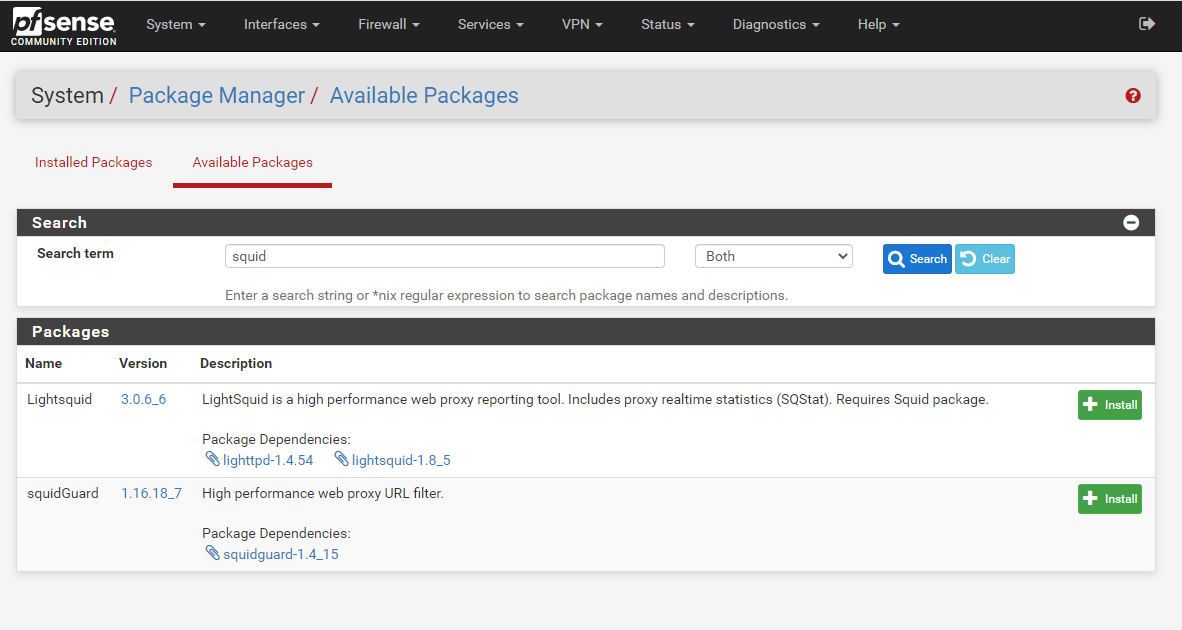
Open the Package Manger under the System menu
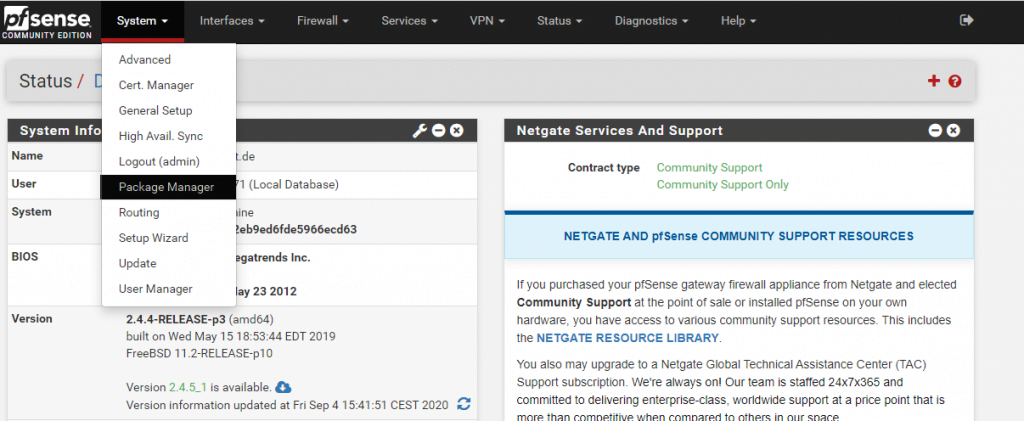
Under Available Packages search for squid
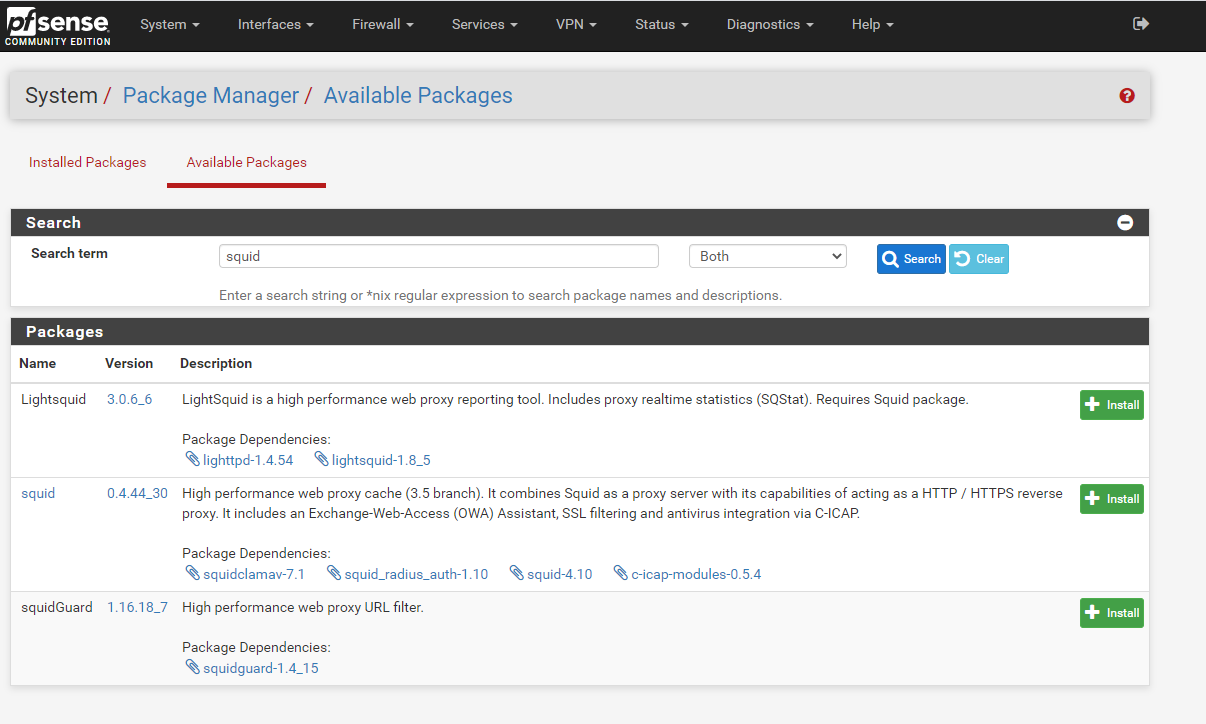
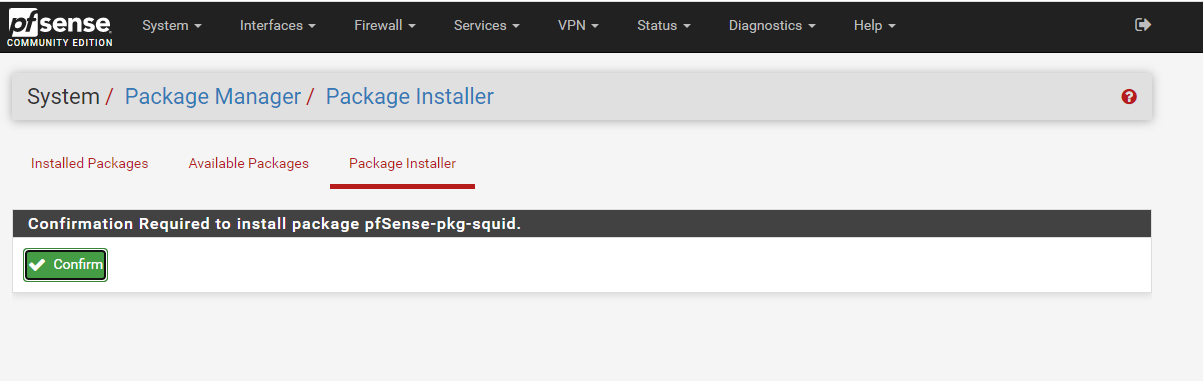
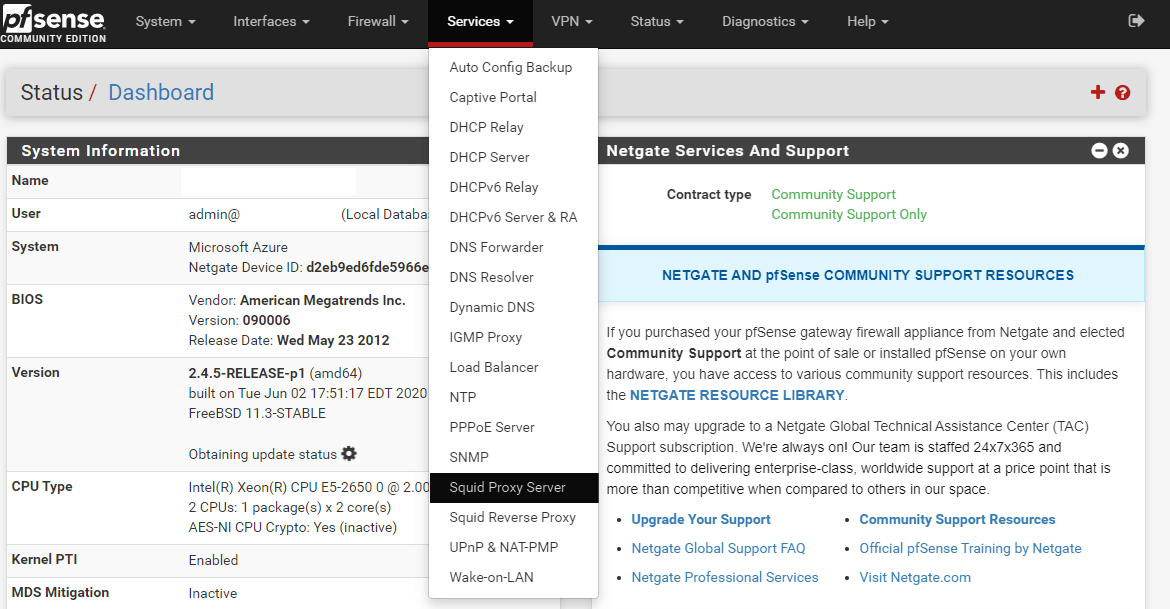
Here we want to install the squid High performance web proxy cache (3.5 branch) package. So click on Install.

Configuration of Squid Proxy Server
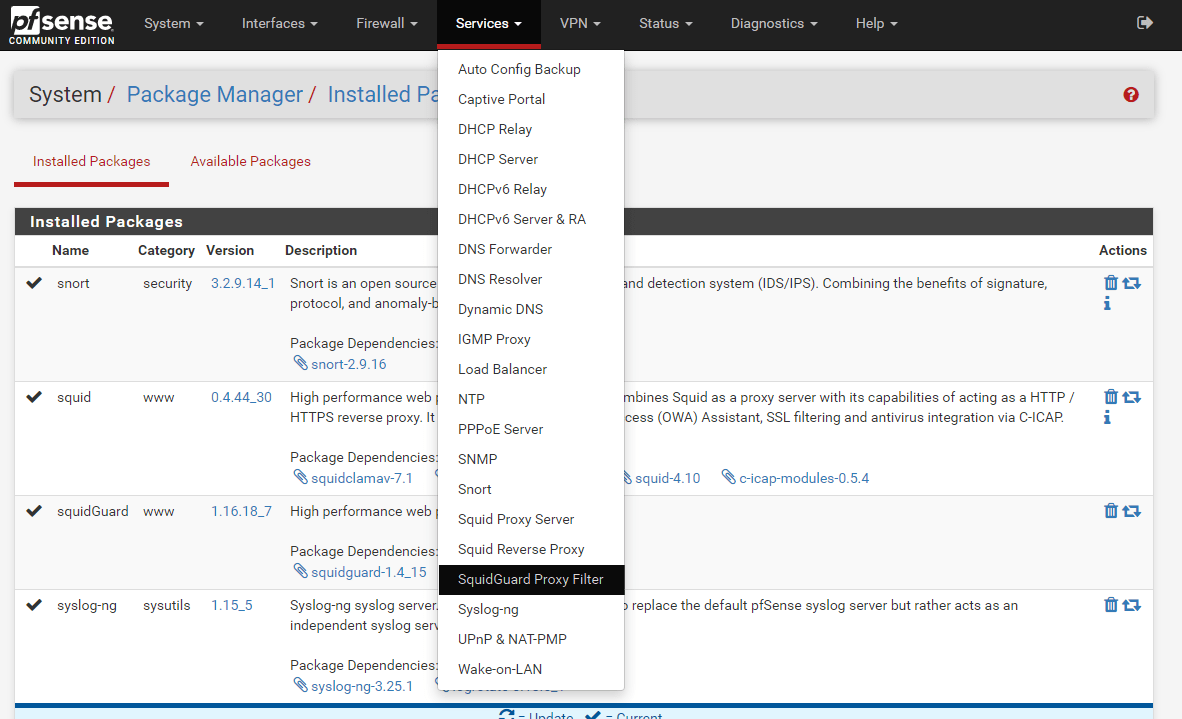
Go to Services – Squid Proxy Server
Under Local Cache adjust the Hard Disk Cache Size, Netgate recommends 3 GB at the beginning.
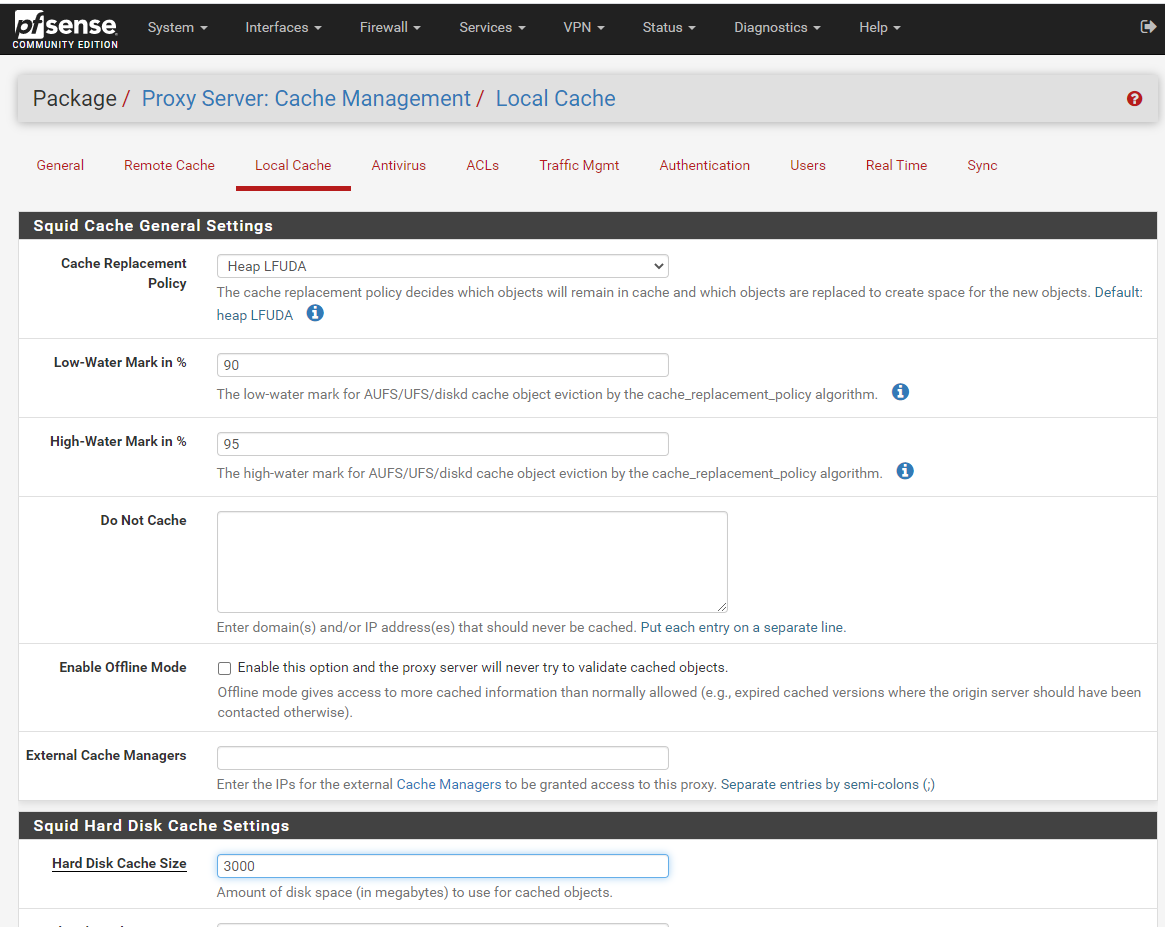
Hard disk cache location: Should be /var/squid/cache but may be moved if needed
Memory cache size: The amount of RAM that squid should claim for caching. Use as much as can be spared, as this is much faster than caching to disk. It should not exceed 50% of the installed RAM, however.
In my case pfSense have a total amount og 8GB RAM, so I use 4GB here.
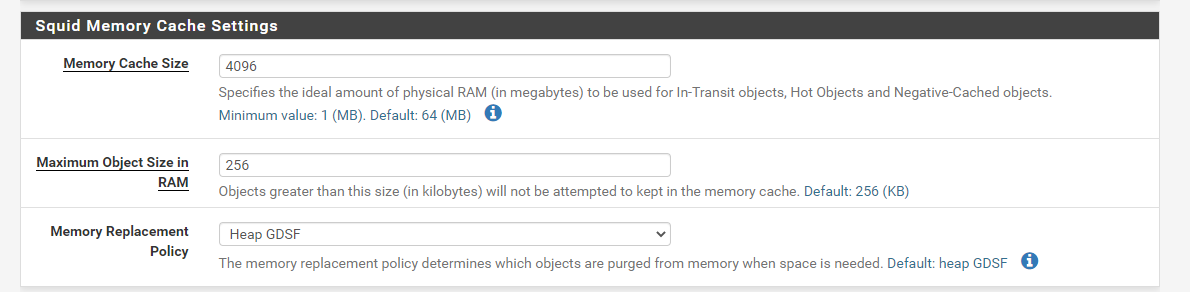
Do Not Cache: Set a list of domains that should never be cached. This may also be left blank.

After adjusting the Local Cache setting click on Save.
Now go to General
Here you can select under Proxy Interface(s), the interface which the proxy server should listen and bind to. Normally this will be the LAN Interface or if located in a perimeter network, the interface directed to the internal network.
Also be sure that Allow Users on Interface is checked. If this is checked, the subnets for the interfaces selected will automatically have access. There will be no need to add them on the Access Control Lists (ACLs) tab.
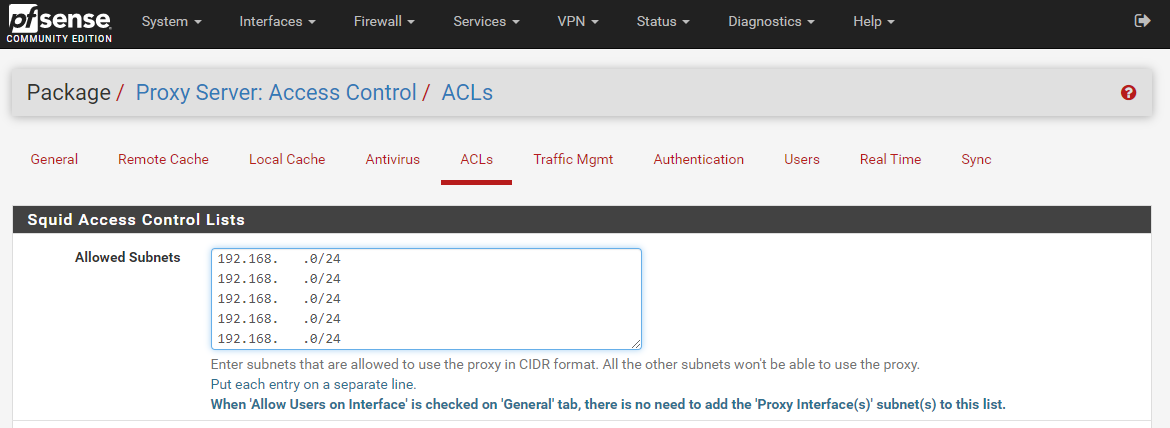
In my case, the proxy server is located in the perimeter network, so I have to configure additional subnets on the ACLs menu tab which should have access to the proxy server. All the other subnets won’t be able to use the proxy.
To enable the Squid Proxy we have to go back to the General menu tab and have to check Enable Squid Proxy.

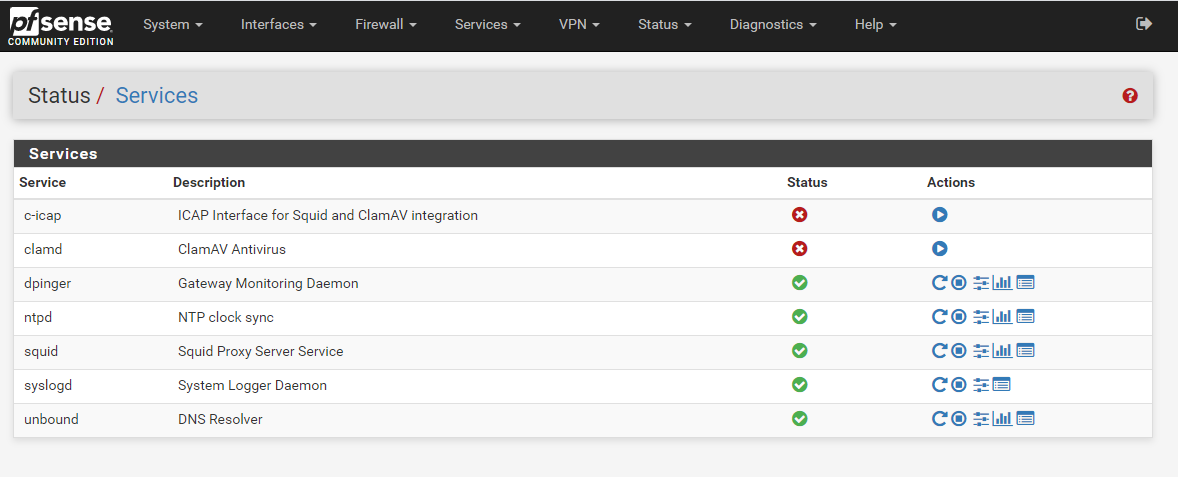
That’s it! Squid should be up and running. The status of the squid proxy can be checked by clicking Status > Services.

Enable further settings
Transparent Proxy Setting
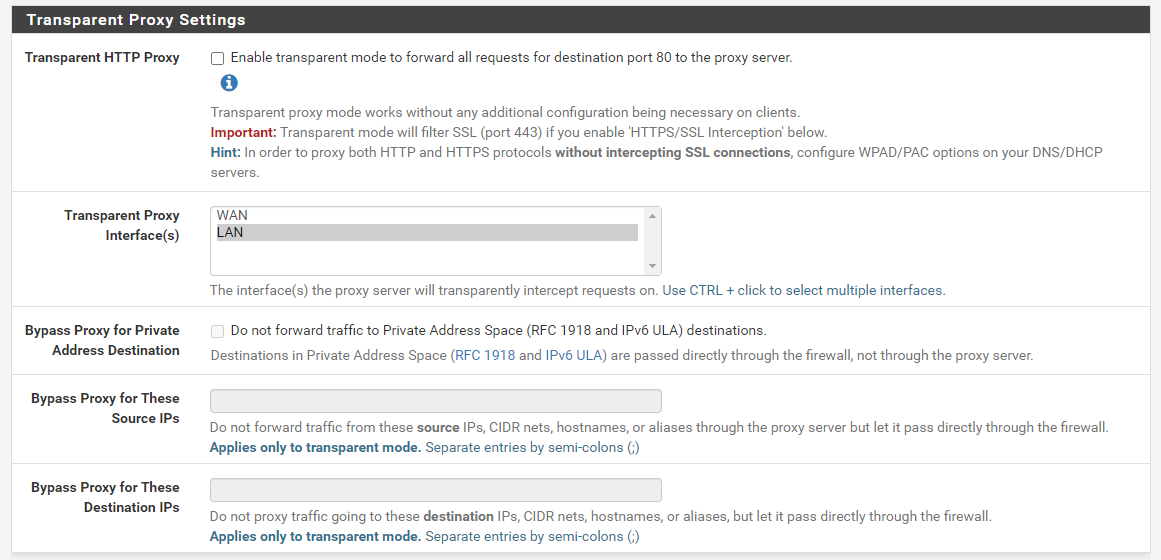
If you enable Transparent HTTP Proxy the clients do not need any additional configuration like environment variables or proxy settings in the browser to use the forward proxy. How to configure the clients if squid is used as an explicit proxy you will see further down.
The only thing the client needs is the correct gateway or default route so that the outbound traffic will be routed through the forward proxy.
By default Transparent HTTP Proxy only forwards requests for destination port 80. In order to proxy both HTTP and HTTPS protocols enable HTTPS/SSL Interception or configure WPAD/PAC options on your DNS/DHCP servers.
Transparent Proxy vs Explicit Proxy
Transparent proxies act as intermediaries between a user and a web service. When a user connects to a service, the transparent proxy intercepts the request before passing it on to the provider. Transparent proxies are considered transparent because the user isn’t aware of them. On the other hand, the servers hosting the service recognize that the proxied traffic is coming from a proxy and not directly from the user.
In contrast with explicit proxies the browser and other apps knows it is talking to a proxy, and asks the proxy to load up the site or resource that it wants to load instead.
The browser talks differently with explicit proxy, it will issue a special CONNECT verb whenever it needs anything over https. With transparent proxy, it will issue normal GET or POST, but never CONNECT.
The HTTP CONNECT tunnel
https://www.joji.me/en-us/blog/the-http-connect-tunnel
HTTPS is widely used on Internet to secure the data being transferred. However, when a browser needs to send a HTTPS request through proxy, since the request hostname and port number are all encrypted in HTTPS request header and even the proxy cannot get them, then how does the proxy know where to send client’s request? To solve this problem, the browser sends a HTTP request with method CONNECT and the target hostname and port number to the proxy. When receiving the CONNECT request, the proxy establishes a TCP connection to the requested hostname on the specified port and then returns HTTP 200 response to tell the browser the requested connection was made. After that, the proxy should just blindly forward the packets back and forth between the client and the server without looking at them until the tunnel is closed.
This is the reason why transparent proxy by default only can deliver HTTP sites. In order to proxy HTTPS the proxy should know the requested host and port number which will be encrypted with POST and GET requests with transparent proxy. Therefore you should enable intercepting SSL connections or configure WPAD/PAC option on the DNS/DHCP server in order to let the client send CONNECT requests.

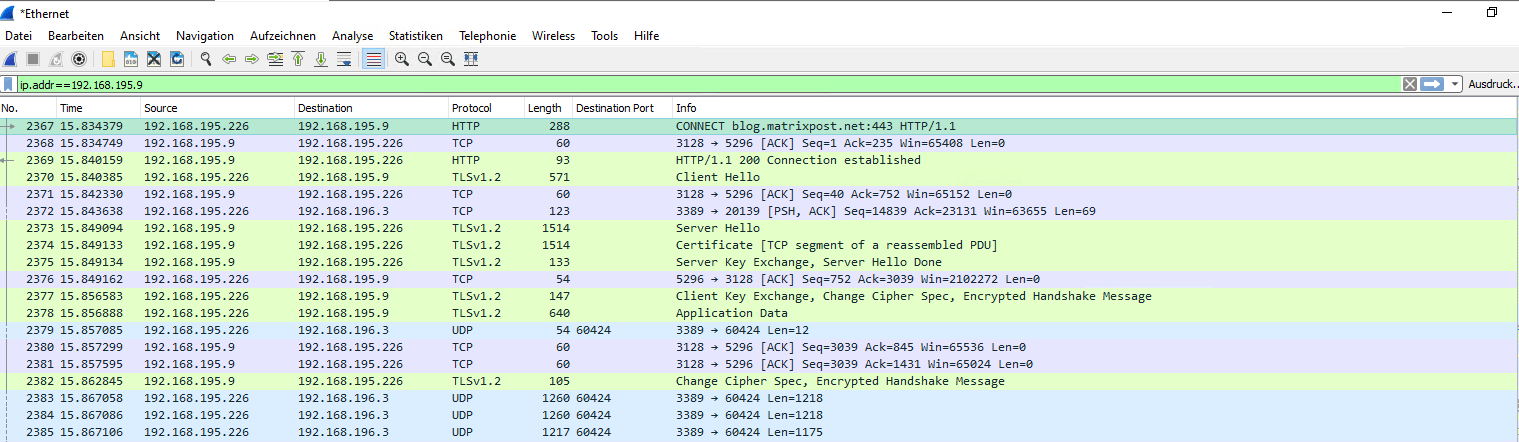
Here you can see a wireshark capture from an internal client with explicit proxy settings for WinINET. You can see the first packet is a CONNECT verb to my blog.
192.168.195.226 is a windows 10 client and 192.168.195.9 is the proxy.
This particular difference doesn’t happen with insecure http. Here you can see a capture where the client requested the site http://e-m-b.org
In case you wonder why I use this site about mosquito control 🙂 , I googled about http sites and found the site on http://scratchpads.eu/explore/sites-list

Setting up Explicit Squid Proxy
https://wiki.alpinelinux.org/wiki/Setting_up_Explicit_Squid_Proxy#explicit_forward_proxy
Benefits of each types
Transparent
- No need to configure on each client
- Can be used by software that has no proxy settings
Explicit
- More obvious that traffic is being monitored
- Can work in places that a transparent proxy would break stuff
- More likely to give useful error messages if the proxy fails
Logging
Per default Logging is not enabled. If you want to enable Access Logging go to Logging Settings under the General menu tab.
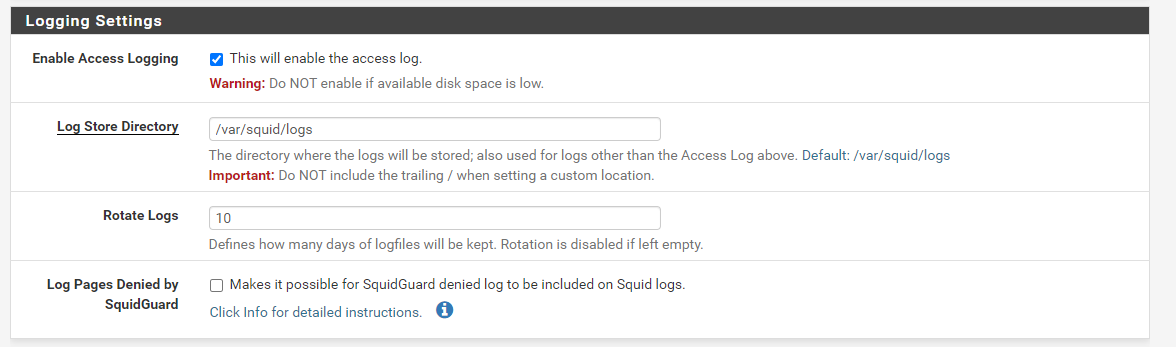
You can also adjust the path to store the logs, default is /var/squid/logs and here you will find when you browse with pfSense – Diagnostics – Edit File the access.log file.
The number of Rotate Logs defines how many days of logfiles will be kept. Rotation is disabled if left empty. Be aware to adjust the logging settings to an appropriate value regarding your available disk space.


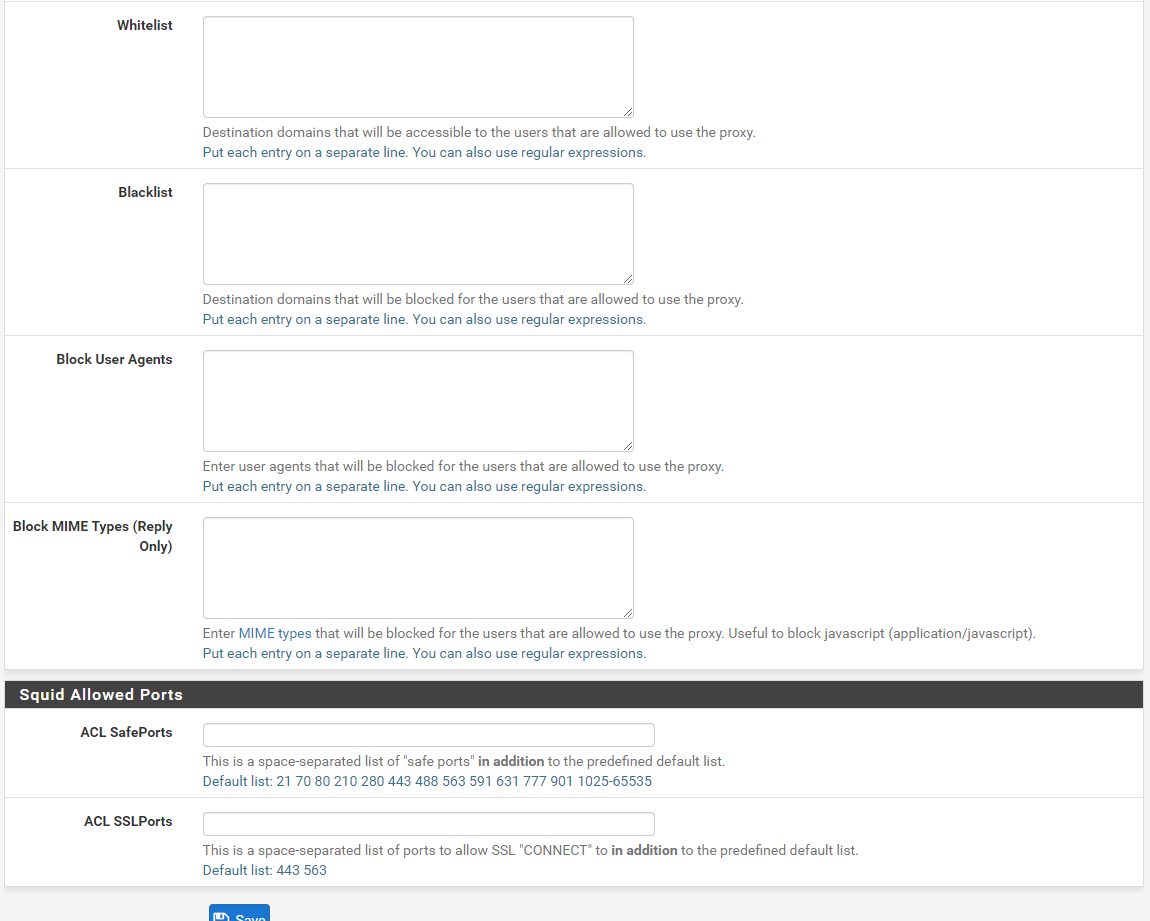
Access Control Lists (ACLs)
In the ACLs for now we only configured above our allowed subnets who can access and request outbound internet access.
But you can allow or restrict more than this. Below you see the several options which I think are self-explaining.

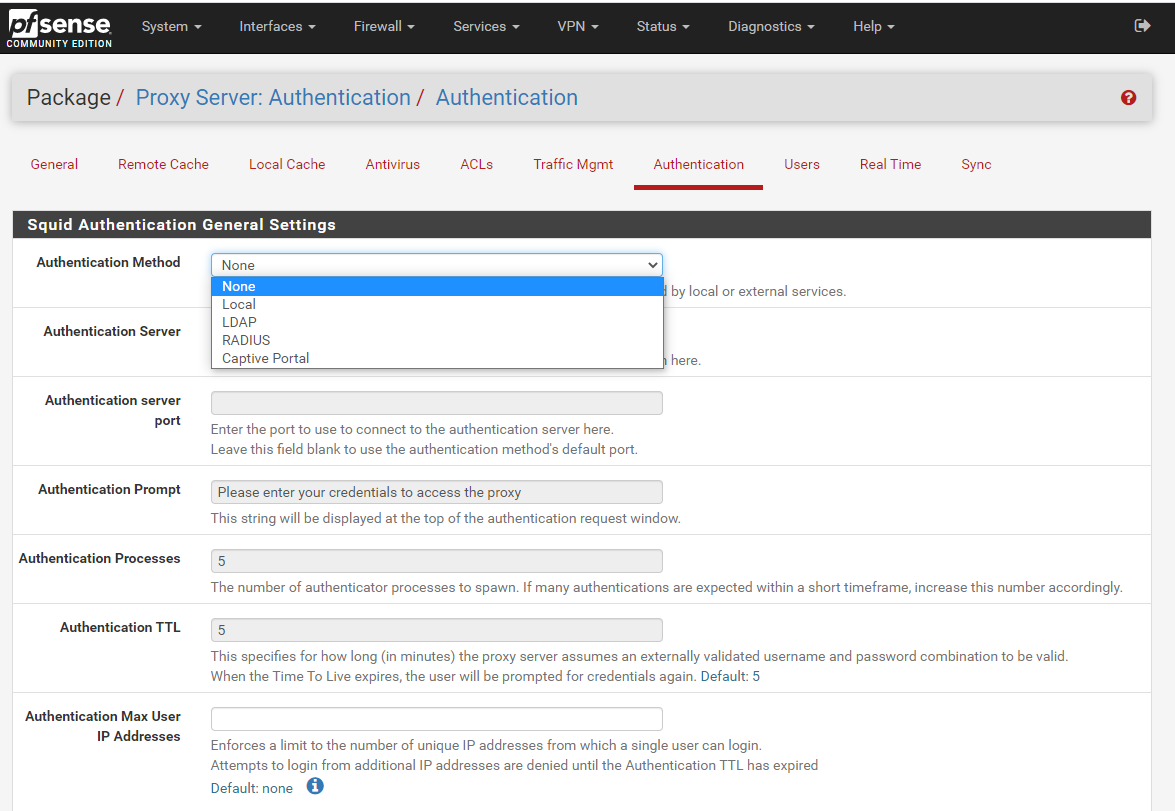
Authentication
By default the Authentication Method of Squid is set to None. If you want to control besides allowed subnets also the the users who are able to use the forward proxy, you can enable authentication under the Authentication tab in squid.
Real Time Logs
Under the Real Time tab you can see the latest access logs regarding requested destinations from the clients.

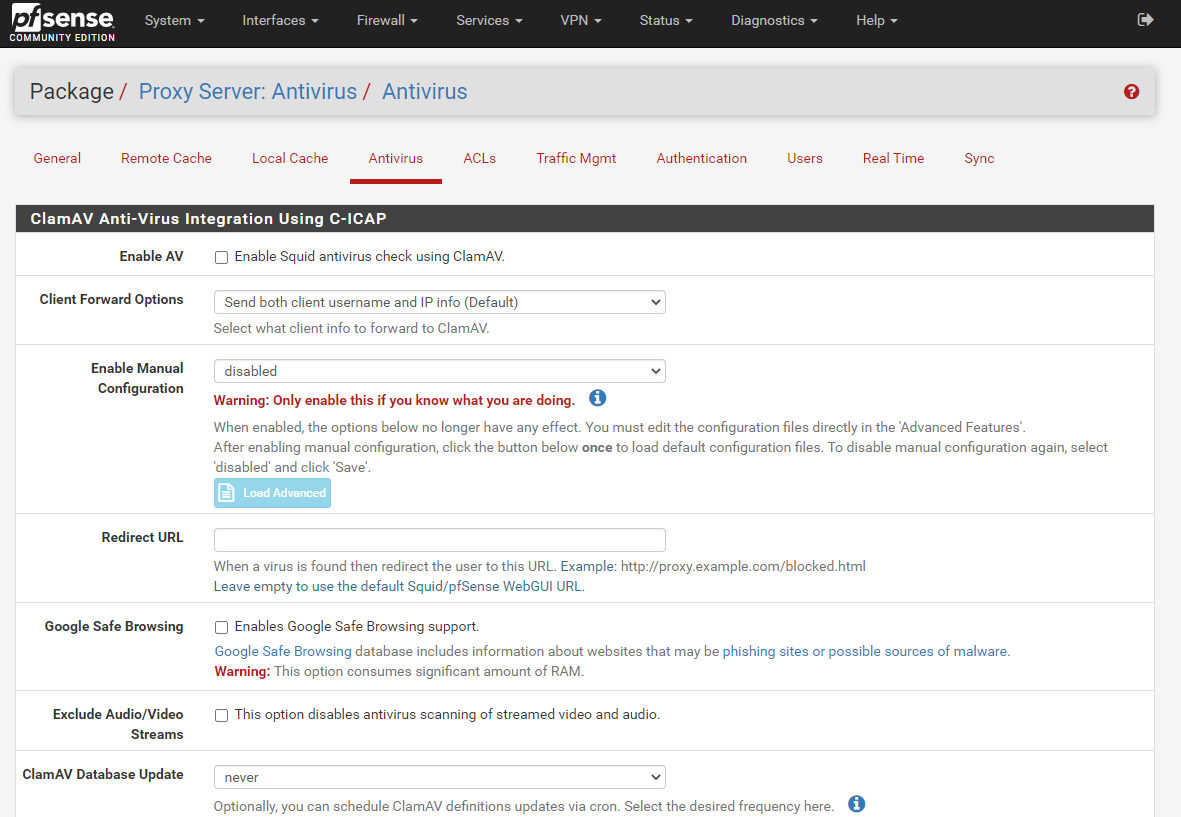
Antivirus
In squid you can enable Antivirus using ClamAV.
ClamAV® is an open source antivirus engine for detecting trojans, viruses, malware & other malicious threats.
https://www.clamav.net/
https://en.wikipedia.org/wiki/Clam_AntiVirus
Intercepting HTTPS Traffic
The CONNECT method is a way to tunnel any kind of connection through an HTTP proxy. By default, the proxy establishes a TCP connection to the specified server, responds with an HTTP 200 (Connection Established) response, and then shovels packets back and forth between the client and the server, without understanding or interpreting the tunneled traffic.
https://wiki.squid-cache.org/Features/HTTPS
It is important to notice that the protocols passed through CONNECT are not limited to the ones Squid normally handles. Quite literally anything that uses a two-way TCP connection can be passed through a CONNECT tunnel. This is why the Squid default ACLs start with deny CONNECT !SSL_Ports and why you must have a very good reason to place any type of allow rule above them.
So by default Squid cannot monitor encrypted HTTPS traffic. Normally with HTTP traffic, the Browser sends a request to the proxy server and is asking to get the requested page on his behalf. Then the proxy established a new connection to the remote site and returns the response to the browser. With HTTP traffic the proxy is able to see the content of the response and can filter it.
But in case the Browser requested HTTPS, he asked the proxy to establish a virtual tunnel between itself and the remote site and then sends encrypted data through the proxy. The FQDN (Domain Name) to which the virtual tunnel must be established is known by the proxy, so he can block the connection to the remote site if it violates existing policies. But in case of the content itself, he have no control to monitor and filter the traffic.
In order to monitor and filter encrypted traffic over HTTPS you can enable HTTPS/SSL Interception in Squid known as SSL Man In the Middle Filtering.
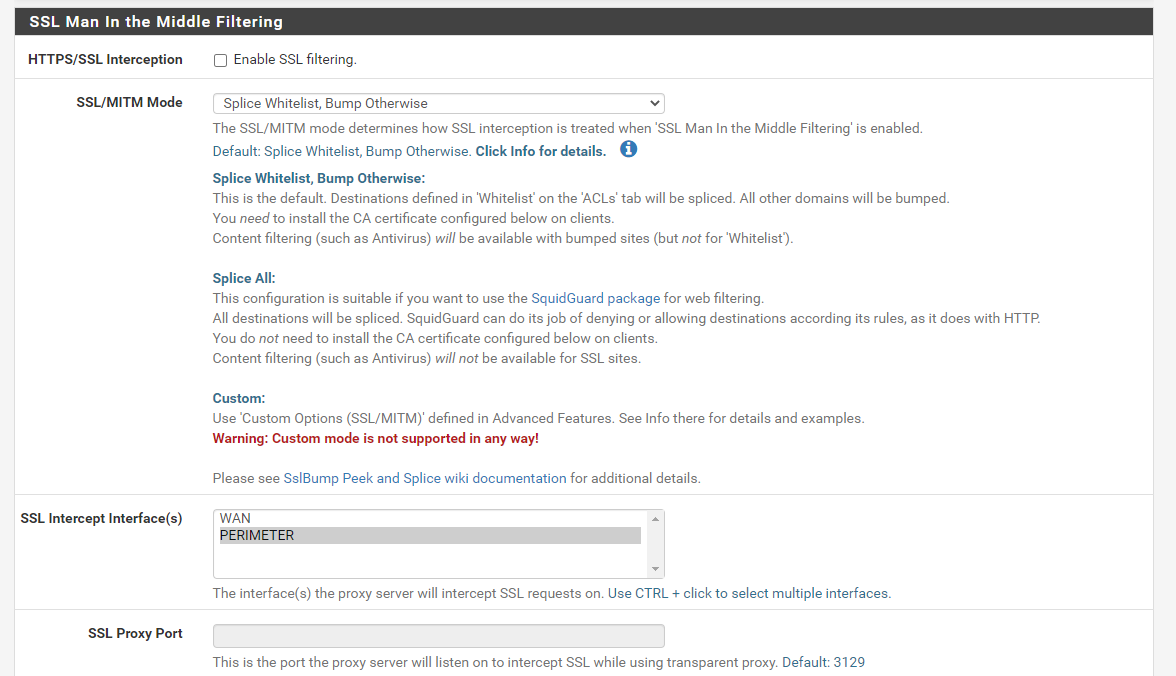
If you enable HTTPS/SSL Interception in squid, the browser needs to trust the proxy to act on their behalf for establishing HTTPS connections, filter them and pass allowed data to the browser while blocking everything which violates the policies. So you need to select a CA in the SSL Man In the Middle Filtering section of the squid configuration and be sure that the clients will trust this CA.
Squid-in-the-middle SSL Bump
https://wiki.squid-cache.org/Features/SslBump
SslBump Peek and Splice
https://wiki.squid-cache.org/Features/SslPeekAndSplice
Configure Proxy Settings (Explicit Proxy)
In order to use the Forward Proxy for internet connection on the clients and servers, we have to configure the proxy on them. Below you see the steps to configure a proxy on Ubuntu and Cent OS.
Intercepting HTTPS Traffic Using the Squid Proxy Service in pfSense
https://turbofuture.com/internet/Intercepting-HTTPS-Traffic-Using-the-Squid-Proxy-in-pfSense
Ubuntu
On Ubuntu and any other Linux distribution you can configure proxy setting using environment variables.
There are several environment variables available in Linux to setup a proxy for HTTP, HTTPS and FTP.
http_proxy
https_proxy
ftp_proxy
no_proxy
If you want the proxy settings permanent for all users you can configure them by setting up global variables in /etc/environment file.
Add the following lines at the end of the environment file.
http_proxy="http://<ip or fqdn proxy>:3128/"
https_proxy="http://<ip or fqdn proxy>:3128/"
ftp_proxy="http://<ip or fqdn proxy>:3128/"
no_proxy="localhost,127.0.0.1,::1
In case authentication is requested for the proxy use the following format:
proxy_http=username:password@proxy-host:port
Another way to set it permanently for all users is to set it with the profile file for all users /etc/profile
In this case best practices is to create a new file inside the /etc/profile.d/ directoy. All *.sh files in this directory will be read/imported by the /etc/profile file and applied to all users at login.
So create a file in /etc/profile.d/ for example proxy.sh and add the following lines.
The name doesn’t matter but the extension must be .sh
# set proxy config via profie.d - should apply for all users
#
export http_proxy="http://<ip or fqdn proxy>:3128/"
export https_proxy="http://<ip or fqdn proxy>:3128/"
export ftp_proxy="http://<ip or fqdn proxy>:3128/"
export no_proxy="127.0.0.1,localhost"
In contrast if you want only set the proxy for a single user, add the above lines directly into the shell profile file, default Bash in Ubuntu.
~/.profile in a default installation.
You need to logoff and login again to get the settings kick in for your session!
To control if the proxy is correctly added to the environment variables with the profile file, you can run the printenv command.
Note:
https://askubuntu.com/questions/29239/where-is-bash-profile
You do not usually have .bash_profile on Ubuntu, nor should you usually create that file
You can create it in your Home Directory but if you do, you should be careful, because it will prevent bash from automatically running the commands in .profile – which you almost certainly do have.
When bash runs as a login shell, it runs the first of .bash_profile, .bash_login, or .profile that exists in your home directory. If you have bash-specific commands that you want to run when you log in–but only when bash is your shell–you could put them in .bash_profile. But the mere existence of .bash_profile would prevent .profile from being used.
So then you would want to source .profile from .bash_profile, assuming you wanted those commands to be run too, which you almost always would. You could do that by putting this command in .bash_profile:
. ~/.profilehttps://askubuntu.com/questions/969632/where-is-bash-profile-located-in-windows-subsystem-for-linux/969635#969635
By default, it first reads and executes commands from the file > /etc/profile, if that file exists. After reading that file, it looks for ~/.bash_profile, ~/.bash_login, and ~/.profile, in that order, and reads and executes commands from the first one that exists and is readable.
Testing Internet Connection from the Clients using the Proxy
If you working only in a terminal session without the possibility to use a browser (X11 Forwarding using an X11 Server on the Client is another topic 🙂 ), you could use several commands to test if outbound internet connection is working. For commands like apt and wget you can configure the proxy to use in separate files, but by default they use also the environment variables of your user session you set above.
The Ping tool wouldn’t work as it operates on ICMP which is directly on the network layer located like TCP or UDP.
Squid itself only supports HTTP and FTP which are on the higher application layer located.
https://en.wikipedia.org/wiki/Squid_(software)
Squid includes limited support for several other protocols including Internet Gopher, SSL,TLS and HTTPS.
Squid does not support the SOCKS protocol unlike Privoxy, with which Squid can be used in order to provide SOCKS support.https://en.wikipedia.org/wiki/SOCKS
SOCKS itself can proxies TCP connections to an arbitrary IP address, and provides a means for UDP packets to be forwarded.
Instead of using Ping you can use the httping tool which sends per default HEAD requests to a webserver. Also it supports a lot of switches like -G to send GET requests instead of HEAD requests.
You can simply test as follows, first with the default HEAD request and second with the GET request.
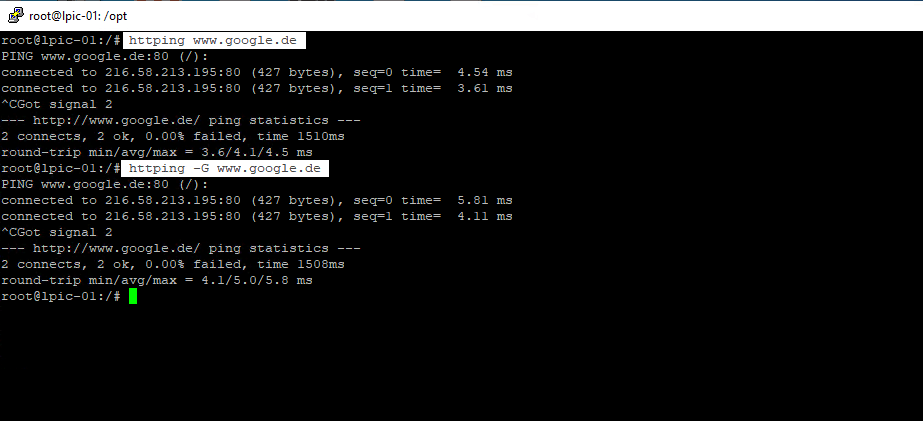
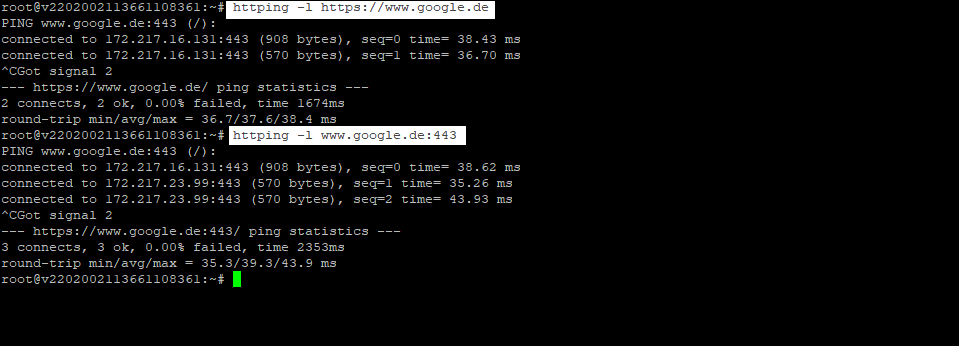
Per default as you can see in the screenshot above httping is using port 80, to connect using SSL/TLS you can set the -l flag and also need to set https for the URL or a 443 portnumber.
More about httping
https://www.vanheusden.com/httping/
https://linux.die.net/man/1/httping
You can install httping as usual with
apt install httping
Setting up the Proxy for APT
As mentioned above, APT uses by default the environment variables to detect the proxy for outbound internet connection. But in case you need a different proxy for the APT tool or do not want to deploy the settings generally with environment variables, you can configure a separate dedicated configuration file for APT. So create a new file under /etc/apt/apt.conf.d/, in my case I use http_proxy as file name but you can use any other name, it doesn’t matter. APT reads all files and executed the commands inside the file.
Add the following lines to this file:
Acquire::http::Proxy "http://<ip or fqdn proxy>:3128/"
Acquire::https::Proxy "http://<ip or fqdn proxy>:3128/"
Setting up the Proxy for WGET
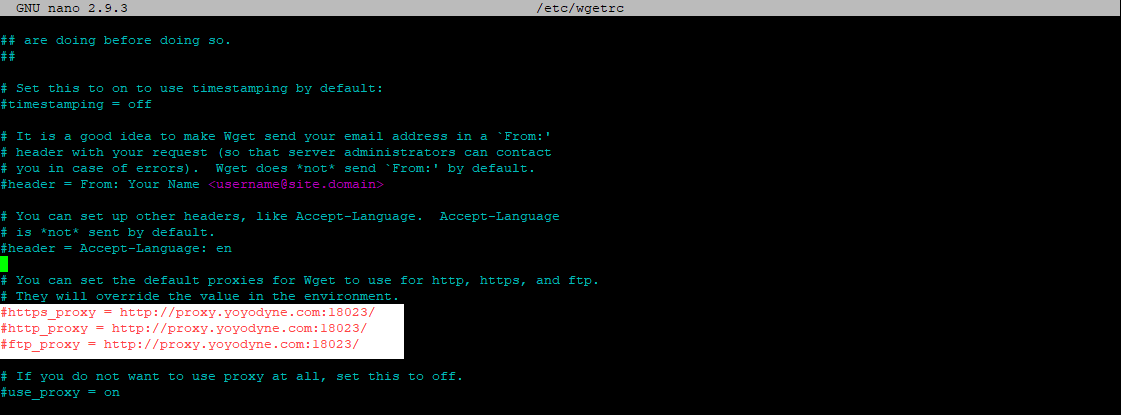
The same regarding APT and environment variables, WGET also uses them by default. Also you can configure the proxy in a dedicated file located under /etc/wgetrc.
Inside the file you can uncomment the following lines in the screenshot and adjust your proxy url.
As you can read in the wgetrc file in the comments of the proxy settings: You can set the default proxies for Wget to use for http, https, and ftp. They will override the value in the environment.
So you generally as mentioned not to have to configure this settings in order to be able to use the proxy with Wget, as long as you have set the proxy in the environment variables.
If you only want some users to be able to use WGET with the proxy or a different proxy, add the file to the users Home ~/.wgetrc
Provided that the proxy wasn’t configured already in the environment variables for this user.
CentOS
Configuring the proxy under CentOS permanent for all users you can also use the environment variables and also the same way to configure them as above in Ubuntu.
Also for Wget it is the same as with Ubuntu, generally Wget utilizes the environment variables for the proxy and also you can add a desired proxy directly in /etc/wgetrc for all users or inside the Home Directory for a single user like in Ubuntu.
As CentOS by default use YUM as package management utility instead of APT with Ubuntu, the configuration is set in /etc/yum.conf.
Add the following line at the end of yum.conf:
proxy=http://<ip or fqdn proxy>:3128# optional if authentication is requested
proxy_username=<Proxy-User-Name>
proxy_password=<Proxy-Password>
Windows
In Windows there are several options to configure a proxy.
- WinINET library
- WinHTTP library
- manual proxy settings in Windows or IE
The Windows Internet (WinINet) application programming interface (API) enables your application to interact with FTP and HTTP protocols to access Internet resources. As standards evolve, these functions handle the changes in underlying protocols, enabling them to maintain consistent behavior.
With a few exceptions, WinINet is a superset of WinHTTP. When selecting between the two, you should use WinINet, unless you plan to run within a service or service-like process that requires impersonation and session isolation.
WinINet vs. WinHTTP
https://docs.microsoft.com/en-us/windows/win32/wininet/wininet-vs-winhttp
Windows HTTP Services
https://docs.microsoft.com/en-us/windows/win32/winhttp/winhttp-start-page
About WinINet
https://docs.microsoft.com/en-us/windows/win32/wininet/about-wininet
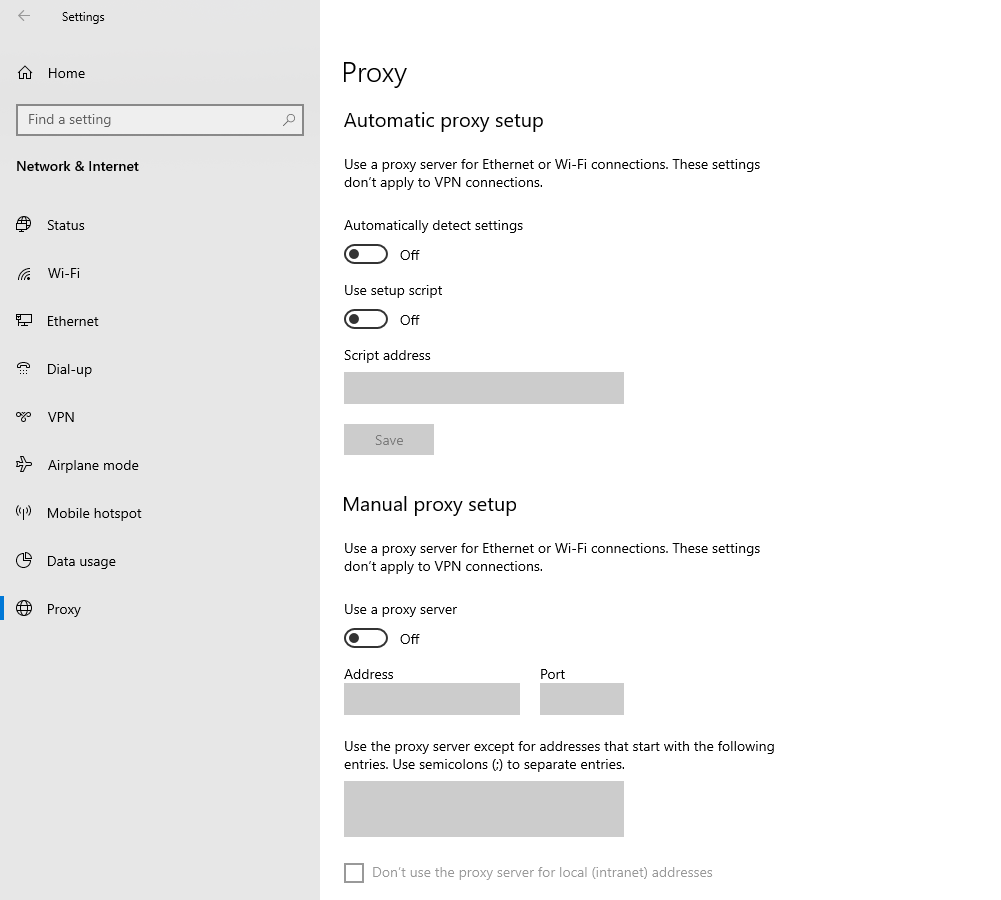
With the GUI – Settings – Network & Internet – Proxy – Manual proxy setup
Set up the proxy here will be leverage the WinINET library which is the core of Internet Explorer. Alternatively you can set it directly in Internet Explorer, both settings will affect the same and can be used by other applications using the WinINET library.
Set up the WinHTTP library can be done with the netsh command.
https://securelink.net/en-be/insights/windows-proxy-settings-explained
WinHTTP is more suited for non-interactive usage, such as windows services or background tasks that need to communicate over HTTP where no user-interaction is required. It is a lot faster than the WinINET library. WinHTTP is also easily accessed from .NET based applications making it a popular library for .NET Applications. WinHTTP by default does not use the proxy settings from WinINET. Typical examples for applications and services using WinHTTP are:
- Adding/Removing features and roles in Windows 8.
- Windows Update
- Certificate validation of code
- Signed binaries / .NET applications that validate the certificate during application launch.
- Exchange Server
For both WinINET and WinHTTP, the proxy can be configured using different mechanisms:
- proxy auto-configuration scripts
- auto-discovery
- manual configuration
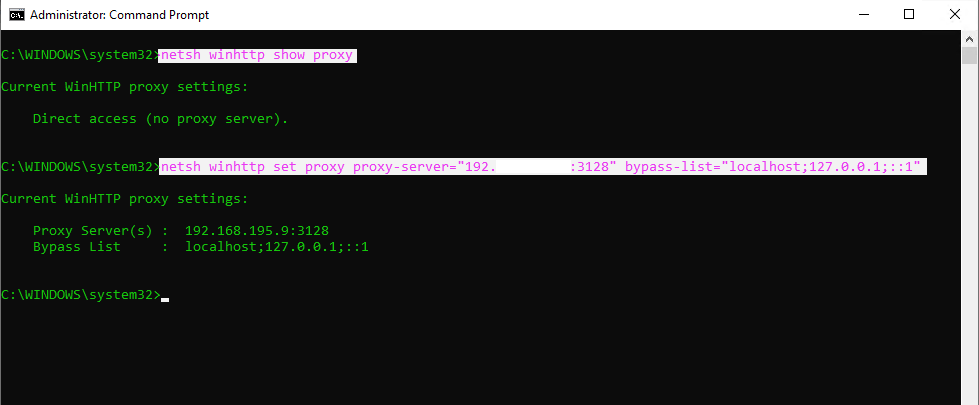
to show WinHTTP proxy settings on the client
netsh winhttp show proxy
to set new WinHTTP proxy settings on the client
netsh winhttp set proxy proxy-server=”proxyserver:port” bypass-list=”localhost; 127.0.0.1; ::1″
to reset WinHTTP proxy settings on the client
netsh winhttp reset proxy
import the IE proxy settings of the current user
netsh winhttp import proxy source=ie
Web Proxy Auto-Discovery Protocol (WPAD) – wpad.dat
The Web Proxy Auto-Discovery (WPAD) Protocol is a method used by clients to locate the URL of a configuration file using DHCP and/or DNS discovery methods. Once detection and download of the configuration file is complete, it can be executed to determine the proxy for a specified URL.
https://en.wikipedia.org/wiki/Web_Proxy_Auto-Discovery_Protocol
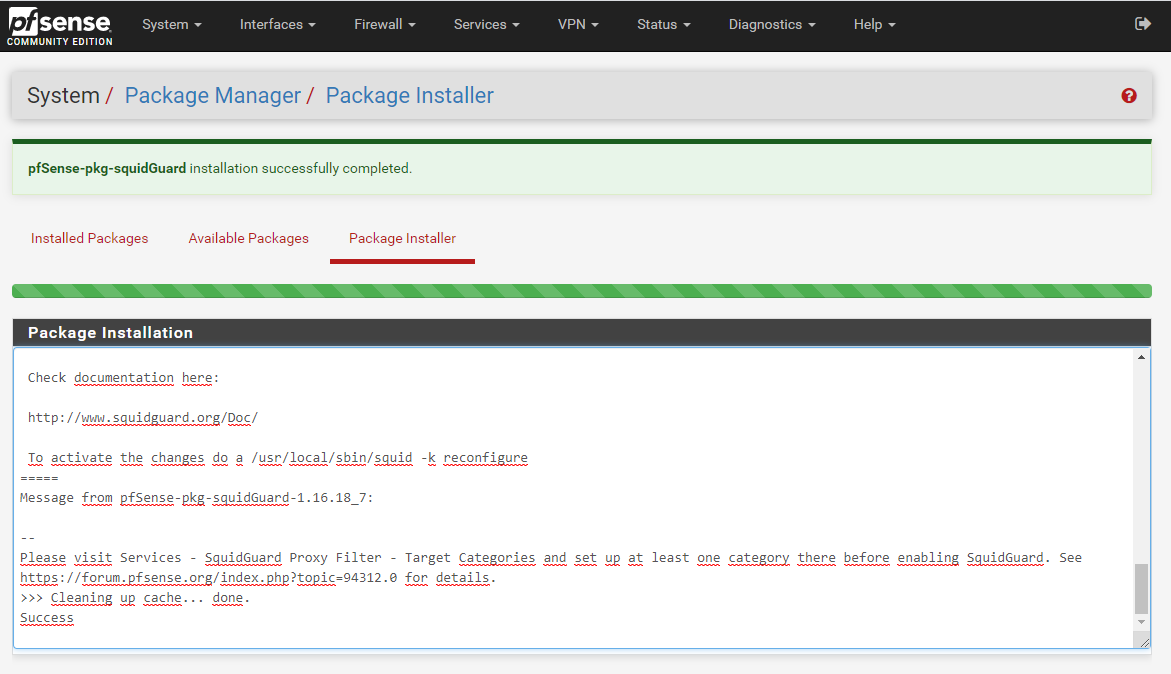
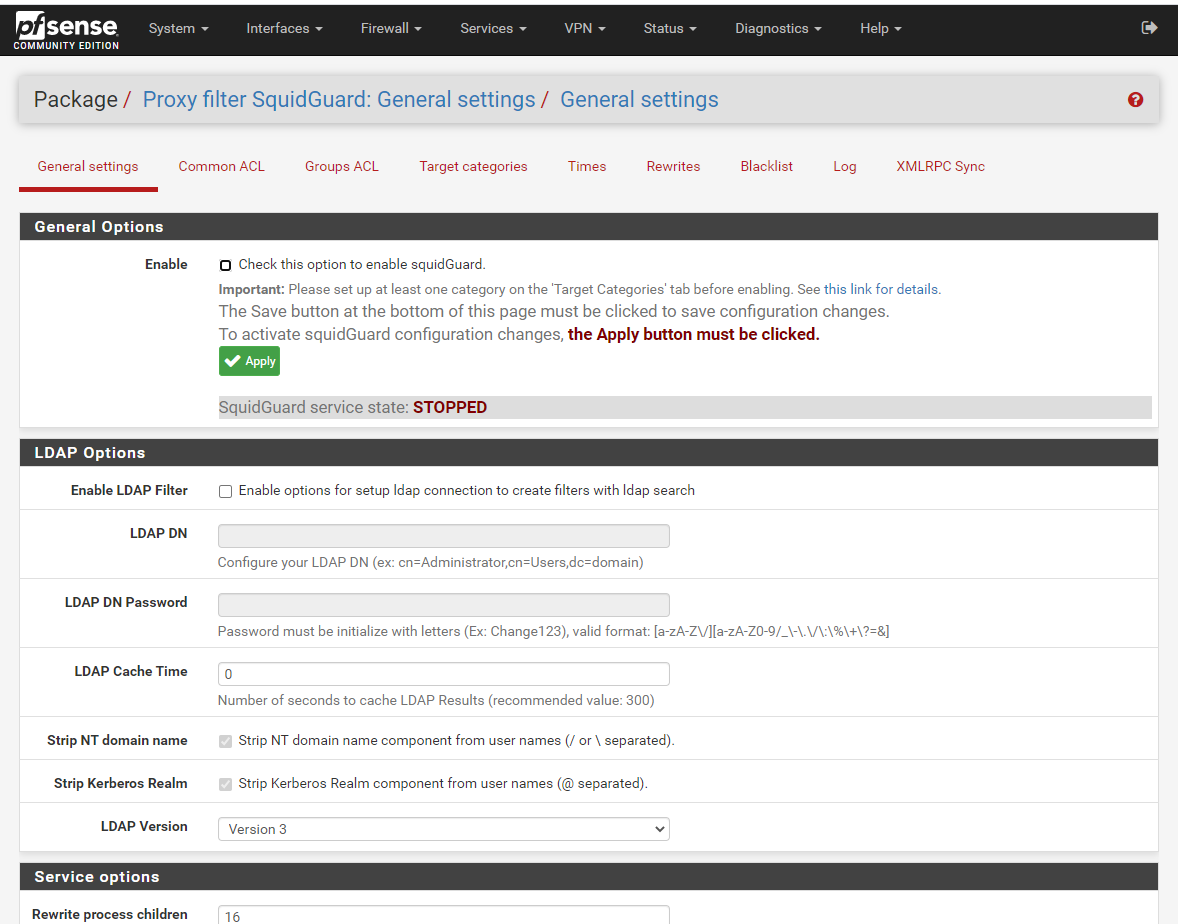
Install squidGuard
SquidGuard is a URL redirector software, which can be used for content control of websites users can access. It is written as a plug-in for Squid and uses blacklists to define sites for which access is redirecte
http://www.squidguard.org
https://en.wikipedia.org/wiki/SquidGuard
Links
squid-cache.org
www.squid-cache.orgSquid
https://en.wikipedia.org/wiki/Squid_(software)List of open source/free proxy/forward proxy/reverse proxy/cache/ server software
https://dannyda.com/2020/01/03/list-of-open-source-free-proxy-forward-proxy-reverse-proxy-cache-server-software/Privoxy
https://en.wikipedia.org/wiki/PrivoxySOCKS
https://en.wikipedia.org/wiki/SOCKSWindows Proxy Configuration
https://www.msxfaq.de/netzwerk/grundlagen/windows_http_proxy.htmWindows proxy settings explained
https://securelink.net/en-be/insights/windows-proxy-settings-explainedConfigure WinINET proxy server
https://blog.workinghardinit.work/2020/03/06/configure-wininet-proxy-server-with-powershell/
The best home for modern WordPress sites built on the Google Cloud Platform