Set up Windows Autopilot – Part 1
In this post I want to show, how you can enroll step by step windows 10 devices using Windows Autopilot.
I will set up a VM in my lab environment which will be enrolled to Azure AD (Azure AD joined) and without any further applications or policies applied to.
In Part 2 I will also set up a VM but this time as Hybrid Azure AD joined to my production environment with pre-installed apps like Notepad++ and a configured VPN for onboarding the device outside the corporate network.
Overview of Windows Autopilot
https://docs.microsoft.com/en-us/mem/autopilot/windows-autopilot
Windows Autopilot is a collection of technologies used to set up and pre-configure new devices, getting them ready for productive use.
When initially deploying new Windows devices, Windows Autopilot uses the OEM-optimized version of Windows 10. This version is preinstalled on the device, so you don’t have to maintain custom images and drivers for every device model. Instead of re-imaging the device, your existing Windows 10 installation can be transformed into a “business-ready” state that can:
– apply settings and policies
– install apps
– change the edition of Windows 10 being used (for example, from Windows 10 Pro to Windows 10 Enterprise) to support advanced features.
To set up Windows Autopilot I used the following article from Microsoft which is well documented step by step.
Demonstrate Autopilot deployment
https://docs.microsoft.com/en-us/windows/deployment/windows-autopilot/demonstrate-deployment-on-vm
To get started with Windows Autopilot, you should try it out with a virtual machine (VM) or you can use a physical device that will be wiped and then have a fresh install of Windows 10.
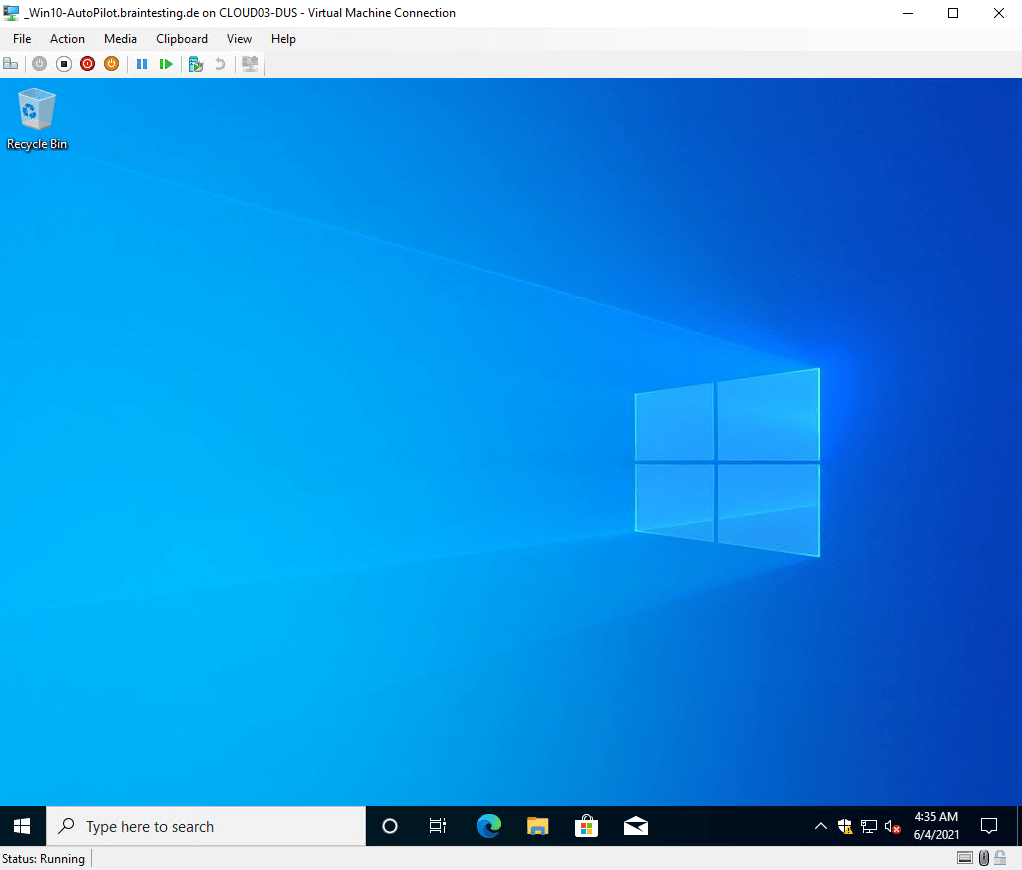
I am also using a VM from my lab environment to set up Windows Autopilot, but it can also be a physical device like a notebook, there will be no difference regarding setting up Windows Autopilot.
Prerequisites
Windows 10 installation media – Windows 10 Professionel or Enterprise.
Azure AD Premium subscription.
The VM must be running Windows 10, version 1903 or a later version.
Assuming we will have a running Windows 10 VM, we will first need to capture the hardware ID as follows.
Normally, the Device ID is captured by the OEM as they run the OA3 Tool on each device in the factory. The OEM (Original Equipment Manufacturer) then submits the 4K HH created by the OA3 Tool to Microsoft by submitting it with a Computer Build Report (CBR). For purposes of this lab, you are acting as the OEM (capturing the 4K HH), but you’re not going to use the OA3 Tool to capture the full 4K HH for various reasons (you’d have to install the OA3 tool, your device couldn’t have a volume license version of Windows, it’s a more complicated process than using a PowerShell script, etc.).
Instead, you’ll simulate running the OA3 tool by running a PowerShell script, which captures the device 4K HH just like the OA3 tool.
Manual registration overview
https://docs.microsoft.com/en-us/mem/autopilot/manual-registration
Manually register devices with Windows Autopilot
https://docs.microsoft.com/en-us/mem/autopilot/add-devices
Using the OA 3.0 tool on the factory floor
https://docs.microsoft.com/en-us/windows-hardware/manufacture/desktop/oa3-using-on-factory-floor
The OA 3.0 tool (OA3Tool.exe) is part of the Windows Assessment and Deployment Kit (Windows ADK). For installation instructions, see Installing the Windows ADK.
The OA 3.0 tool creates the hardware association that joins a single Microsoft-issued Windows product key to a single computer.
Now on the client, the Windows 10 VM in my case, open PowerShell and run the following commands.
md c:\HWID
Set-Location c:\HWID
Set-ExecutionPolicy -Scope Process -ExecutionPolicy Unrestricted -Force
Install-Script -Name Get-WindowsAutopilotInfo -Force
$env:Path += ";C:\Program Files\WindowsPowerShell\Scripts"
Get-WindowsAutopilotInfo.ps1 -OutputFile AutopilotHWID.csv
When you are prompted to install the NuGet package, choose Yes.
See the sample output below. A dir command is issued at the end to show the file that was created.
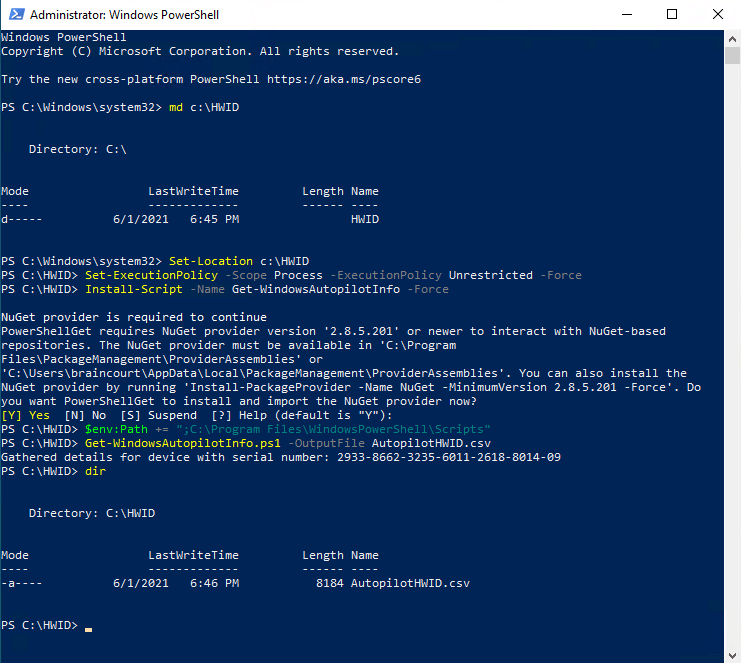
Verify that there is an AutopilotHWID.csv file in the c:\HWID directory that is about 8 KB in size. This file contains the complete 4K HH.
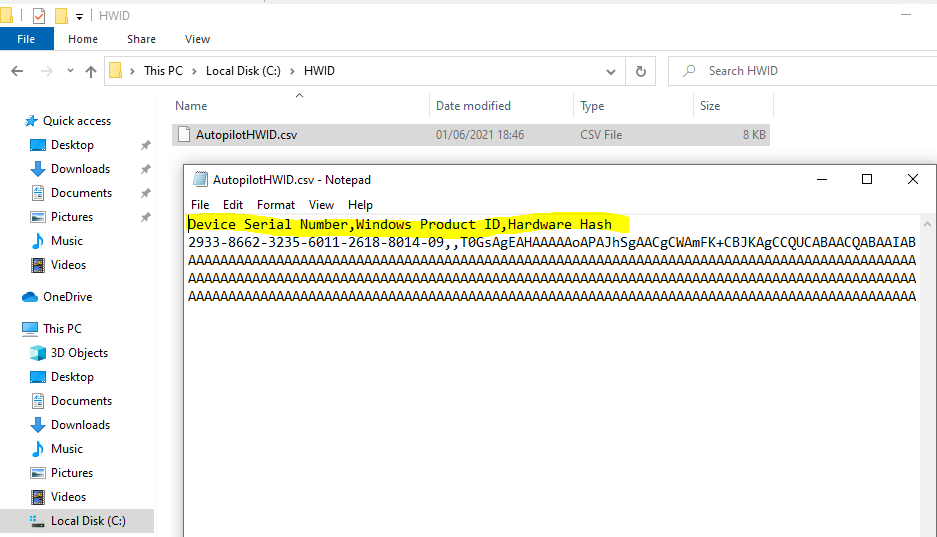
You will need to upload this data into Intune to register your device for Autopilot, so the next step is to transfer this file to the computer you will use to access the Azure portal. If you are using a physical device instead of a VM, you can copy the file to a USB stick. If you’re using a VM, you can right-click the AutopilotHWID.csv file and copy it, then right-click and paste the file to your desktop (outside the VM).
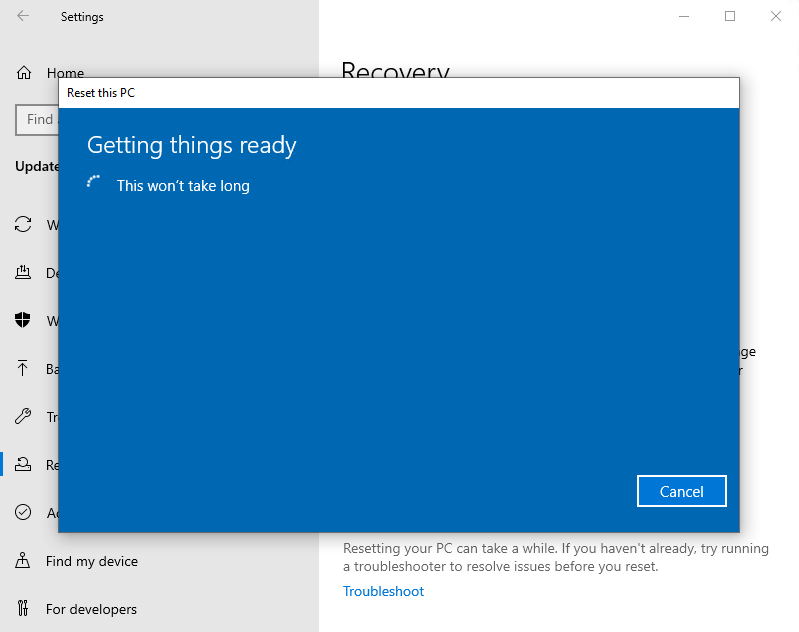
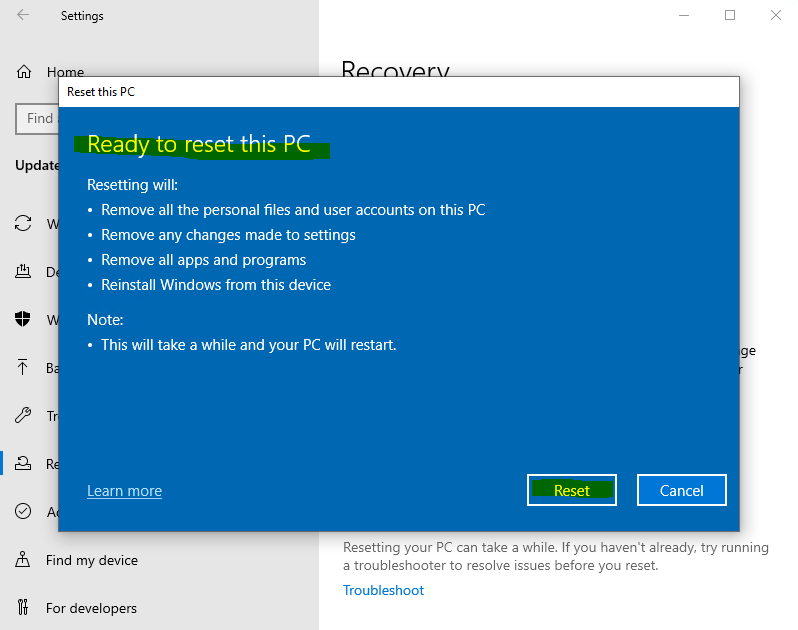
The next step is to reset the VM or physical device back to Out-Of-Box-Experience (OOBE).
With the hardware ID captured in a file, prepare your Virtual Machine for Windows Autopilot deployment by resetting it back to OOBE.
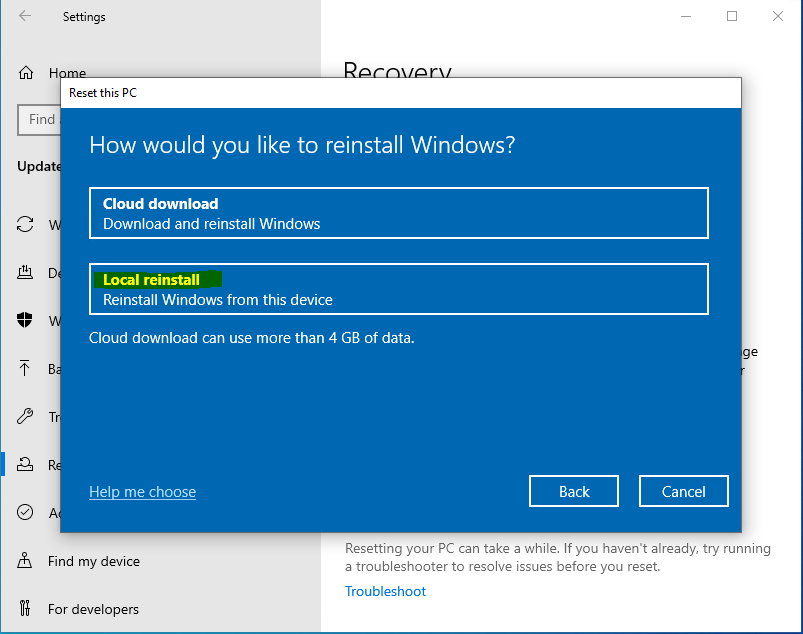
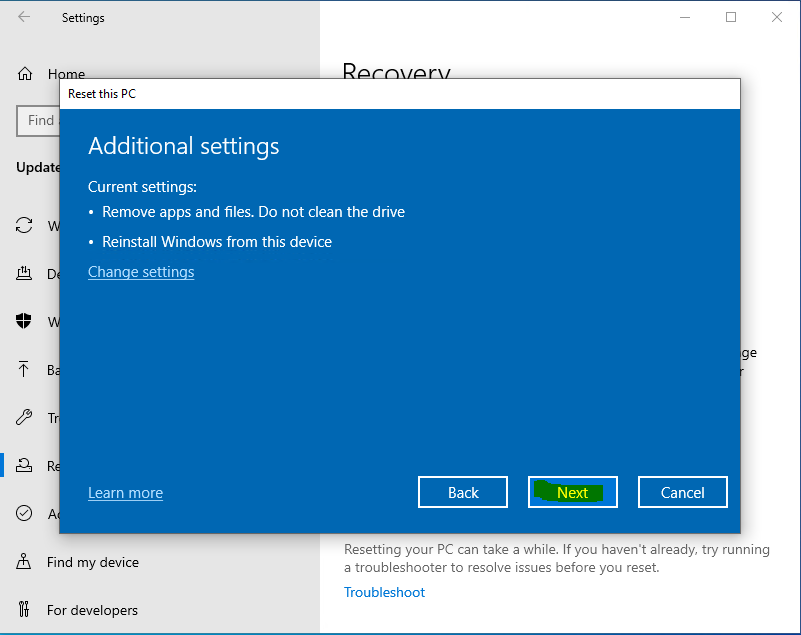
On the Virtual Machine, go to Settings > Update & Security > Recovery and click on Get started under Reset this PC. Select Remove everything and Just remove my files. If you are asked How would you like to reinstall Windows, select Local reinstall. Finally, click on Reset
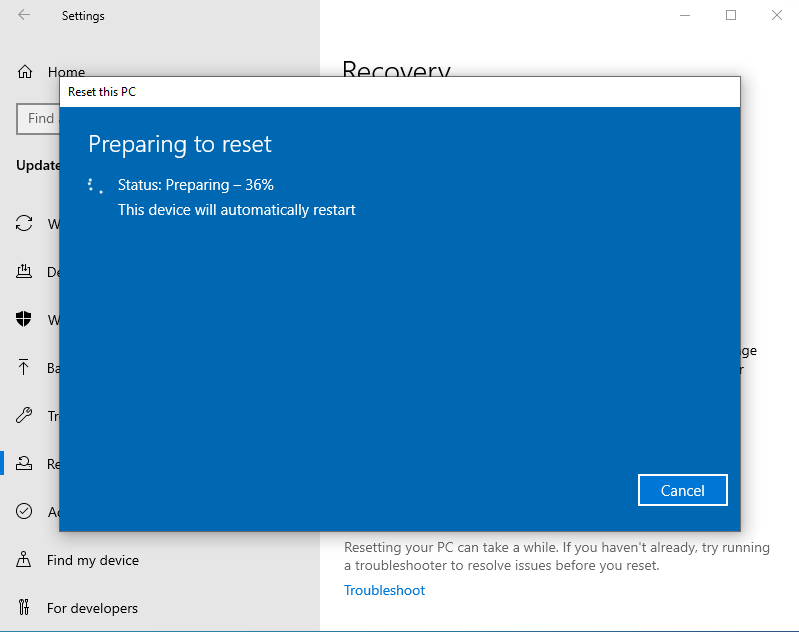
Resetting the VM or device can take a while. Proceed to the next step (verify subscription level) during the reset process.

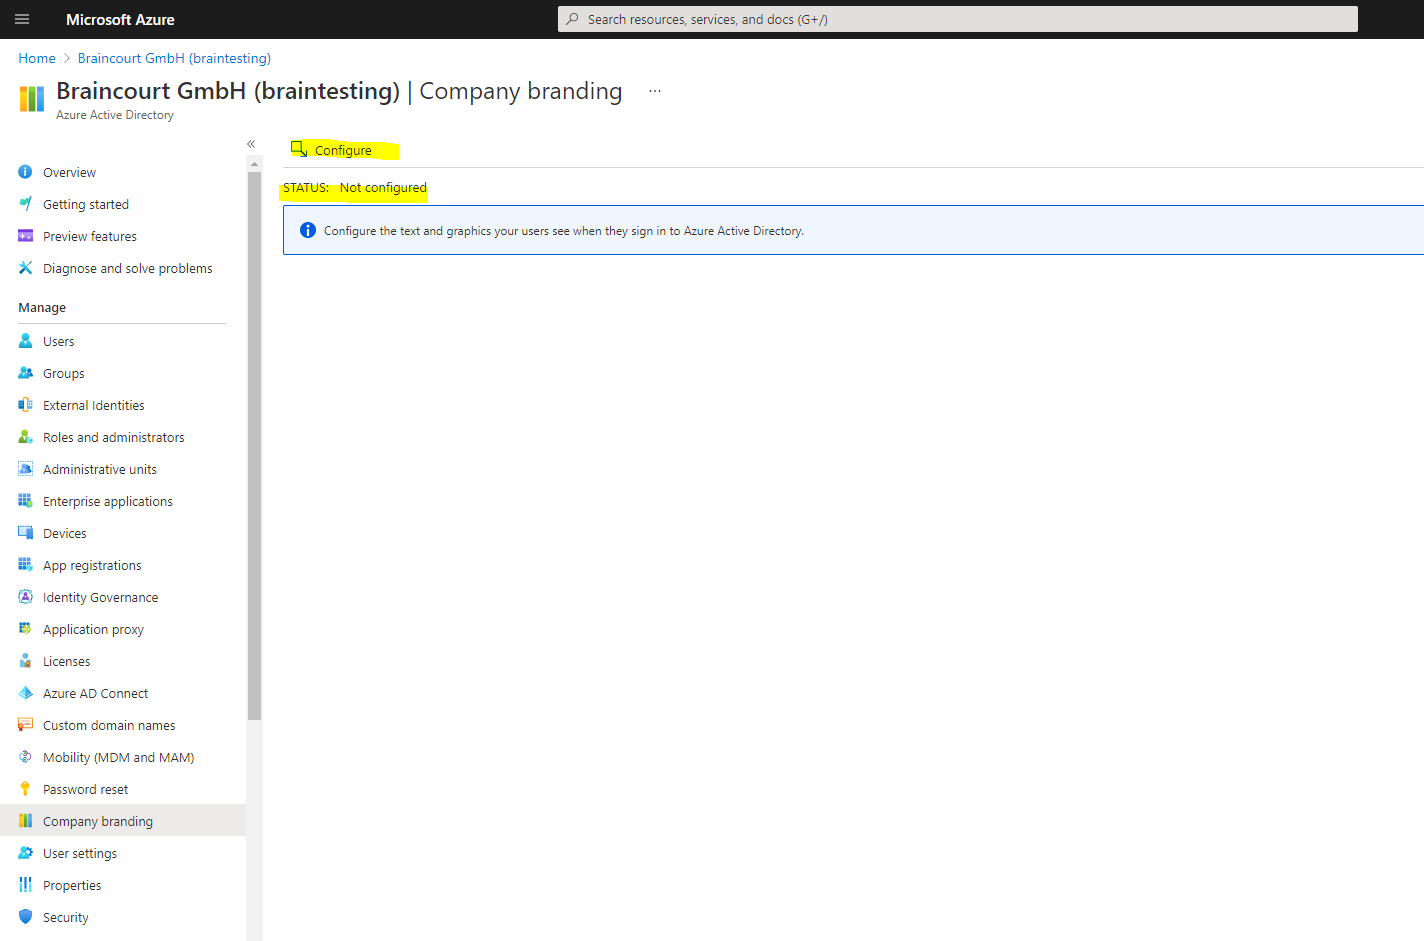
We now switch to the Azure portal to configure our company branding under Azure AD -> Company Branding
click on Configure and configure any type of company branding you’d like to see during the OOBE.
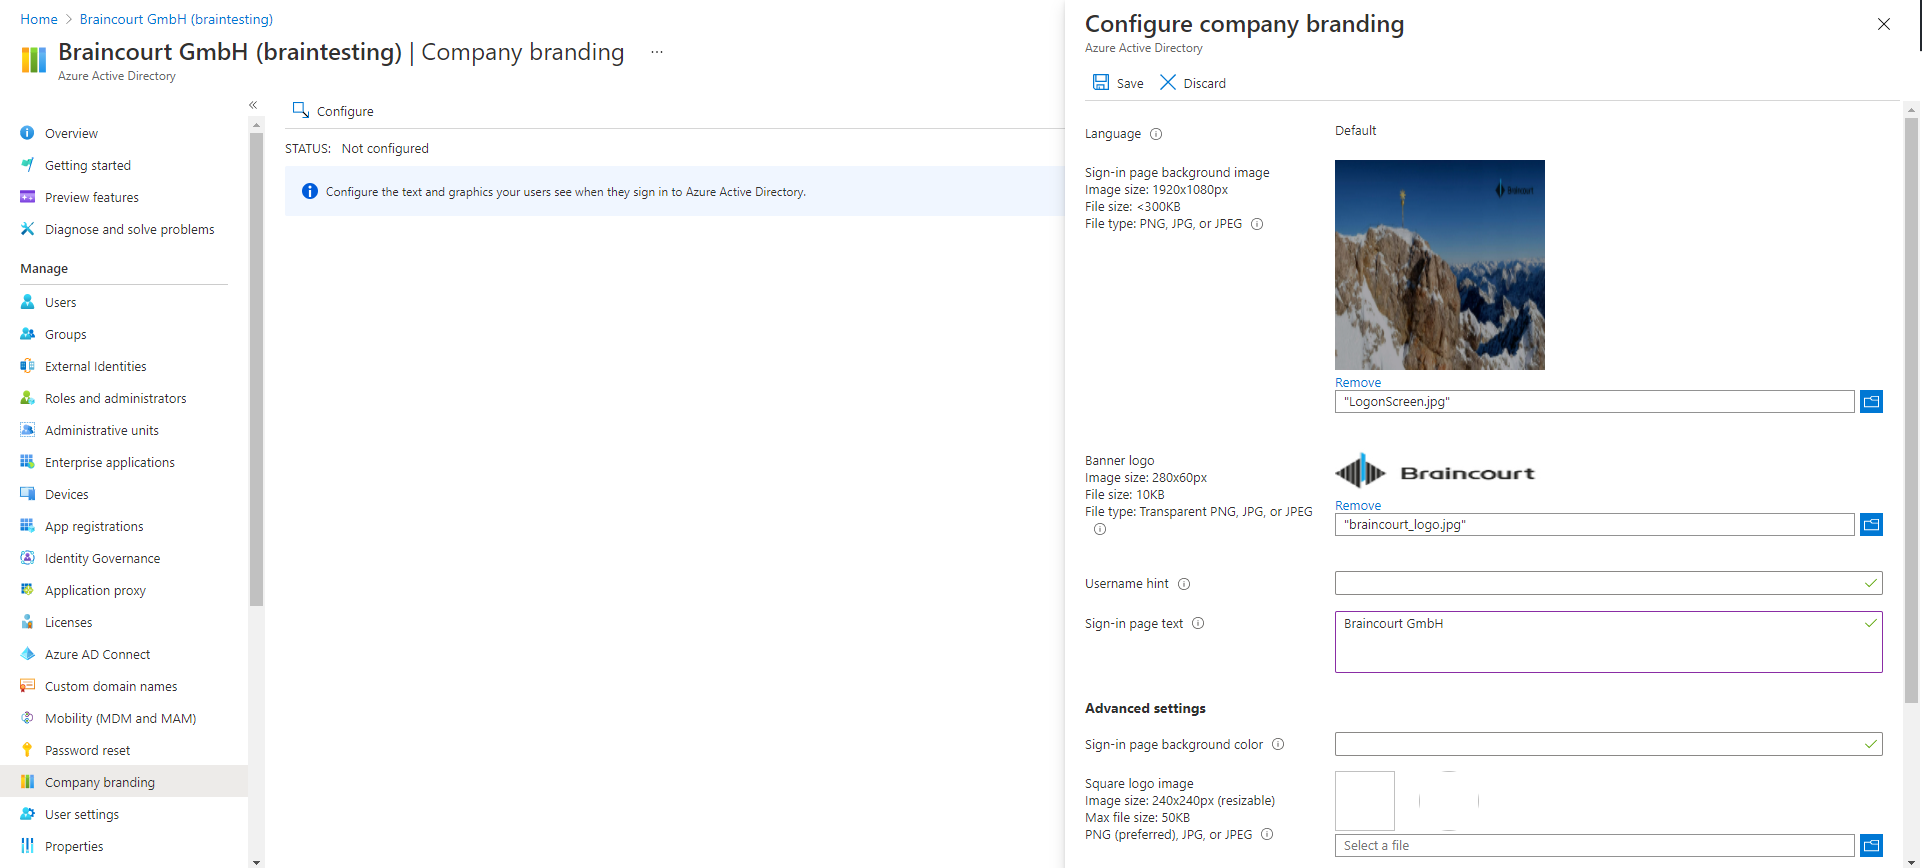
When you are finished, click Save.
Changes to company branding can take up to 30 minutes to apply.
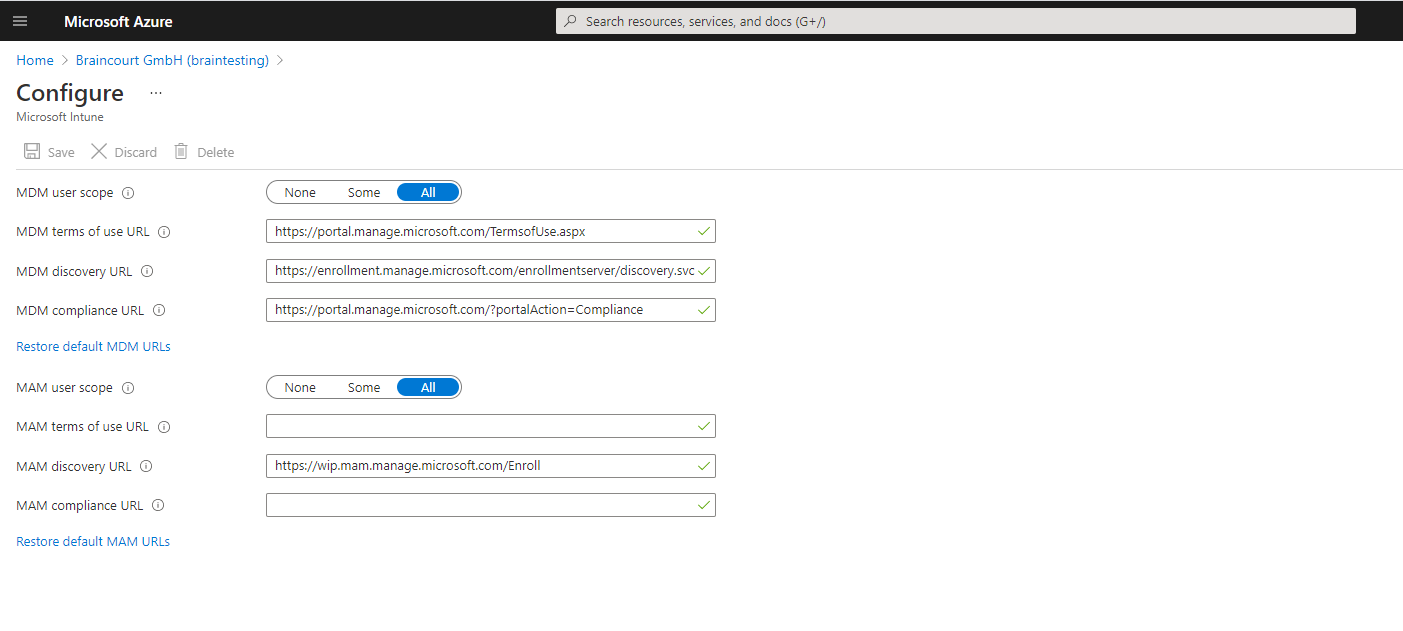
Now we need to configure Microsoft Intune auto-enrollment.
Open Mobility (MDM and MAM) in Azure Active Directory and select Microsoft Intune. If you do not see Microsoft Intune, click Add application and choose Intune.
For the purposes of this demo, select All under the MDM user scope and click Save.
Next we have to register our VM in Azure AD via Intune.
Your VM (or device) can be registered either via Intune or Microsoft Store for Business (MSfB). Both processes are shown here, but only pick one for purposes of this lab. We highly recommend using Intune rather than MSfB.
So I will only use Intune here.
Microsoft Endpoint Manager admin center
https://endpoint.microsoft.com
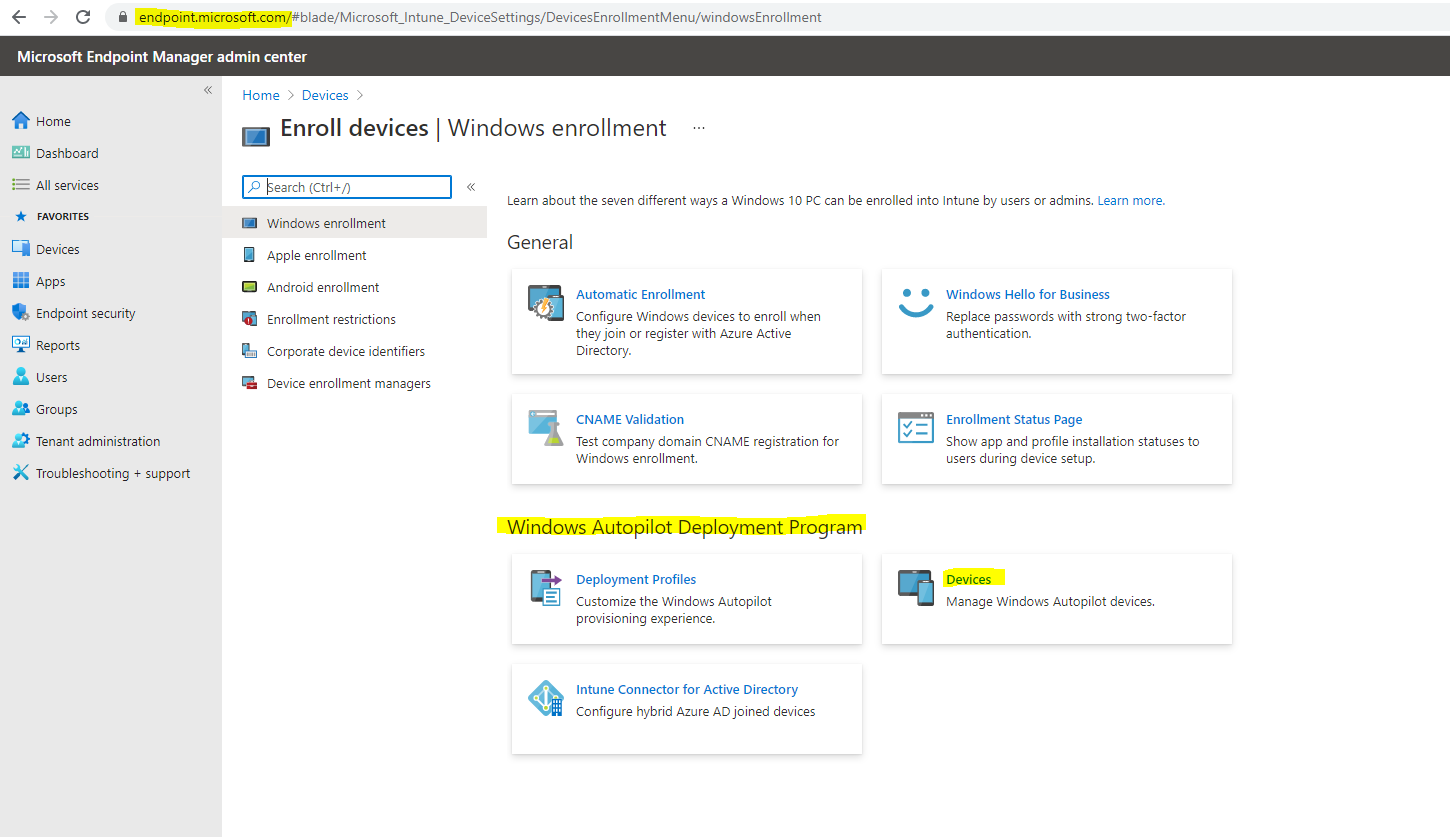
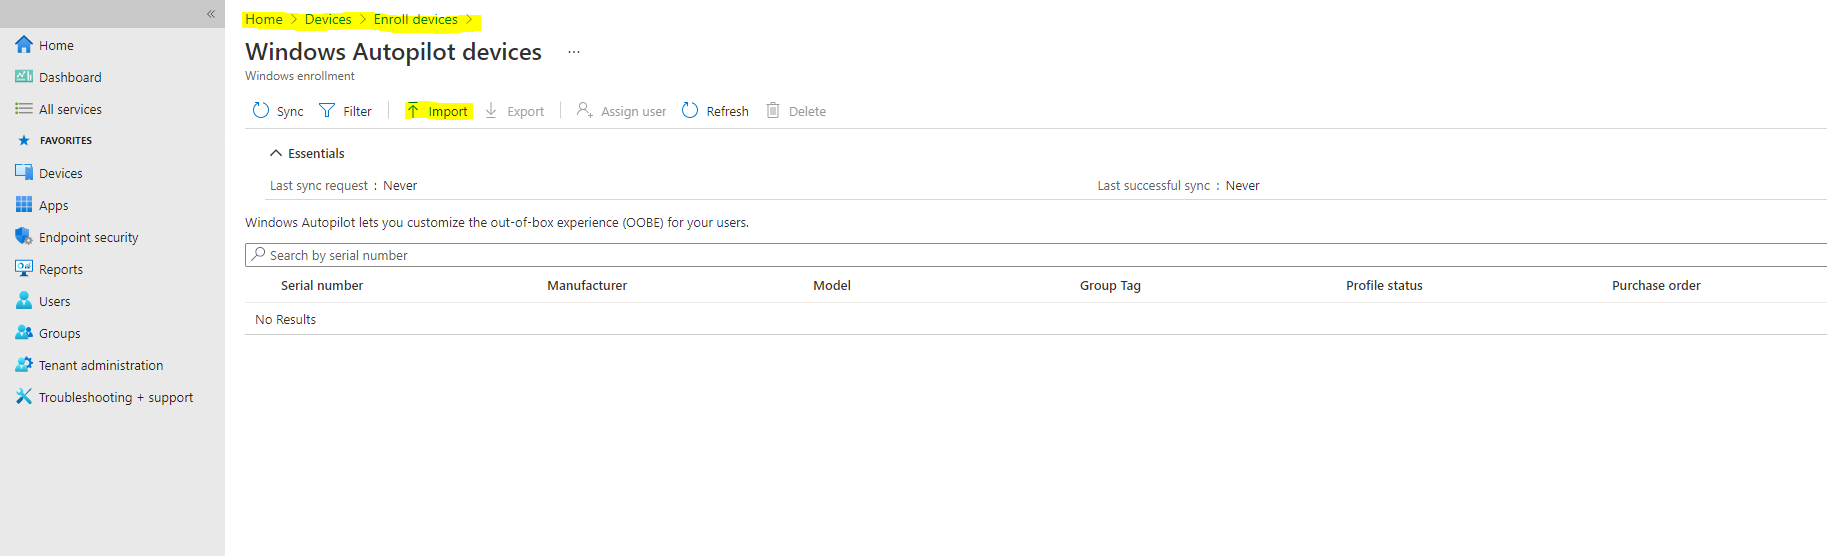
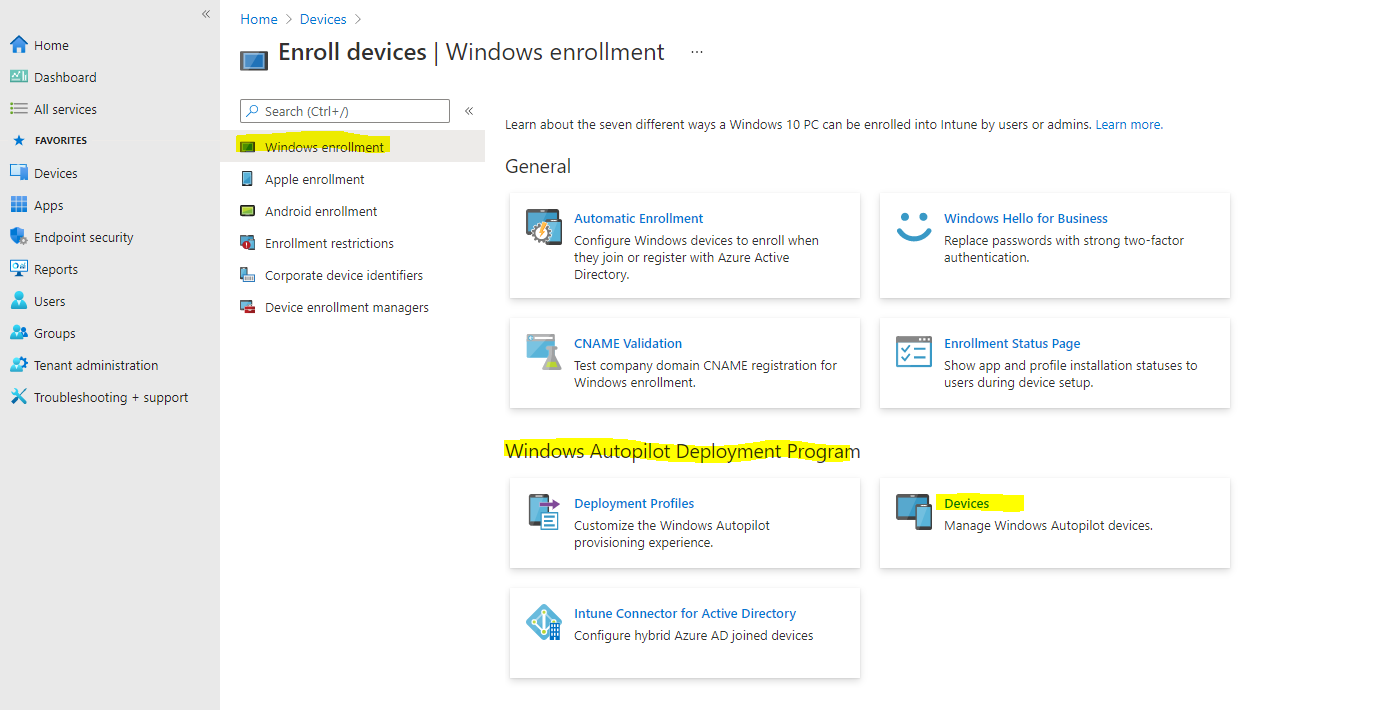
In the Microsoft Endpoint Manager admin center, choose Devices > Device enrollment | Enroll devices > Windows enrollment > Windows Autopilot Deployment Program | Devices and then on the Windows Autopilot devices page, choose Import.
In my lab environment I will first have to enable device management.
Set the mobile device management authority
https://docs.microsoft.com/en-us/mem/intune/fundamentals/mdm-authority-set
The mobile device management (MDM) authority setting determines how you manage your devices. As an IT admin, you must set an MDM authority before users can enroll devices for management.

Possible configurations are:
- Intune Standalone – Cloud-only management, which you configure by using the Azure portal. Includes the full set of capabilities that Intune offers. Set the MDM authority in the Intune console.
- Intune co-management – Integration of the Intune cloud solution with Configuration Manager for Windows 10 devices. You configure Intune by using the Configuration Manager console. Configure auto-enrollment of devices to Intune.
- Basic Mobility and Security for Microsoft 365 – If you have this configuration activated, you’ll see the MDM authority set to “Office 365”. If you want to start using Intune, you’ll need purchase Intune licenses.
- Basic Mobility and Security for Microsoft 365 coexistence – You can add Intune to your tenant if you’re already using Basic Mobility and Security for Microsoft 365 and set the management authority to either Intune or Basic Mobility and Security for Microsoft 365 for each user to dictate which service will be used to manage their MDM-enrolled devices. Each user’s management authority is defined based on the license assigned to the user: If the user has only a license for Microsoft 365 Basic or Standard, their devices will be managed by Basic Mobility and Security for Microsoft 365. If the user has a license entitling Intune, their devices will be managed by Intune. If you add a license entitling Intune to a user previously managed by Basic Mobility and Security for Microsoft 365, their devices will be switched to Intune management. Be sure to have Intune configurations assigned to users to replace Basic Mobility and Security for Microsoft 365 before switching users to Intune, otherwise their devices will lose Basic Mobility and Security for Microsoft 365 configuration and won’t receive any replacement from Intune.
Source: https://docs.microsoft.com/en-us/mem/intune/fundamentals/mdm-authority-set
Regarding Intune co-management you can read my following post.
For pre-1911 service release tenants, if you haven’t yet set the MDM authority, follow the steps below.
- In the Microsoft Endpoint Manager admin center, select the orange banner to open the Mobile Device Management Authority setting. The orange banner is only displayed if you haven’t yet set the MDM authority.
- Under Mobile Device Management Authority, choose your MDM authority from the following options:
- Intune MDM Authority
- None
When I click on the orange banner I will run into the following error
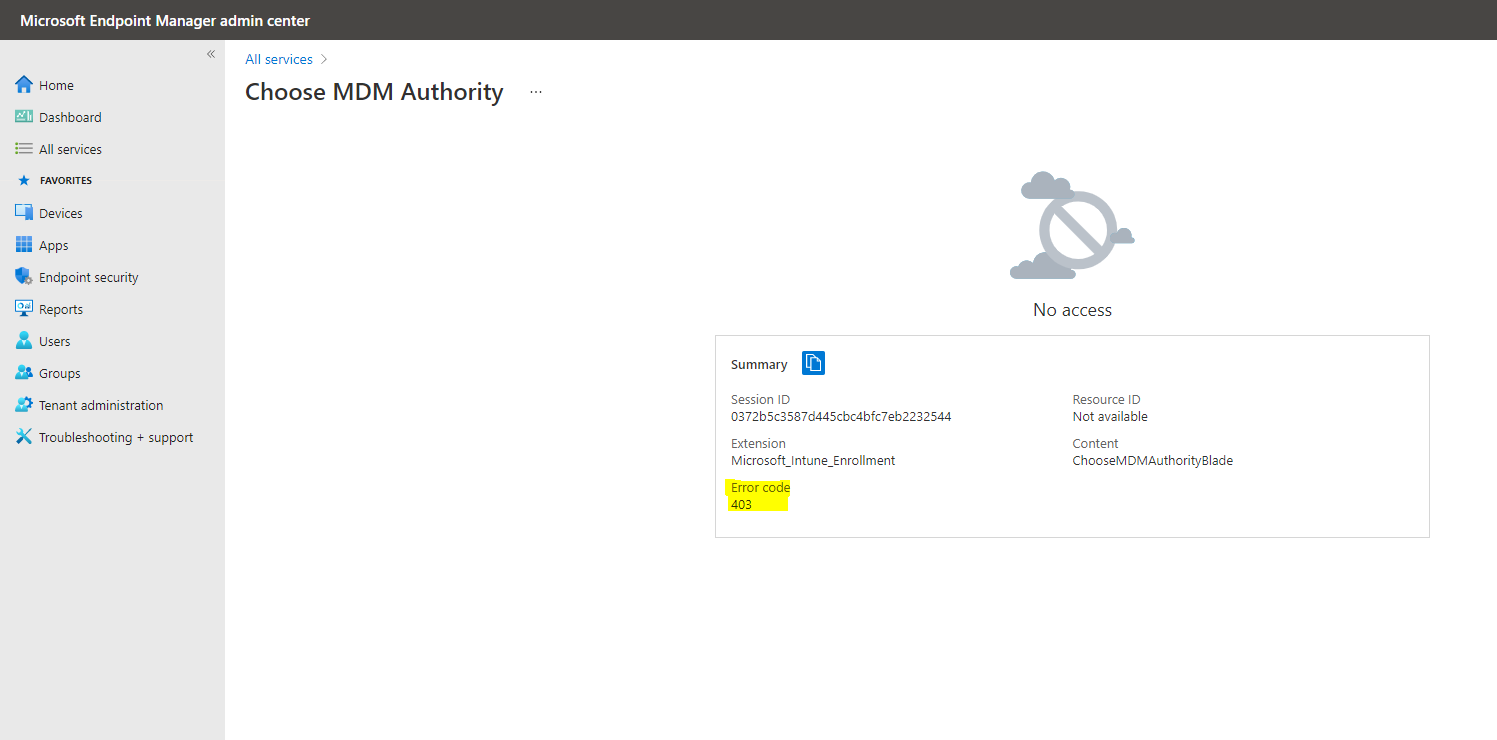
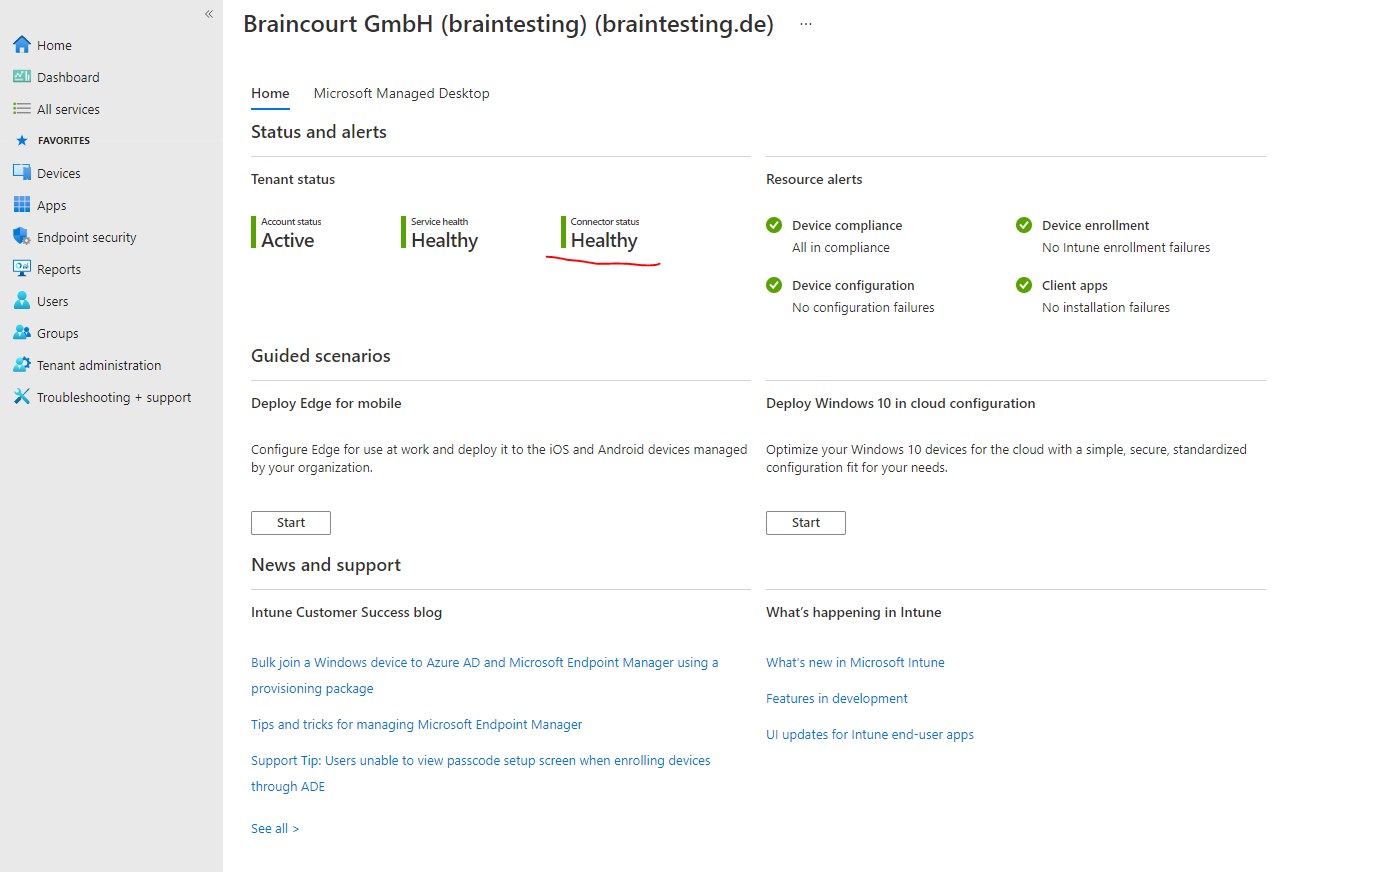
The reason for is that you first need a valid license for Microsoft Intune assigned to your logged-in user. After purchasing the Enterprise Mobility + Security E3 which includes Intune it works and also the Connector status appears now healthy.
Basically, the MDM authority is automatically set to Intune for the newest tenant service release.
If the MDM authority is unknow, please make sure you have purchased an Intune license.
Back on registering our device via Intune in Azure AD.
Autopilot registration using Intune
In the Microsoft Endpoint Manager admin center, choose Devices > Device enrollment | Enroll devices > Windows enrollment > Windows Autopilot Deployment Program | Devices and then on the Windows Autopilot devices page, choose Import.
Choose Import
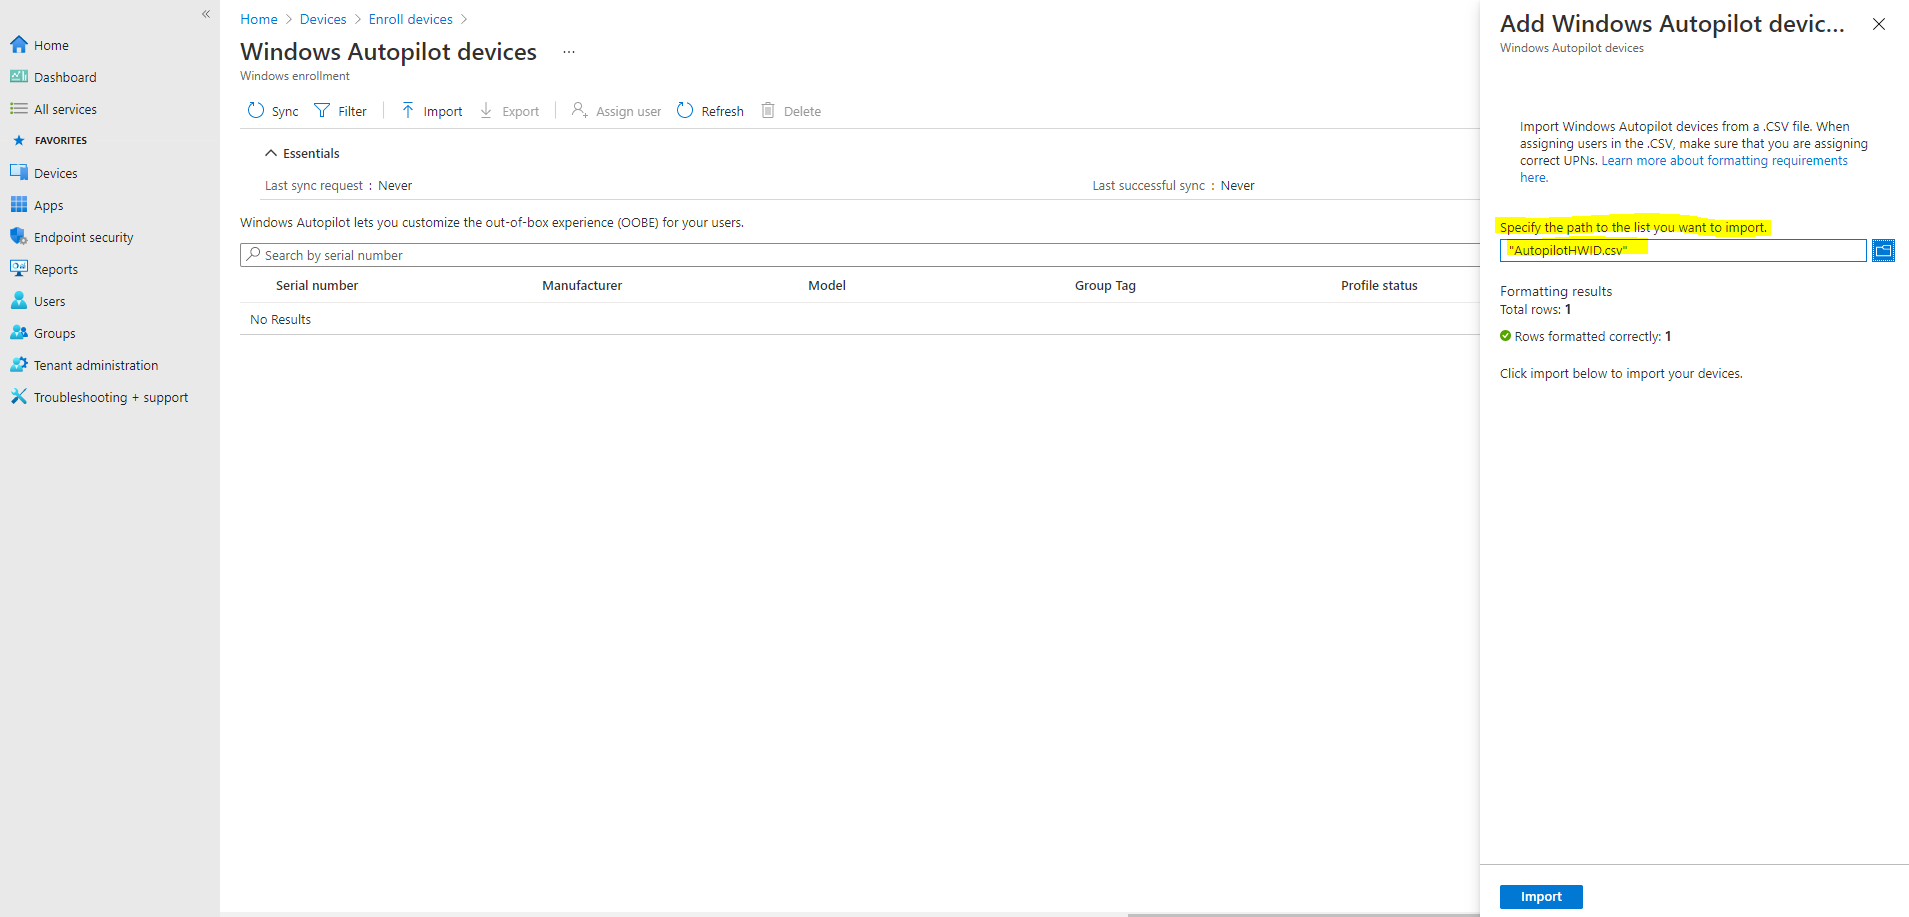
Under Add Windows Autopilot devices in the far right pane, browse to the AutopilotHWID.csv file you previously copied to your local computer. The file should contain the serial number and 4K HH (4-K hardware hash) of your VM (or device). It’s okay if other fields (Windows Product ID) are left blank.
You should receive confirmation that the file is formatted correctly before uploading it, as shown above.
Click Import and wait until the import process completes. This can take up to 15 minutes.

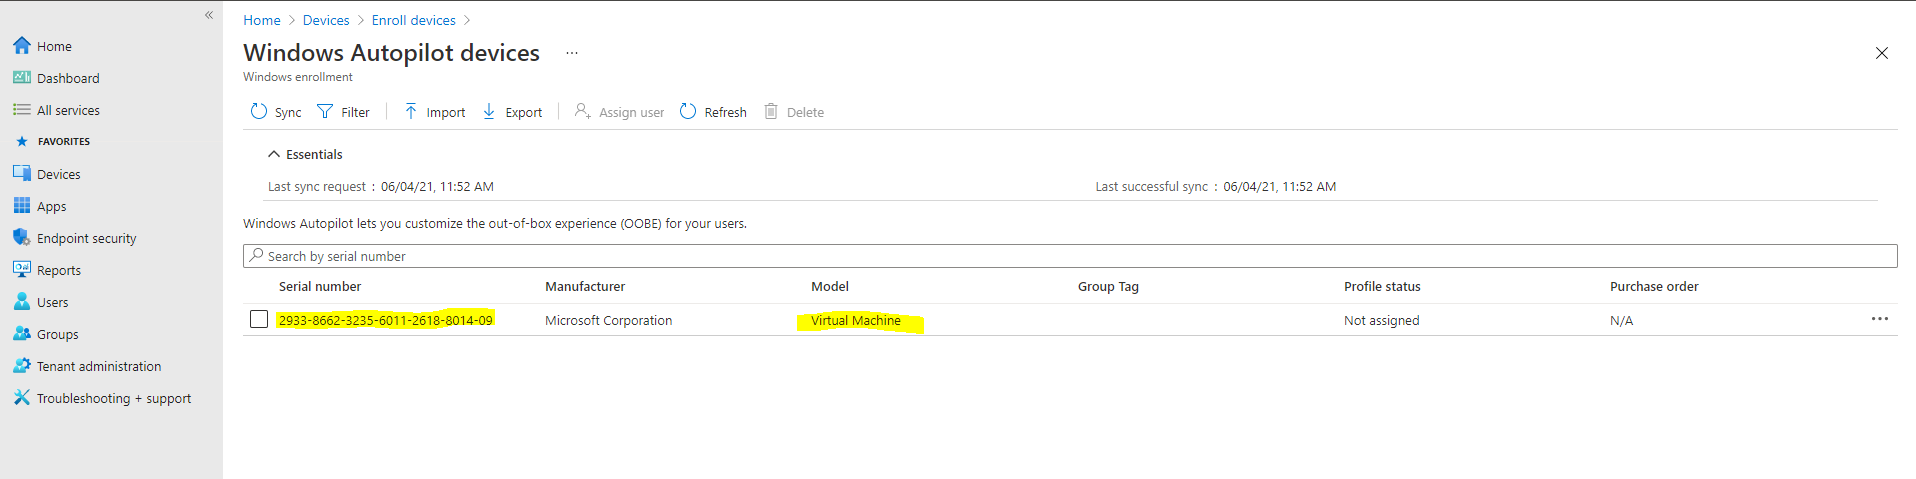
Click Refresh to verify your VM or device has been added. See the following example.
I will only use Microsoft Intune as recommended for Autopilot registration, how to use the Microsoft Store for Business (MSfB) you can read the original article below.
Autopilot registration using MSfB
https://docs.microsoft.com/en-us/windows/deployment/windows-autopilot/demonstrate-deployment-on-vm#autopilot-registration-using-msfb
Now the next step is to create and assign a Windows Autopilot deployment profile.
Autopilot profiles can be created and assigned to your registered VM or device either through Intune or MSfB.
I will only use Microsoft Intune again.
The Autopilot deployment profile wizard will ask for a device group, so we must create one first. To create a device group:
In the Group blade:
- For Group type, choose Security.
- Type a Group name and Group description (ex: Autopilot Lab).
- Azure AD roles can be assigned to the group: No
- For Membership type, choose Assigned.
Click Members and add the Autopilot VM to the group. See the following example:
Click Create.

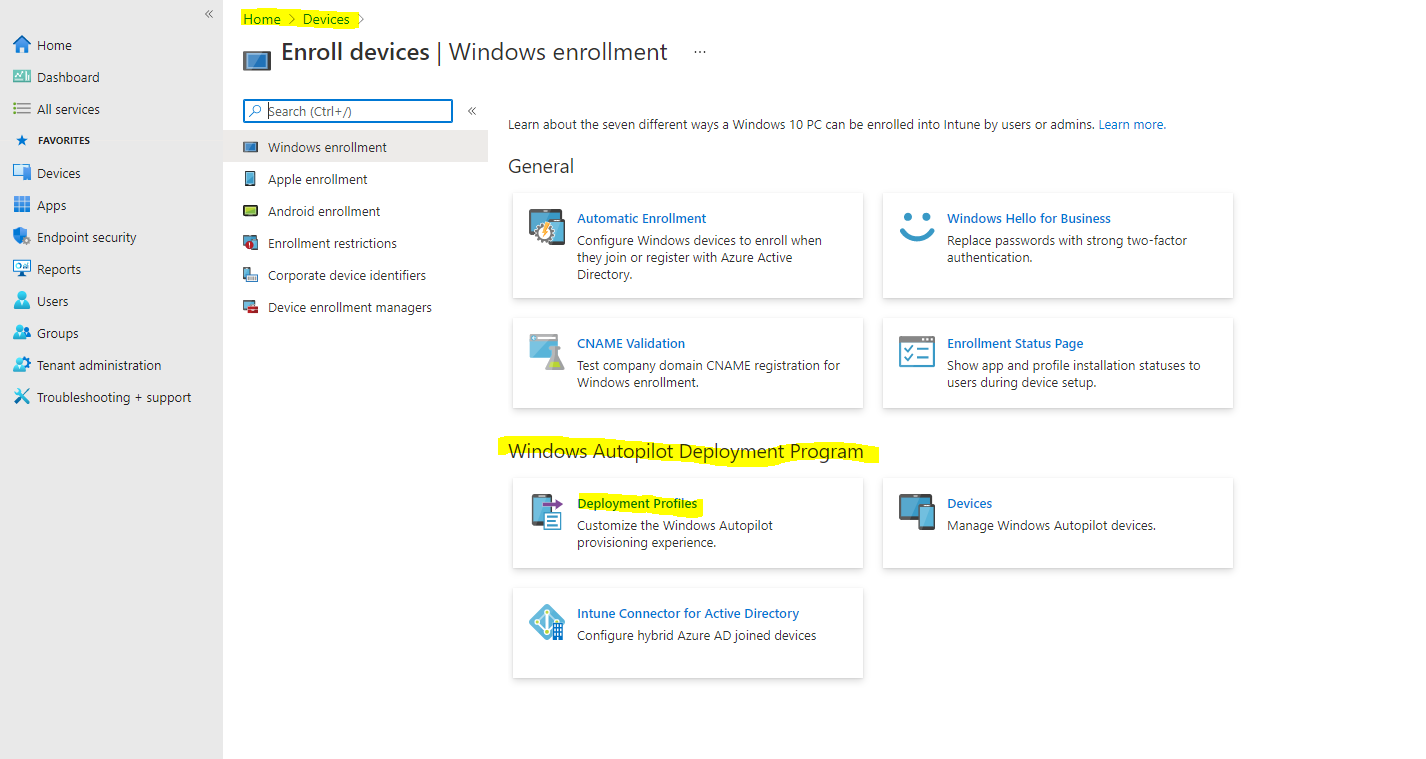
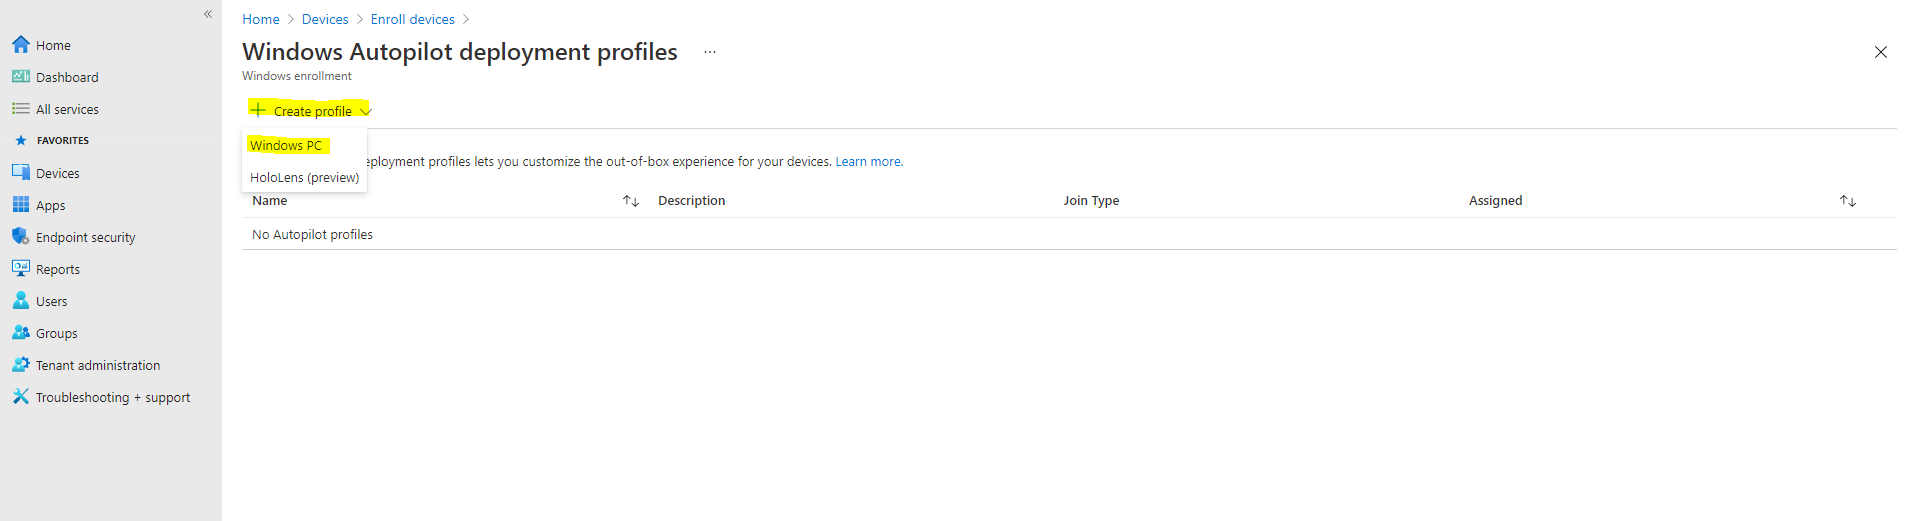
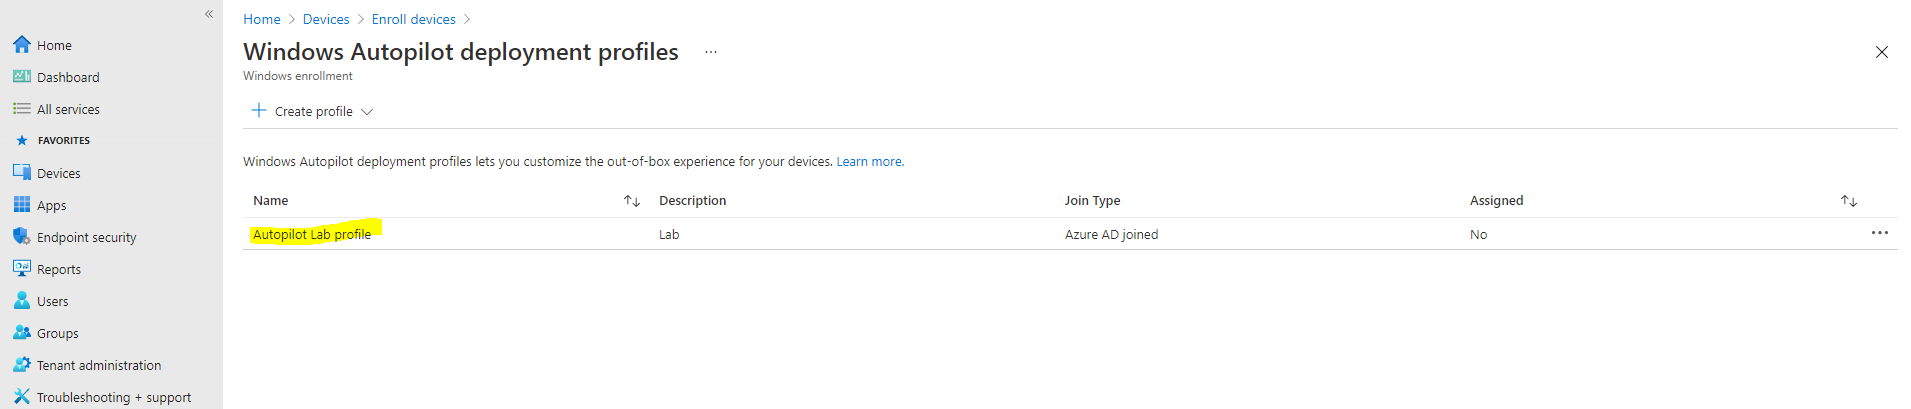
Now we can create a Windows Autopilot profile, scroll back to the left hand pane and click Devices, then under Enroll devices | Windows enrollment select Deployment Profiles.
Click on Create profile and then select Windows PC.
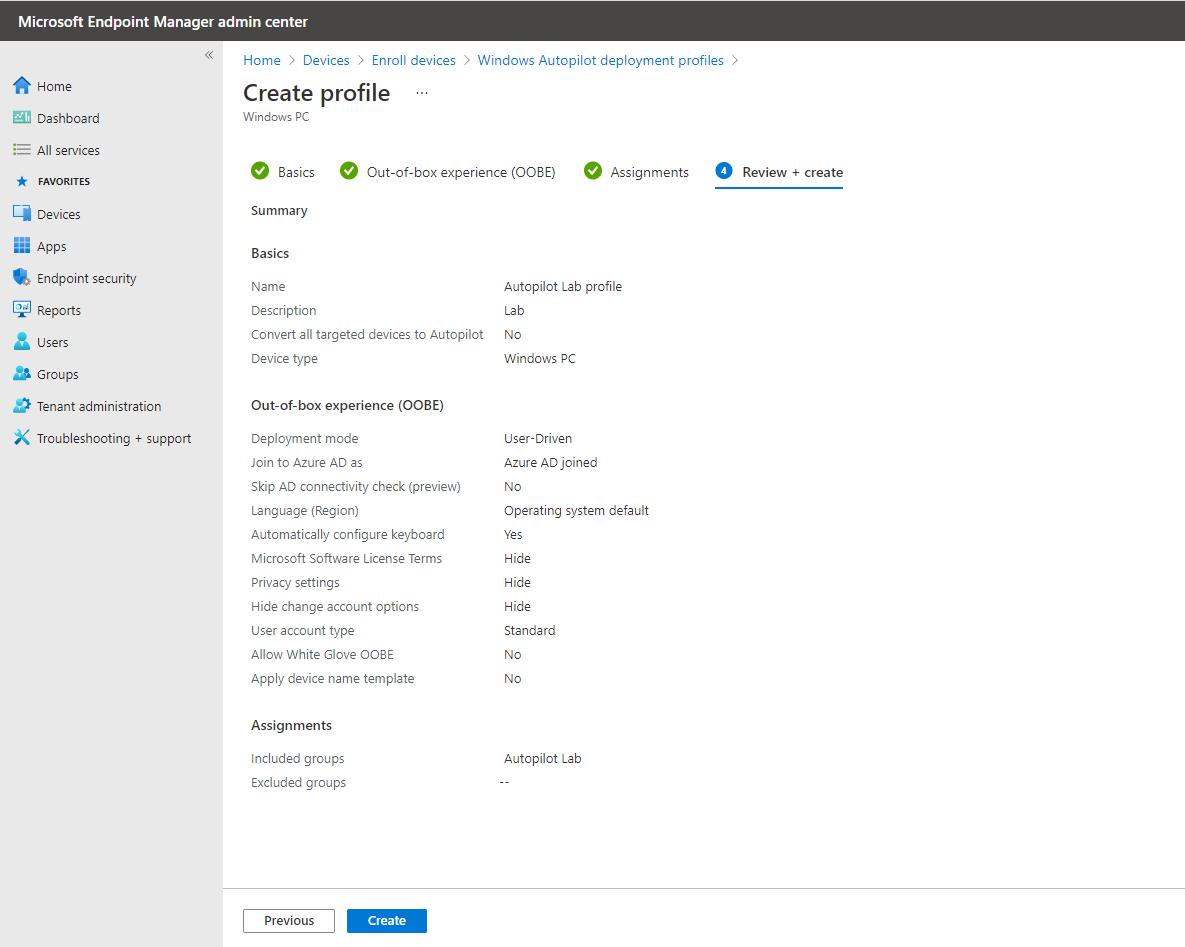
On the Create profile blade, use the following values:
Name -> Autopilot Lab profile
Description -> Lab
Convert all targeted devices to Autopilot -> No
Click Next to continue with the Out-of-box experience (OOBE) settings:
Deployment mode -> User-driven
Join to Azure AD as -> Azure AD joined
Microsoft Software Licence Terms -> Hide
Privacy Settings -> Hide
Hide change account option -> Hide
User account type -> Standard | Administrator (here you can also elevate the user who will perform the OOEB process Welcome Screen sign-in to be a local administrator on the device)
Allow White Gove OOBE -> No
Language (Region) -> Operating system default
Automatically configure keyboard -> yes
Apply device name template -> No
Click Next to continue with the Assignments settings:
Assign to -> Selected groups
- Click Add groups under Included groups
- Click the Autopilot Lab group, and then click Select.
- Click Next to continue and then click Create. See the following example:
If you want to add an app to your profile via Intune, the OPTIONAL steps for doing so can be found in Appendix B: Adding apps to your profile.
The new profile will only be applied if the device has not been started, and gone through OOBE. Settings from a different profile can’t be applied when another profile has been applied. Windows would need to be reinstalled on the device for the second profile to be applied to the device.
See Windows Autopilot in action
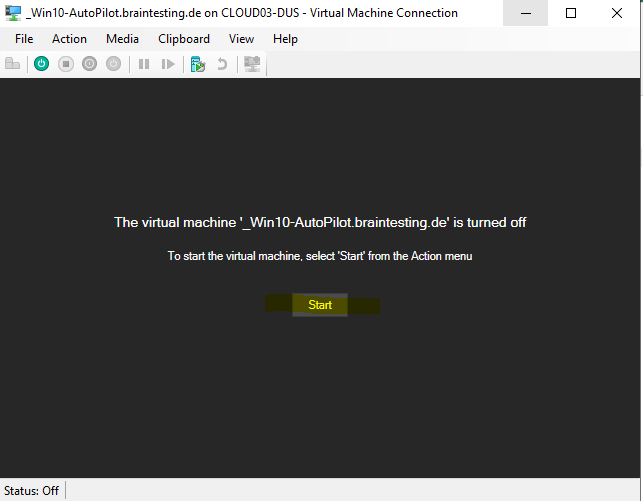
If you shut down your VM after the last reset, it’s time to start it back up again, so it can progress through the Autopilot OOBE experience but do not attempt to start your device again until the PROFILE STATUS for your device in Intune has changed from Not assigned to Assigning and finally Assigned:
Also, make sure to wait at least 30 minutes from the time you’ve configured company branding, otherwise these changes might not show up.
If you reset your device previously after collecting the 4K HH info, and then let it restart back to the first OOBE screen, then you might need to restart the device again to ensure the device is recognized as an Autopilot device and displays the Autopilot OOBE experience you’re expecting. If you do not see the Autopilot OOBE experience, then reset the device again (Settings > Update & Security > Recovery and click on Get started. Under Reset this PC, select Remove everything and Just remove my files. Click on Reset).
- Ensure your device has an internet connection.
- Turn on the device
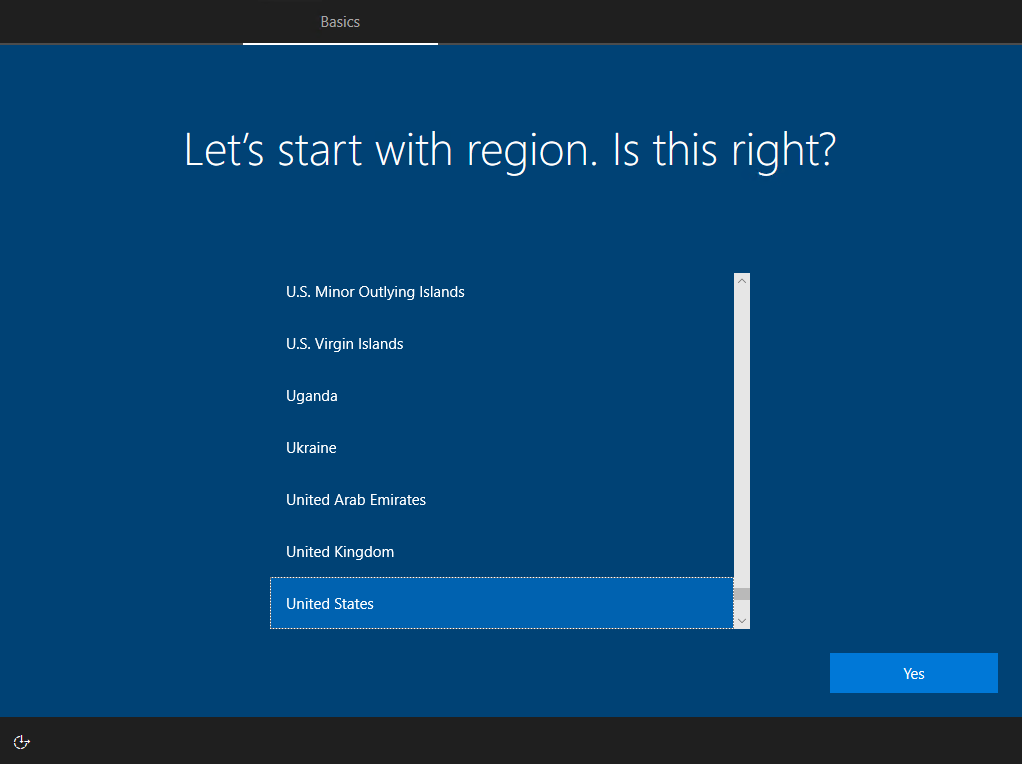
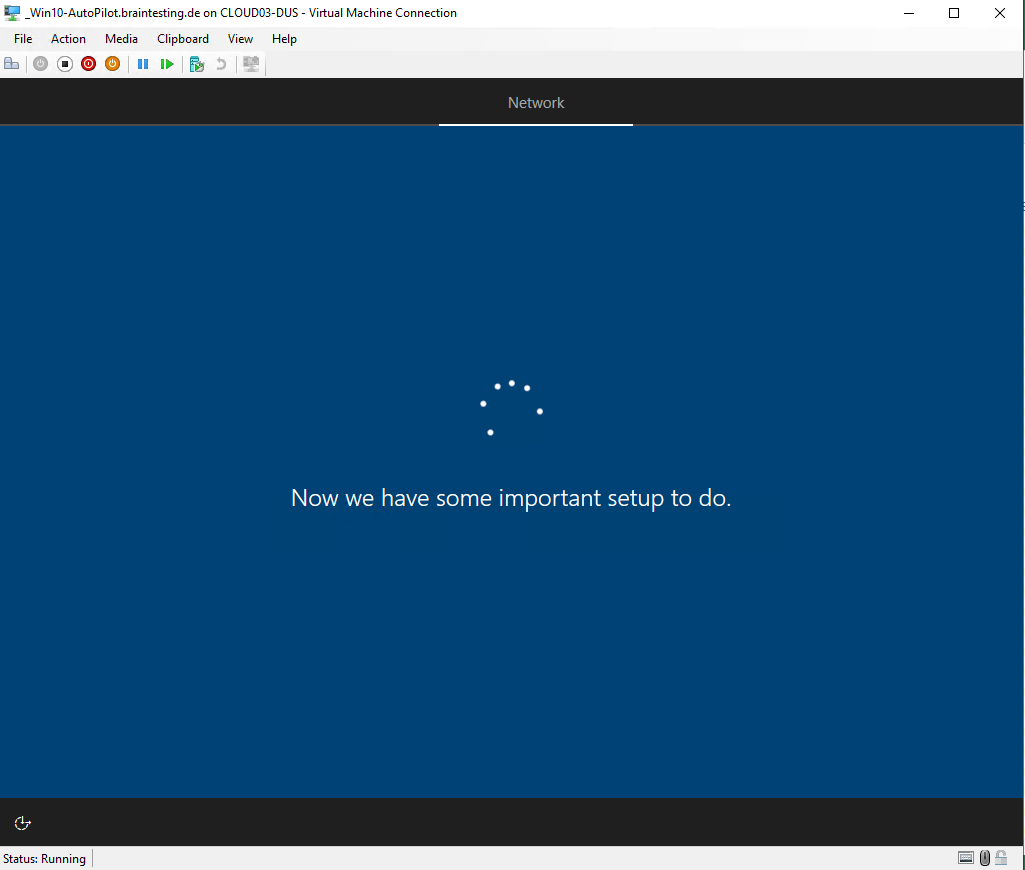
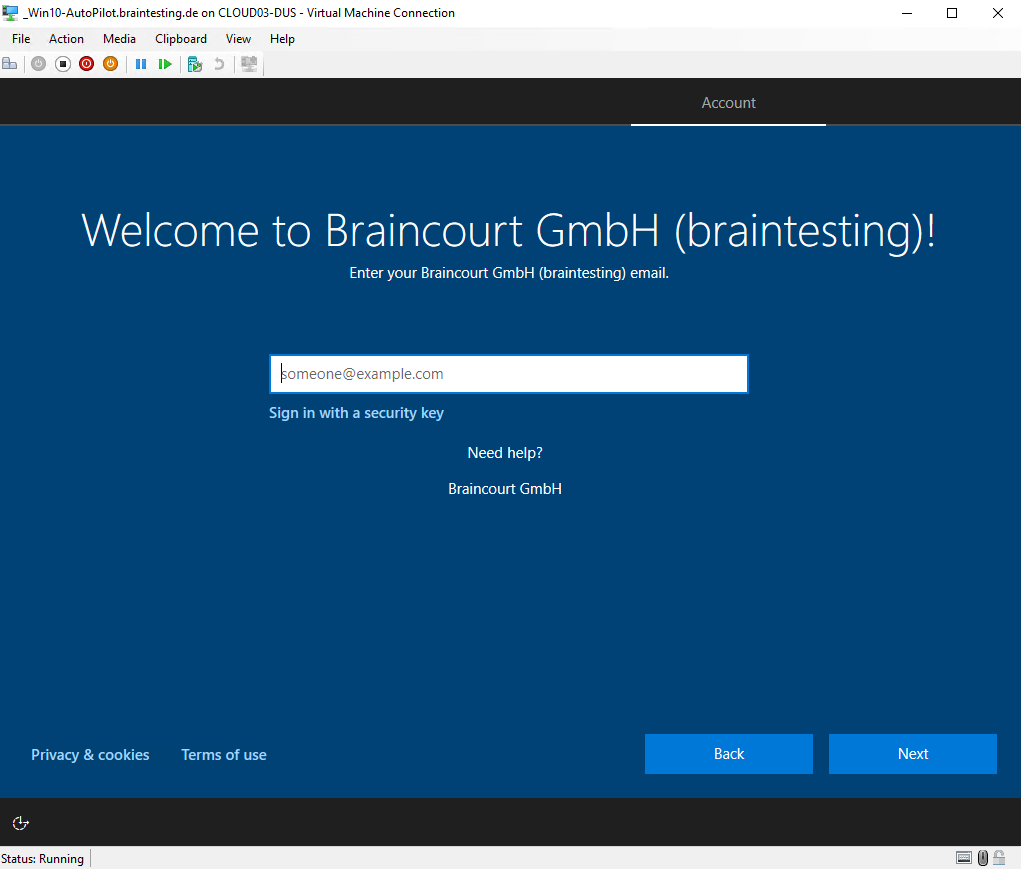
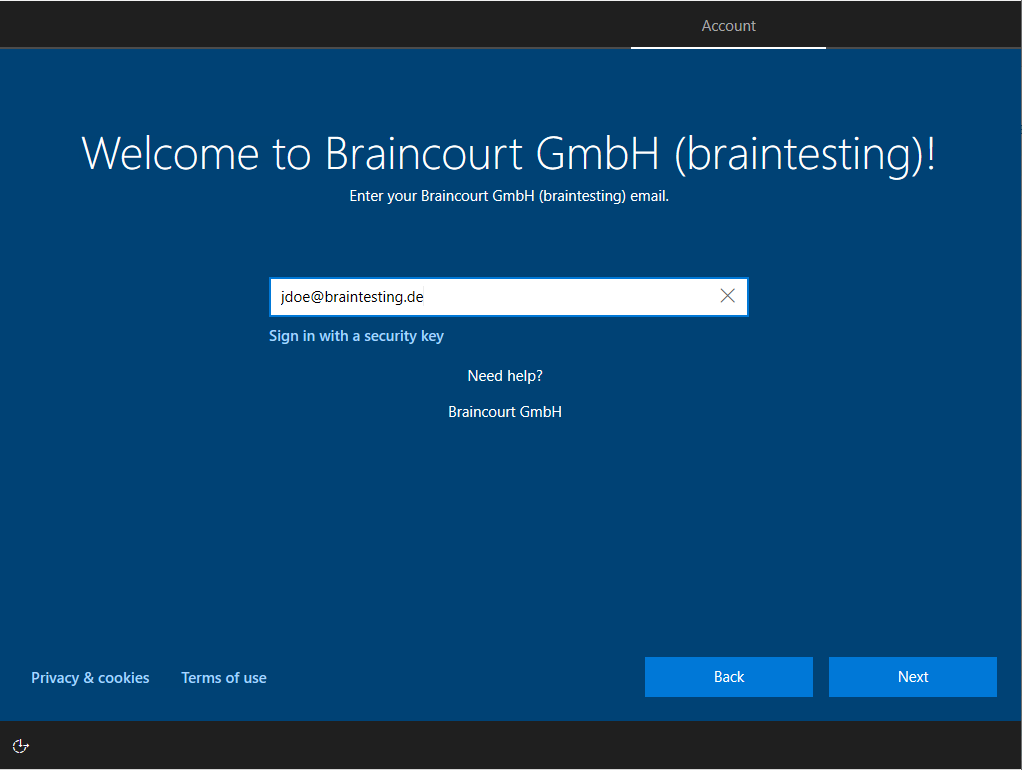
- Verify that the appropriate OOBE screens (with appropriate Company Branding) appear. You should see the region selection screen, the keyboard selection screen, and the second keyboard selection screen (which you can skip).

Looks good!
The following error message appears if the user you try to logon, doesn’t had a valid Microsoft Intune lincense assigned to.
Looks like we can’t connect to the URL for your organization’s MDM terms of use. Try agin, or contact your system administrator with the problem information from this page.
Additional problem information:
Error: invalid_client
Error subcode:
Description: failed%20to%20authenticate%20user
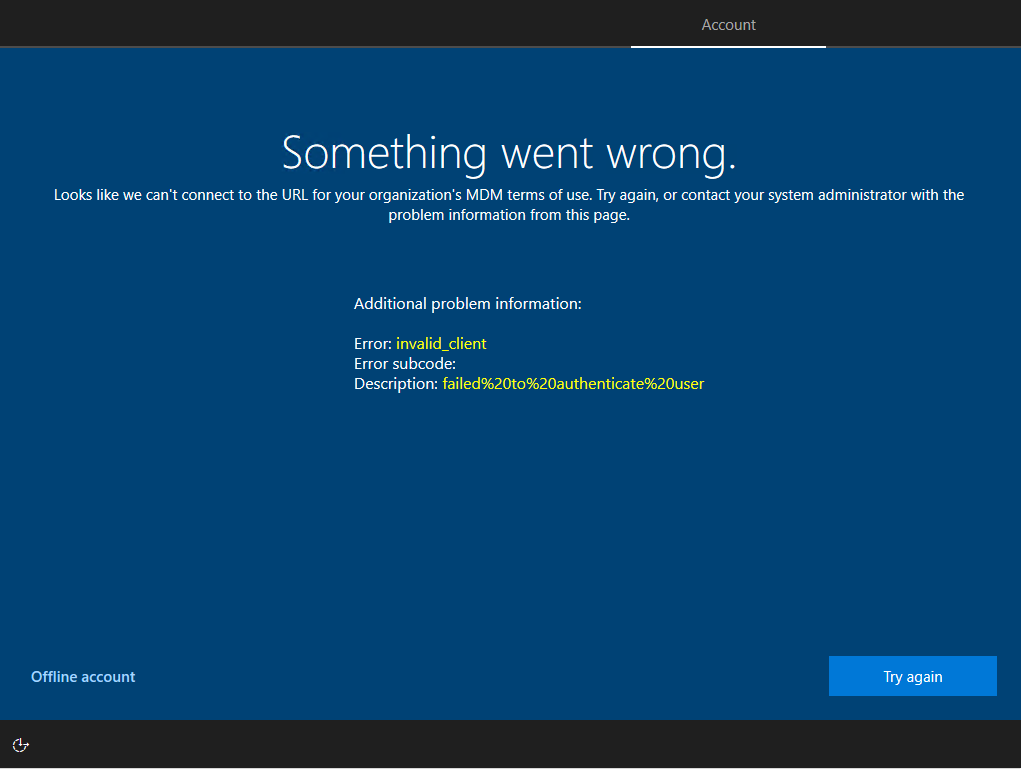
So I clicked on Try again and typed in a username with a valid Microsoft Intune license and it works as you can see below.

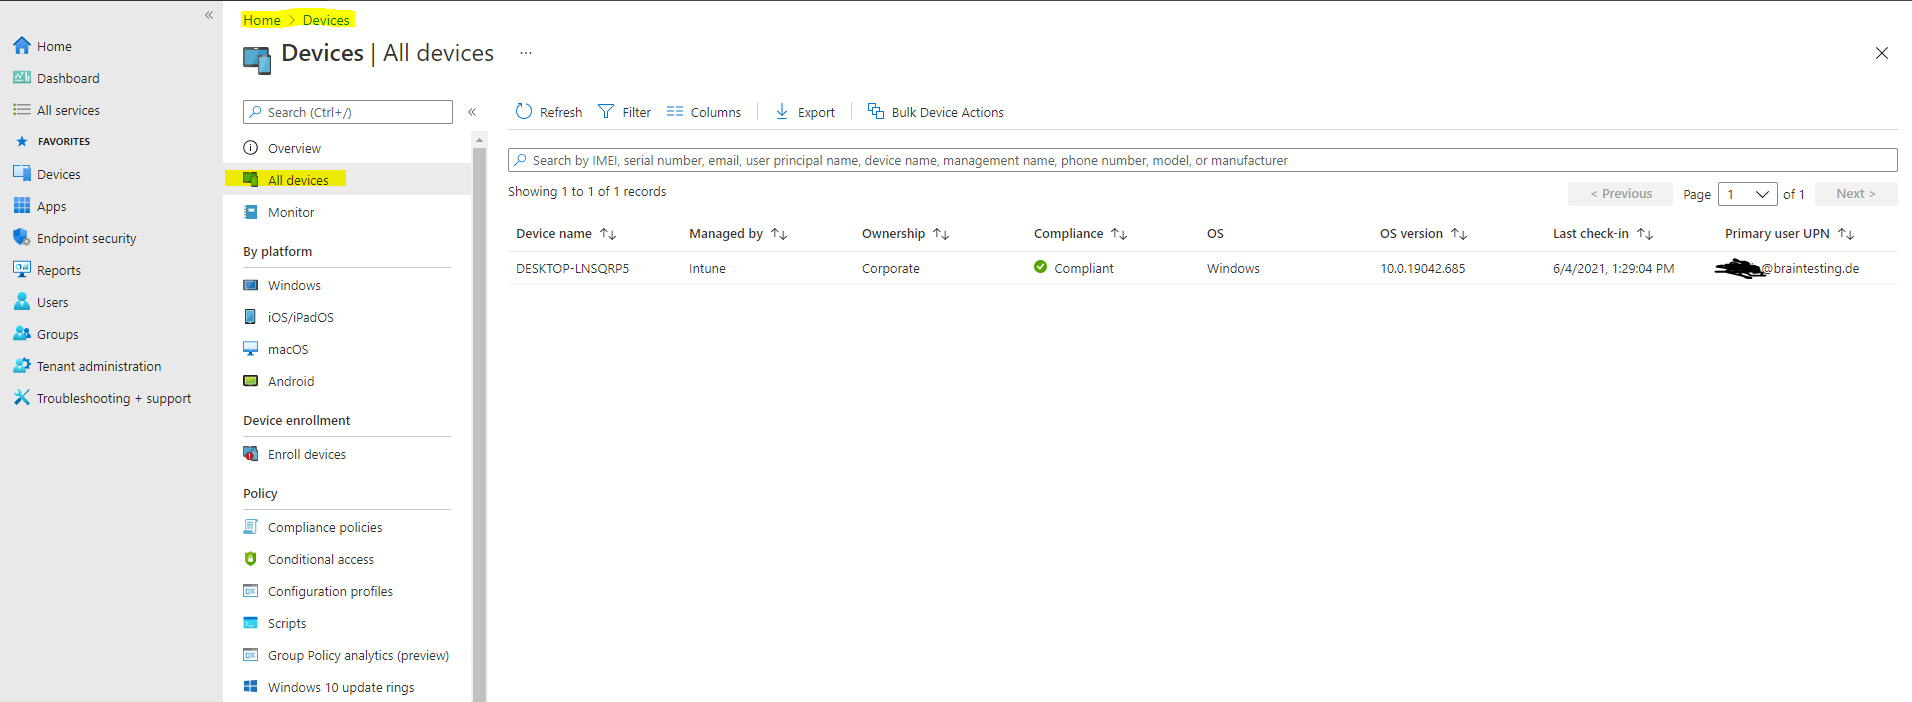
Soon after reaching the desktop, the device should show up in Intune as an enabled Autopilot device. Go into the Intune Azure portal, and select Devices > All devices, then Refresh the data to verify that your device has changed from disabled to enabled, and the name of the device is updated.
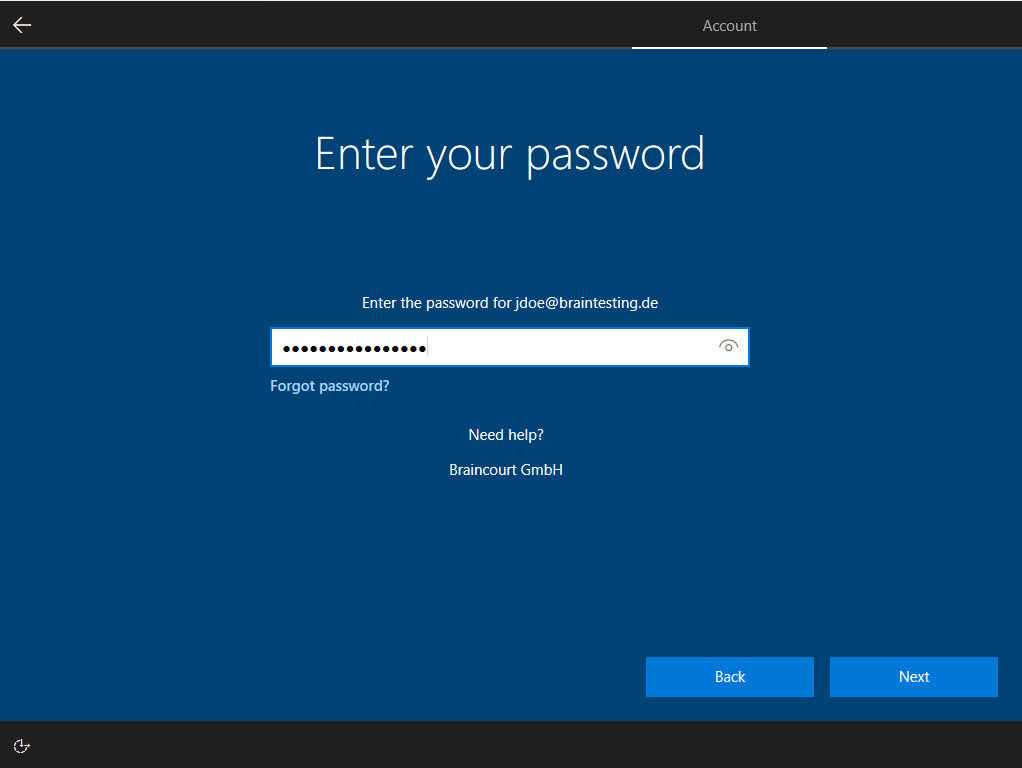
Once you select a language and a keyboard layout, your company branded sign-in screen should appear. Provide your Azure Active Directory credentials and you’re all done.
Windows Autopilot will now take over to automatically join your device into Azure Active Directory and enroll it to Microsoft Intune.
Remove devices from Autopilot
To use the device (or VM) for other purposes after completion of this lab, you will need to remove (deregister) it from Autopilot via either Intune or MSfB, and then reset it. Instructions for deregistering devices can be found at Enroll Windows devices in Intune by using Windows Autopilot and Remove devices by using wipe, retire, or manually unenrolling the device and below.
Delete (deregister) Autopilot device
You need to delete (or retire, or factory reset) the device from Intune before deregistering the device from Autopilot. To delete the device from Intune (not Azure Active Directory), log into the MEM admin center, then navigate to Intune > Devices > All Devices. Select the device you want to delete, then click the Delete button along the top menu.
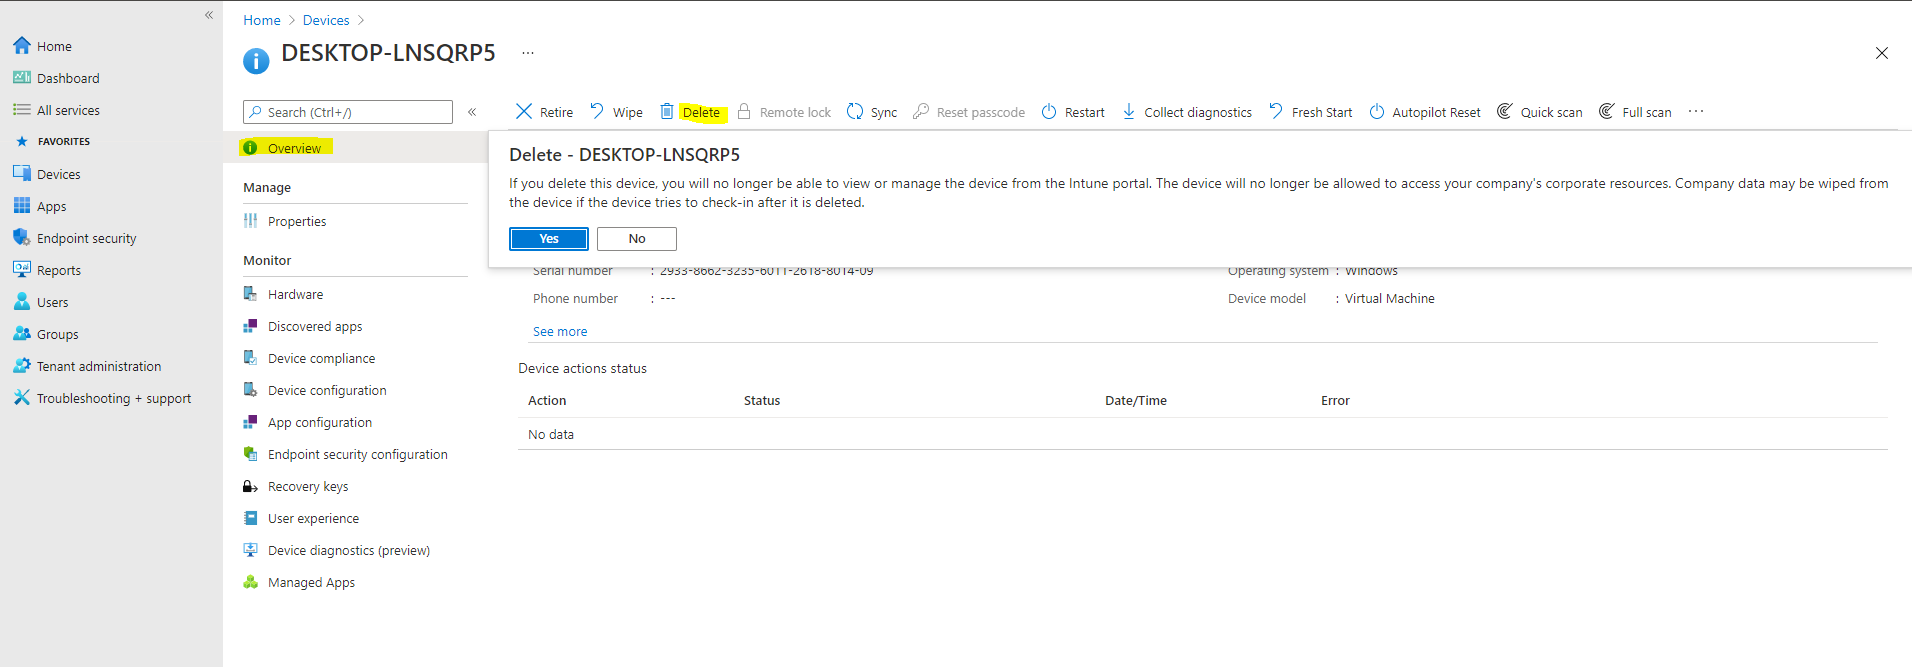
This will remove the device from Intune management, and it will disappear from Intune > Devices > All devices. But this does not yet deregister the device from Autopilot, so the device should still appear under Intune > Device Enrollment > Windows Enrollment > Windows Autopilot Deployment Program > Devices.
The Intune > Devices > All Devices list and the Intune > Device Enrollment > Windows Enrollment > Windows Autopilot Deployment Program > Devices list mean different things and are two completely separate datastores. The former (All devices) is the list of devices currently enrolled into Intune.
A device will only appear in the All devices list once it has booted. The latter (Windows Autopilot Deployment Program > Devices) is the list of devices currently registered from that Intune account into the Autopilot program – which may or may not be enrolled to Intune.
To remove the device from the Autopilot program, select the device and click Delete. You will get a popup dialog box to confirm deletion.

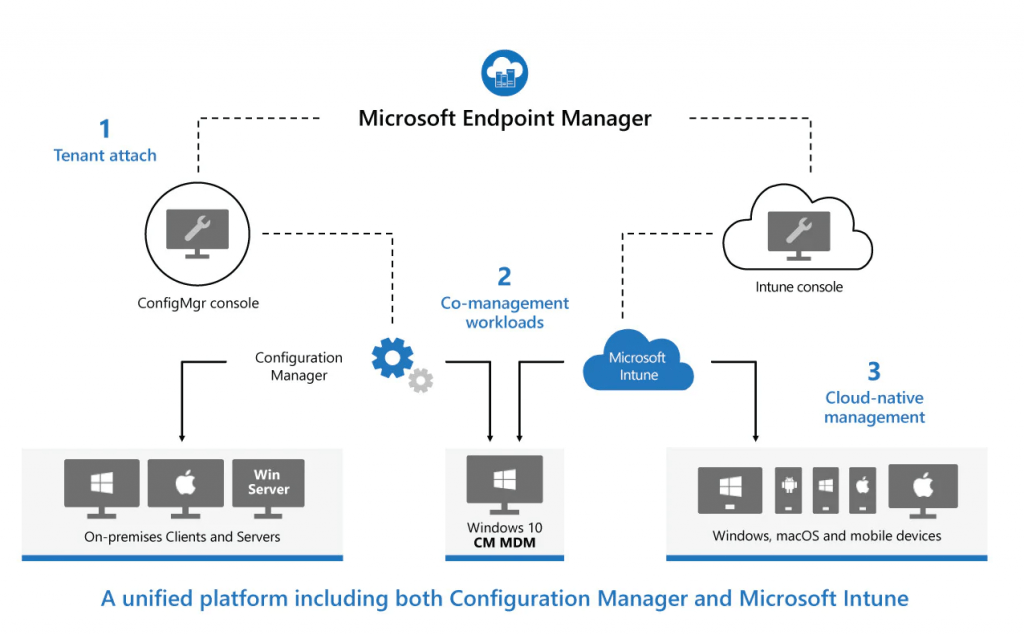
Microsoft Endpoint Manager
https://endpoint.microsoft.com/
Microsoft Endpoint Manager helps deliver the modern workplace and modern management to keep your data secure, in the cloud and on-premises. Endpoint Manager includes the services and tools you use to manage and monitor mobile devices, desktop computers, virtual machines, embedded devices, and servers.
Endpoint Manager combines services you may know and already be using, including Microsoft Intune, Configuration Manager, Desktop Analytics, co-management, and Windows Autopilot. These services are part of the Microsoft 365 stack to help secure access, protect data, and respond and manage risk.
Endpoint Manager includes the following services:
– Microsoft Intune: Intune is a 100% cloud-based mobile device management (MDM) and mobile application management (MAM) provider for your apps and devices.
– Configuration Manager: Configuration Manager is an on-premises management solution to manage desktops, servers, and laptops that are on your network or internet-based.
– Co-management: Co-management combines your existing on-premises Configuration Manager investment with the cloud using Intune and other Microsoft 365 cloud services. You choose whether Configuration Manager or Intune is the management authority for the seven different workload groups.
– Desktop Analytics: Desktop Analytics is a cloud-based service that integrates with Configuration Manager. It provides insight and intelligence for you to make more informed decisions about the update readiness of your Windows clients.
– Windows Autopilot: Windows Autopilot sets up and pre-configures new devices, getting them ready for use. It’s designed to simplify the lifecycle of Windows devices, for both IT and end users, from initial deployment through end of life.
– Azure Active Directory (AD): Azure AD is used by Endpoint Manager for identity of devices, users, groups, and multi-factor authentication (MFA). Azure AD Premium, which may be an additional cost, has additional features to help protect devices, apps, and data, including dynamic groups, auto-enrollment, and conditional access.
– Endpoint Manager admin center: The admin center is a one-stop web site to create policies and manage your devices. It plugs-in other key device management services, including groups, security, conditional access, and reporting. This admin center also shows devices managed by Configuration Manager and Intune (in preview).
Source: https://docs.microsoft.com/en-us/mem/endpoint-manager-overview
Source: https://www.microsoft.com/en-us/security/business/microsoft-endpoint-manager
Dell Windows Autopilot
https://www.dell.com/en-us/work/shop/help-me-choose/cp/hmc-autopilot
Enroll a Windows 10 device automatically using Group Policy
https://docs.microsoft.com/en-us/windows/client-management/mdm/enroll-a-windows-10-device-automatically-using-group-policy
Starting in Windows 10, version 1709, you can use a Group Policy to trigger auto-enrollment to MDM for Active Directory (AD) domain-joined devices.
Links
Overview of Windows Autopilot
https://docs.microsoft.com/en-us/mem/autopilot/windows-autopilot
Demonstrate Autopilot deployment
https://docs.microsoft.com/en-us/windows/deployment/windows-autopilot/demonstrate-deployment-on-vm
Windows Autopilot device guidelines
https://docs.microsoft.com/en-us/mem/autopilot/autopilot-device-guidelines
Manual registration overview
https://docs.microsoft.com/en-us/mem/autopilot/manual-registration
Manually register devices with Windows Autopilot
https://docs.microsoft.com/en-us/mem/autopilot/add-devices
Enroll a Windows 10 device automatically using Group Policy
https://docs.microsoft.com/en-us/windows/client-management/mdm/enroll-a-windows-10-device-automatically-using-group-policy
The best home for modern WordPress sites built on the Google Cloud Platform